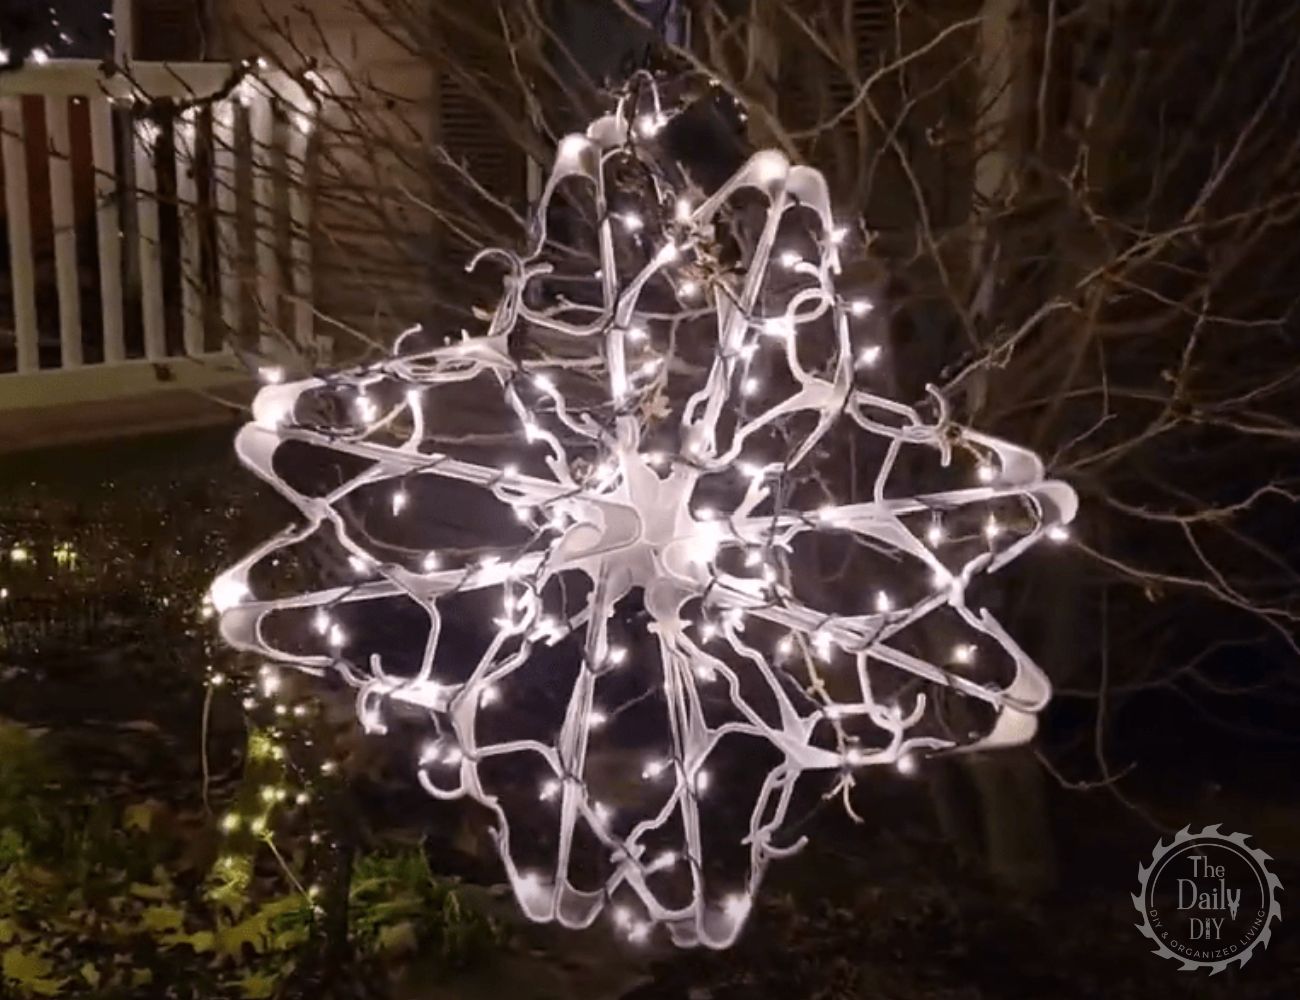
How To Make a DIY Light Up Snowflake With Dollar Tree Hangers
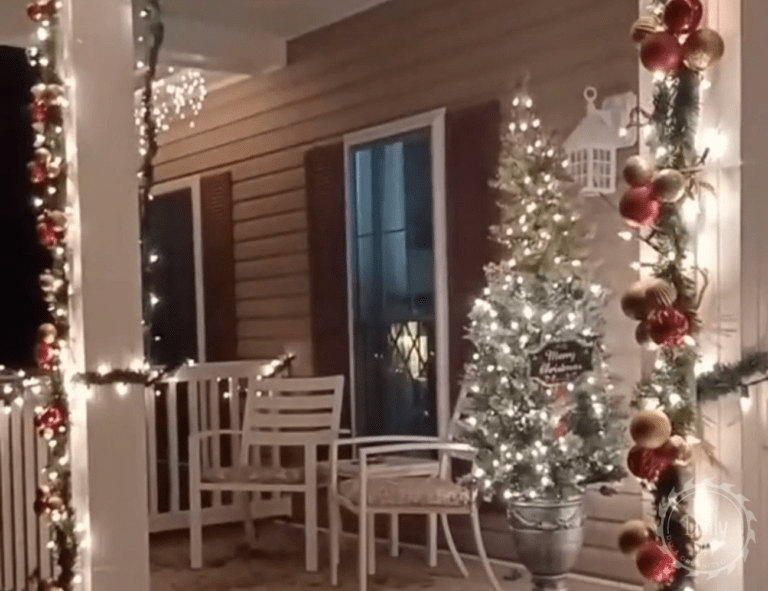
Holiday decorations are everywhere you look now that December is here. Don’t you just love all of the beautifully decorated trees and bright lights? And of course, what can be better than a DIY Holiday light project? Grab your kiddos or friends for a craft night and make these simple light-up snowflakes. This project is also great for the budget since you can purchase the hangers and zip ties at The Dollar Tree. Let’s learn how to make a DIY light up snowflake using plastic hangers. If you don’t have a Dollar Tree nearby, you can grab them from Amazon.
Supplies:
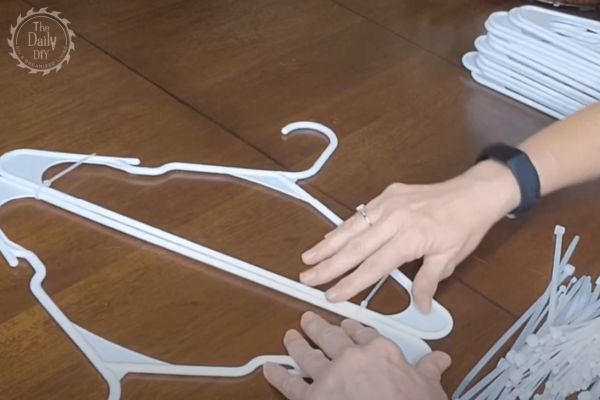
Step 1
Start with 2 hangers and zip tie them together, back to back, as shown in the picture above. Secure these together with zip ties as tight as you can. Cut off the excess plastic from the zip ties. Repeat this in the same fashion 8 times until all 16 hangers have been used. You’ll have 8 pairs of these.

Step 2
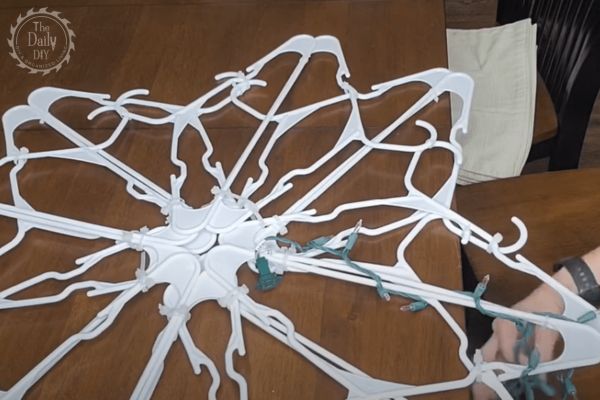
Place 4 of the sets that you just made in Step 1 on a table. Put them together to form a four point star as shown in the picture above. Take small zip ties and zip tie all of the hook parts of the hangers together. Pull these tight and snip off the excess.
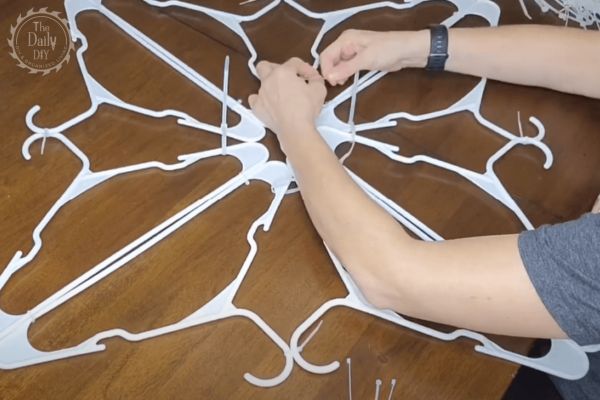
Step 3
Using medium sized zip ties, tie the sets to each other near the center point of the star you have formed. Do not pull these zip ties tight yet until you have completed the next step. Leave them a bit looser for now.
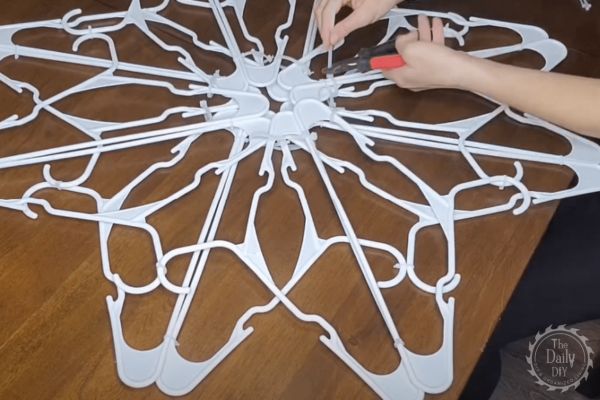
Step 4
Lay the first set of 8 hangers over the second set of 8 hangers. Place it offset, in order to form an 8 point star as shown above. Use your medium sized zip ties to zip tie both sets to each other. Zip tie in the center of your star and snip off excess.
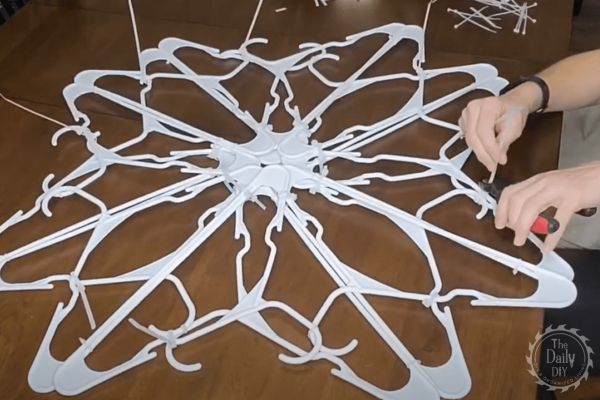
Step 5
Next you can zip tie the two sets together near the outside points. Be sure to use enough zip ties in the middle an along the edge to make it sturdy. After that, you can go back over the loose zip ties from Step 3 and tighten those all up. Snip off all of the excess.
Step 6
Finally, take your 100 count light set and string them through your snowflake. When placing the lights on, have some patience as you’ll have to weave the lights in and out of some small spaces in the snowflake.
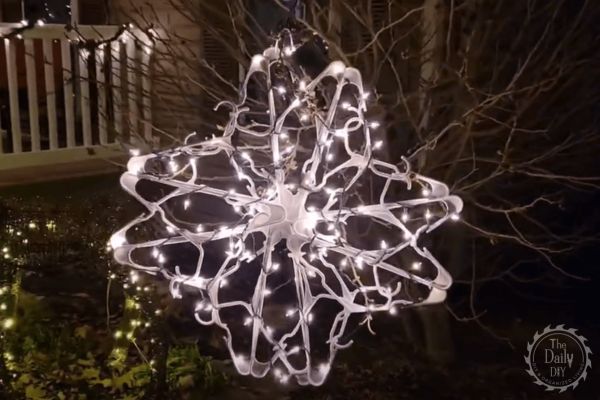
That’s all there is to it. All together this project can be completed in less than a half an hour. What do you think of this very simple and easy DIY project? Click below if you’d like to watch the video version of this tutorial. For more tutorials delivered straight to your inbox, subscribe to The Daily DIY Newsletter.