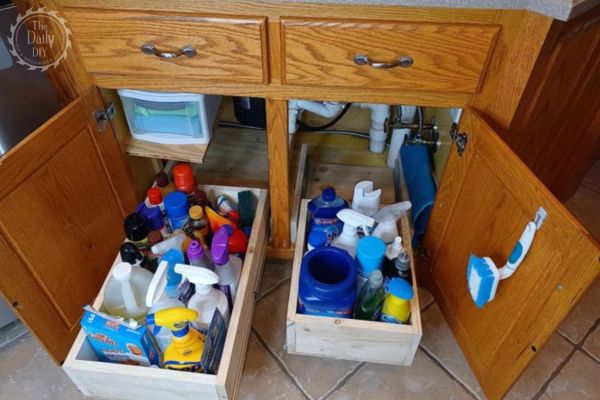
Easy DIY Under Sink Storage Drawers You Can Build Today
Are you tired of the chaos under your kitchen sink? It’s time to take control with custom under sink storage solutions! This guide will walk you through building your own DIY sliding drawers, step by step. With materials from your local home improvement store, this beginner-friendly project requires only simple, straight cuts. Grab your measuring tape and let’s get to work!
Tools You Will Need For Under Sink Storage Boxes
- Air Compressor
- Air Hose
- Clamps
- Cordless Drill
- Nail Gun
- Safety Glasses
- Tape Measure
- Table Saw or Circular Saw
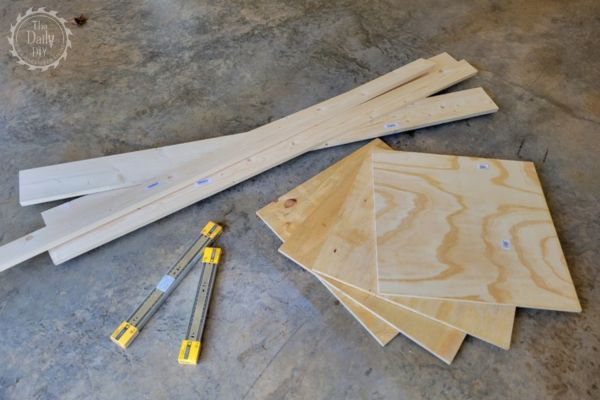
Materials You Will Need For Your Under Sink Storage Trays:
- 1-5/8″ wood screws (about 12)
- 1/2″ plywood for bases and tray bottoms (2’X2′ boards will work for most projects). You’ll need up to 4 of these.
- 1X4 for the tray walls (16′ will work for most projects)
- 1X6 for the base sidewalls (8′ will work for most projects)
- Ball bearing drawer glides (length will vary depending on the depth of your cabinet, this example used a 14″ and a 20″)
- Wood Glue
- Finish Nails
- Sandpaper (around 120 grit)
Note: Adapt the project to fit your specific measurements and account for any plumbing and electrical under your sink.
Step By Step How To Build Under Sink Storage Boxes
Now that you have your materials ready, let’s get to work on your custom under kitchen sink pull out storage.
2 minute YouTube Video Tutorial
For a quick, and detailed visual walkthrough instead, watch our YouTube video tutorial on building these custom under kitchen sink pull out storage boxes.
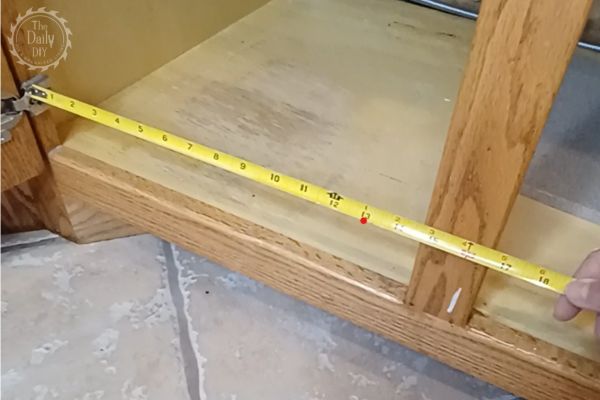
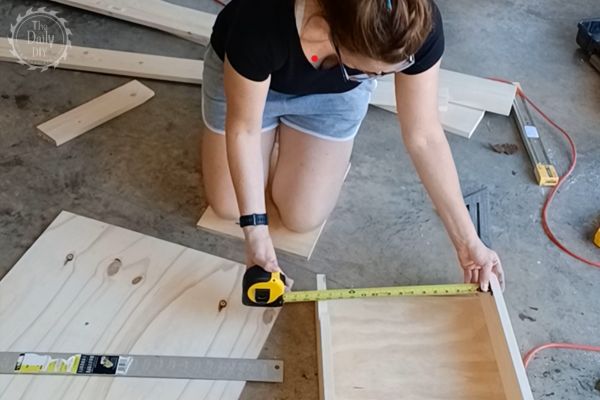
Step 1: Measure Your Space
Before you begin to build your custom under kitchen sink organization trays, you need to take measurements. First measure the width of your cabinet on the inside of the frame. You’ll want to cut the base 1/4″ narrower. Then measure the depth. Remember to measure around any plumbing and electrical that may be located inside your kitchen sink cabinet. In this example there was a lot of plumbing located on the right side of the cabinet, so we made one slider tray 6″ shorter than the other one to accommodate that.
Step 2: Gather Materials
Head to your local home improvement store to gather all the materials you’ll need.
Step 3: Cut the Base Pieces
Cut all of the pieces that you will need to build the bases. The bases are what you will attach to the bottom of your kitchen sink cabinet, and then attach your slider trays to. Use the 1/2″ plywood for the base bottoms, and the 1X4 boards for the base sides, which we will call the “sidewalls”.

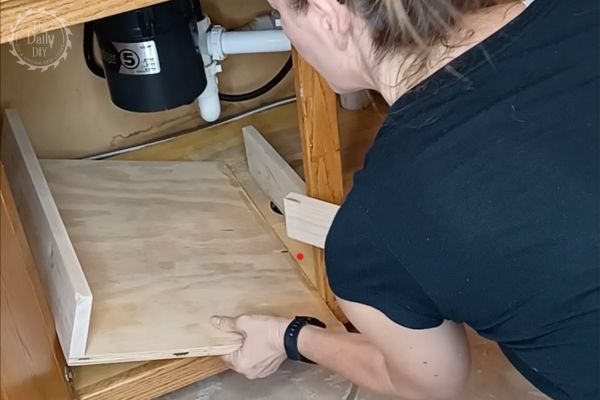
Step 4: Dry Fit
“Dry fit” the pieces under your sink to ensure they will fit around your plumbing. Check the fronts to see where the side walls lay, does it look like there will be room for the trays to slide out once you get those installed? Make any adjustments needed.
Step 5: Sand the Base Pieces
Lightly sand all the pieces for the bases with 120 grit sandpaper.
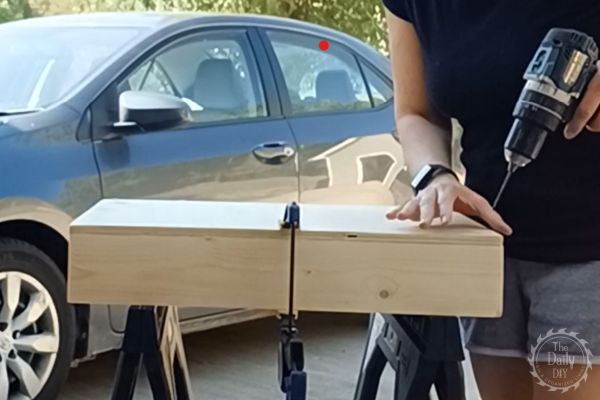
Step 6: Assemble the Bases
Apply wood glue to the longer sides of the base bottoms. Clamp the sidewalls to the base bottoms, drill pilot holes, and screw the sidewalls in place using the 1-5/8″ wood screws. Use three screws per sidewall.
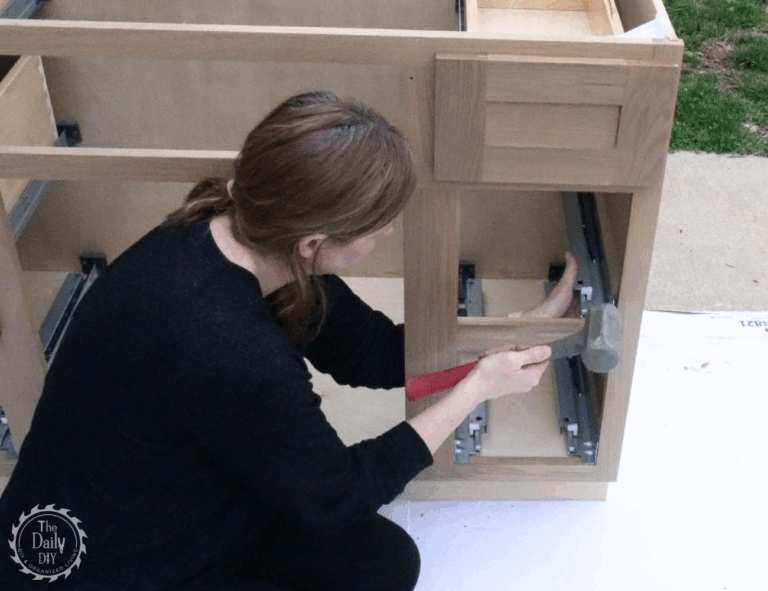
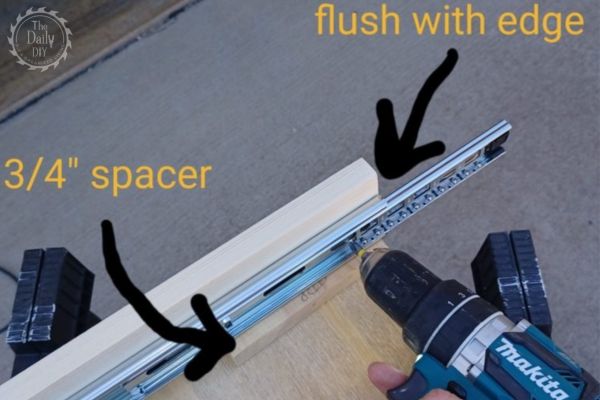
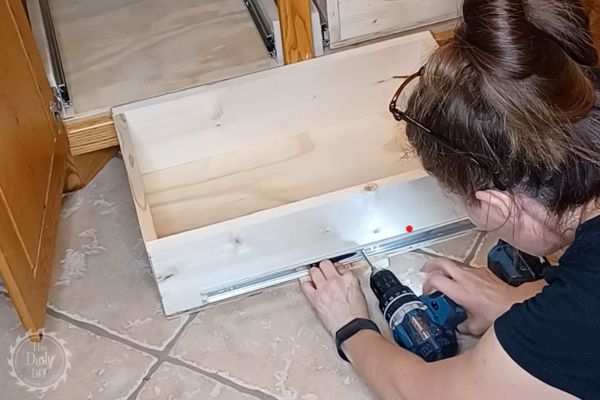
Step 7: Attach the Gliders
Attach the gliders to the base bottom sidewalls. Follow the package insert directions. Separate the inner glider from the outer glider (the part that contains the ball bearings) and attach the outer glider to the sidewalls. Use a 3/4″ spacer made out of scrap wood to use a guide to keep the gliders level. Ensure the glider is flush with the front edge of the sidewall. Slide open the glider to expose the mounting holes. Drill pilot holes and then screw them to the sidewalls.
Keep in mind the ball bearing glides are meant to be mounted on the sides, not the bottom. The glides need 1/2″ of space between the sidewall and the tray wall to work properly. You will be cutting your tray bottom 1″ shorter than the width of your base to allow enough distance for the gliders to glide smoothly.
Step 8: Cut the Drawer Pieces
Cut all of the pieces needed for the trays (drawers). The trays are what will slide in and out of the bases and will hold all of your storage items. Use 1/2″ plywood for tray bottoms and 1X6 boards for the tray sides.
You’ll need to measure the width of your bases first, take that measurement and subtract 1″, and use that new measurement for your tray bottom. This will allow for 1/2″ of room on each side for your gliders. The depth measurement of your base will be the same for your tray. In this example, the left side base is 14-1/4″ wide by 22″ deep, so we will cut the tray bottom to be 13-1/4″ wide by 22″ deep. Then cut all of the pieces that will make up the tray sides.
Step 9: Sand the Tray Pieces
Lightly sand all the pieces for the trays.
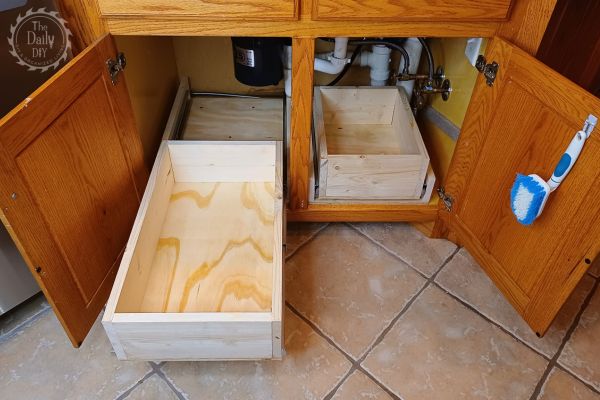
Step 10: Assemble the Trays
Apply wood glue to the tray bottom and attach the sides using finish nails.

Step 11: Attach Inner Gliders
Attach inner gliders to the outer tray sides. Use the same 3/4″ spacer as a guide to keep the glider level. Remember to keep the glider flush with the front of the tray.
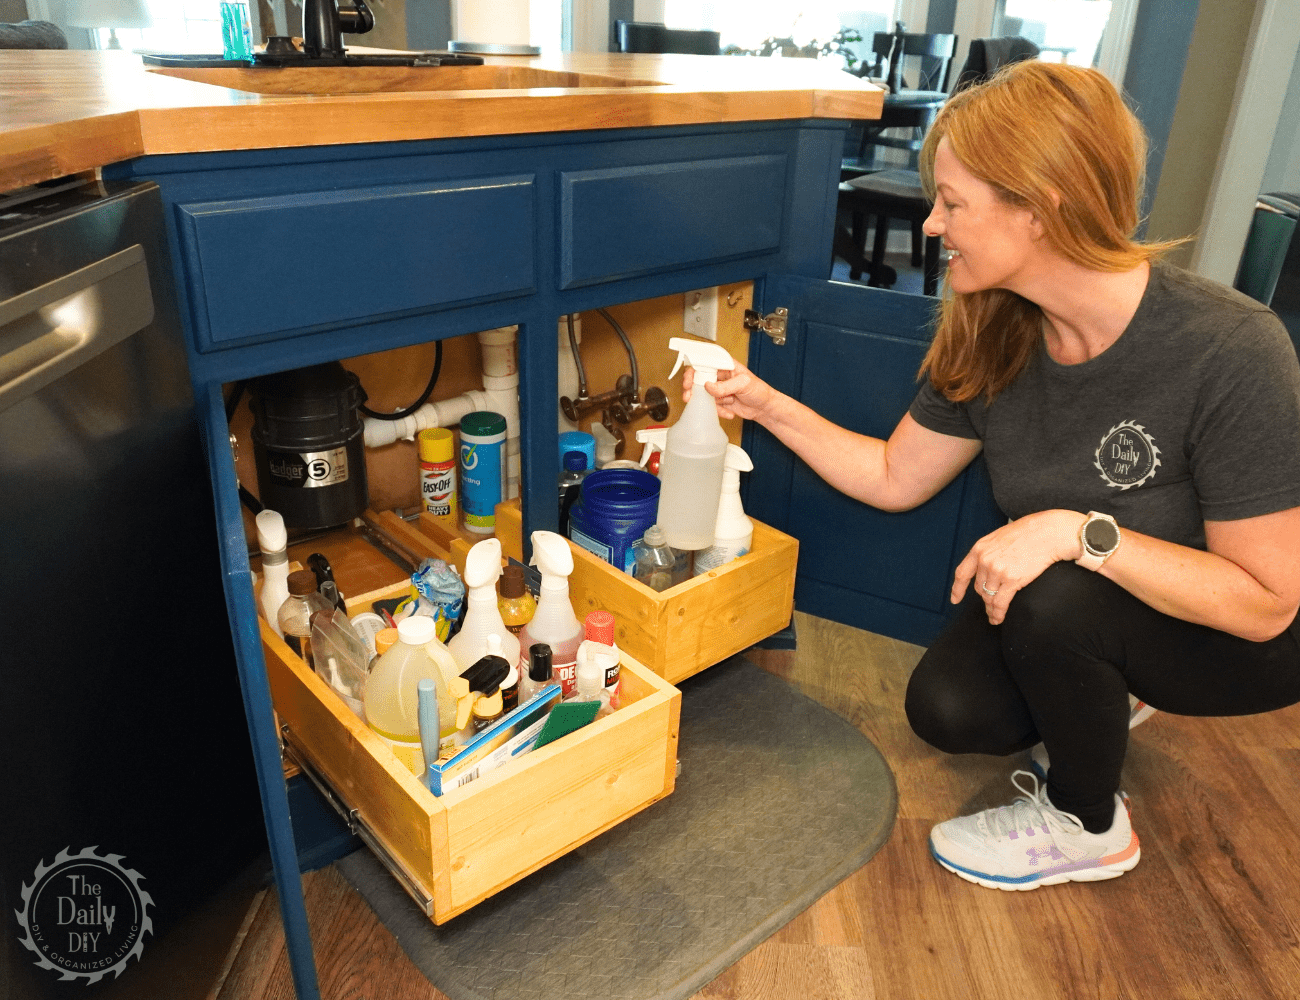
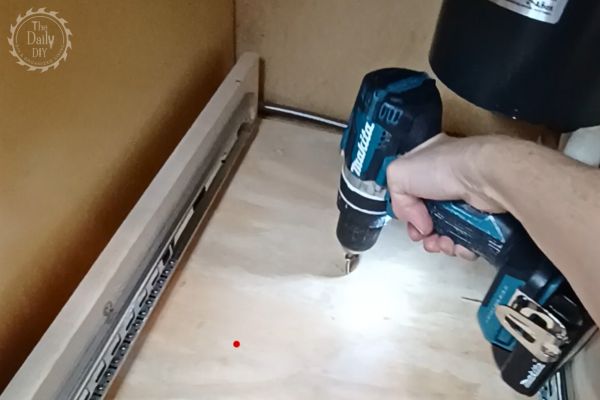
Step 12: Install the Bases and Trays
Finally, secure the base to the bottom of your kitchen cabinet. After that you can slide in your trays and begin using your new custom built under sink storage trays!
Finishing Touches
Once your custom under sink pull out storage trays are complete, consider coating them with polyurethane or paint. If you choose to do this, it’s best to apply the finish before attaching the drawer glides.
These under sink storage ideas can also be used in other cabinets around your home. They would be perfect for pantry slide out drawers, or for under sink storage bathroom trays.
For more DIY inspiration, check out our guide on building custom pantry shelves.