How To Replace a Pool Liner
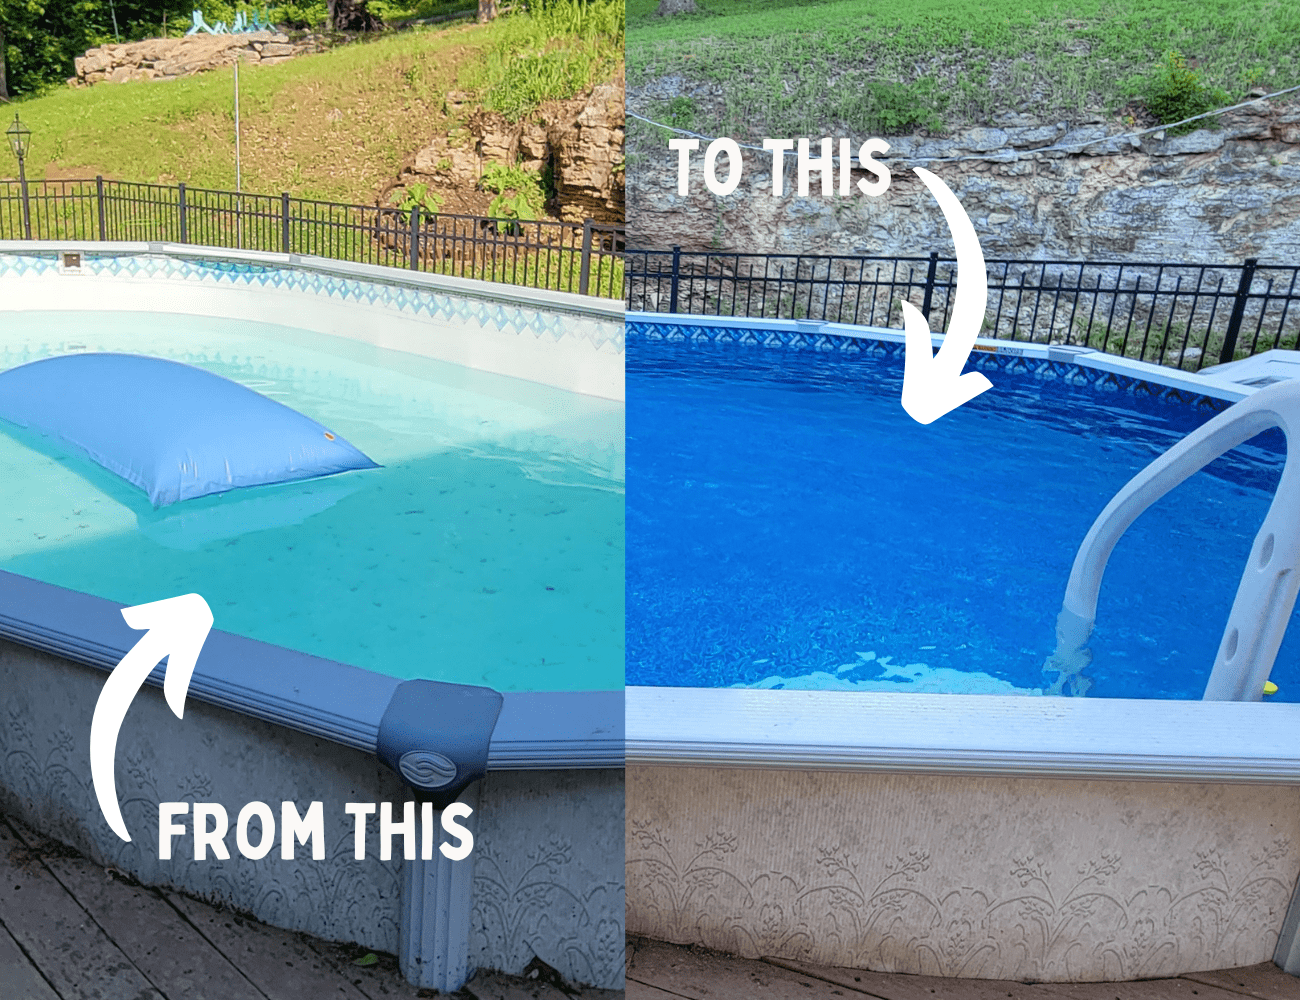
Is it time to replace your pool liner? If you’ve got a quote for $1,000 just for labor to replace your pool liner in an above ground pool like I did, you might be looking for a more affordable solution. The good news is that replacing a pool liner, especially for above-ground pools, can be a manageable DIY project. In this guide, we’ll walk you through the steps to replace a pool liner above ground, helping you save money while rejuvenating your swimming pool.
Related Posts: How To Open an Above Ground Pool, How To Close an Above Ground Pool For Winter
Why Consider a DIY Replacement?
Pool liner replacement doesn’t require specialized skills, just some basic tools and patience. By handling the replacement yourself, you can significantly reduce the costs associated with professional installation. Plus, it’s a satisfying project that can give you a sense of accomplishment and extend the life of your pool.
Timing Your Pool Liner Replacement
Replacing a pool liner is a straightforward task, but it’s important to note that it requires a bit of time and patience. In my experience, the entire process took about a week to complete. Draining the pool was the most time-consuming part, taking three days to get all the water out. After that, it took a few hours to remove the old liner and install the new one. Filling the pool back up with water took another few days. So, while it’s not a quick weekend project, it’s definitely manageable and well worth the effort for the cost savings and satisfaction of doing it yourself.
Important Note:
While this guide is specific to replacing a liner in an Esther Williams brand above-ground pool, the steps outlined below can still be applicable to other brands of pools. Just be sure to check for any brand-specific instructions or differences in liner attachment methods before starting your project as different brands may have unique “liner beads”. The liner bead is the top part of the liner that attaches to the pool’s bead receiver. Ensure you purchase the correct replacement pool liner for your pool brand and bead receiver type.
Watch On YouTube
Before we dive into the step-by-step guide on how to replace your pool liner, I recommend watching this helpful YouTube video. It provides a visual overview of the entire process, making it easier for you to follow along with the instructions. Whether you’re a seasoned DIY enthusiast or new to pool maintenance, this video will give you a clearer understanding of what to expect and how to achieve the best results. So, grab a cup of coffee, click play, and let’s get started on giving your pool a fresh, new look!
Now that you’ve watched the video and have a visual understanding of the process, let’s dive deeper into the details. In the following step-by-step guide, we’ll break down each part of the pool liner replacement process for your above-ground pool. From draining your pool to installing the new liner, we’ve got you covered with clear instructions and helpful tips. So, gather your tools, roll up your sleeves, and let’s get started on this rewarding DIY project!
Step 1: Drain the Pool
Start by draining all the water from your swimming pool. You can use a pump or siphon the water through a garden hose. Remember to disconnect and drain the hoses connected to your pump and filter as well.

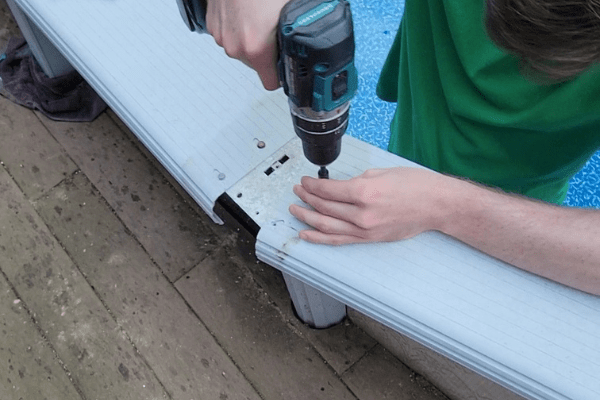
Step 2: Remove Pool Components
With the pool drained, remove the coping covers, top seats, skimmer basket, and return jet assembly. This will prepare the pool for the new liner installation.
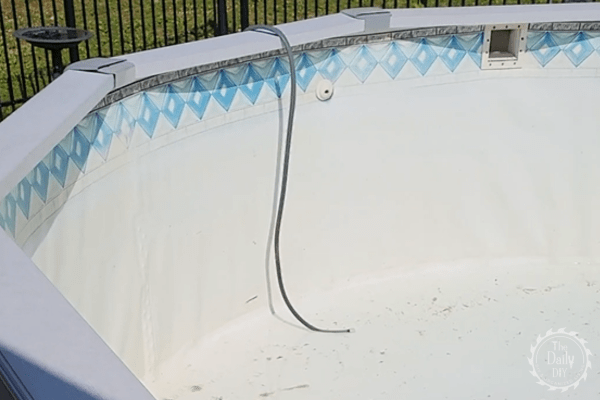
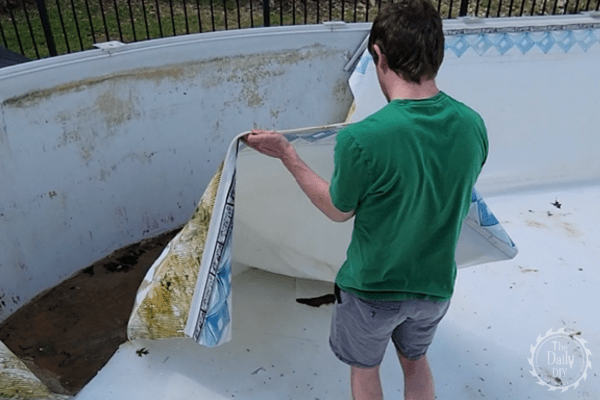
Step 3: Remove the Old Liner
Before installing your new liner, you need to remove the old one. Start by carefully cutting the old liner into strips using a utility knife or scissors. This makes it easier to handle and remove from the pool. Be cautious not to damage the pool walls or floor while cutting. Once cut, pull out the strips and dispose of them properly. With the old liner removed, you can proceed with preparing the pool for the new liner installation.
Step 4: Install the New Liner
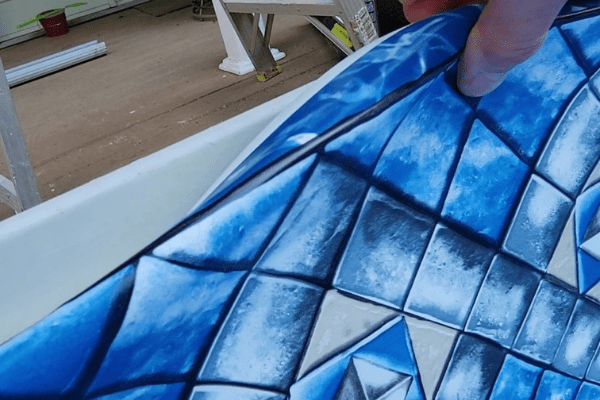
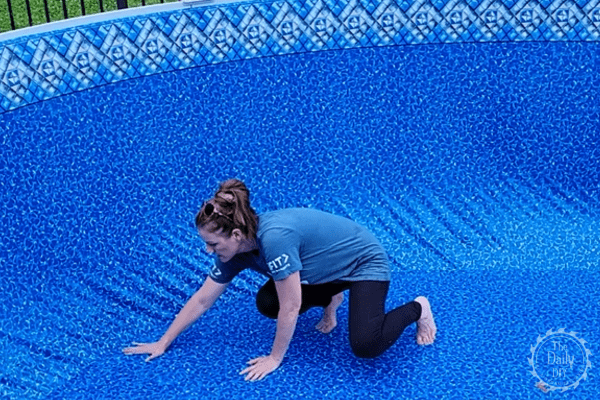
Unfold the new liner and let it warm in the sun for a few hours. This makes it more pliable and easier to work with. When you’re ready, place the liner inside the pool and align it according to the manufacturer’s instructions. Attach the liner to the pool walls by inserting the bead of the liner into the bead receiver.

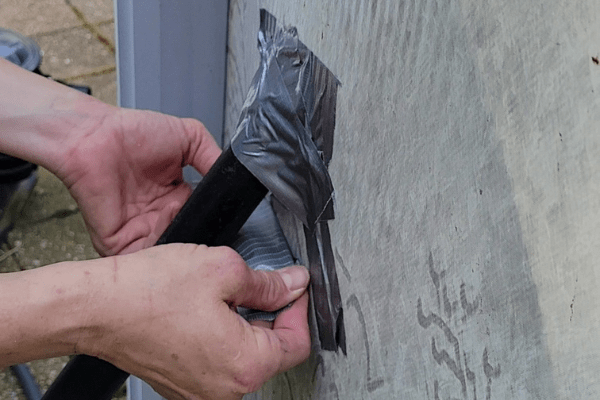
Step 5: Vacuum Out Air
Seal the skimmer opening with tape and attach a Shop-Vac hose to the return jet, ensuring an airtight connection. Turn on the vacuum to remove air between the liner and pool wall. Simultaneously, smooth out any wrinkles at the bottom of the pool.
Step 6: Fill the Pool
Begin filling the pool with water. As the water level rises, manually adjust the liner to eliminate any remaining wrinkles at the bottom.
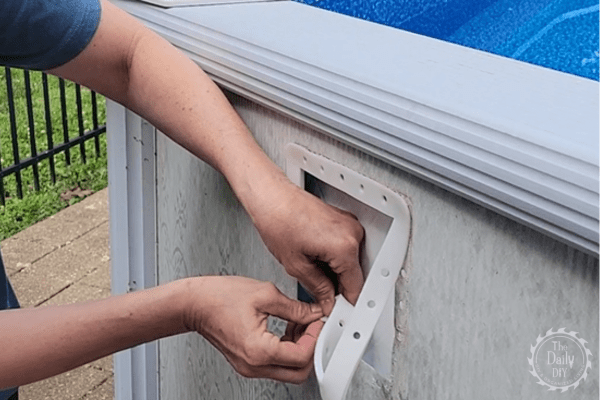
Step 7: Reattach Components
When the pool is about halfway filled, reinstall the skimmer, return jet, and all associated hoses. Replace any worn gaskets or washers as needed.
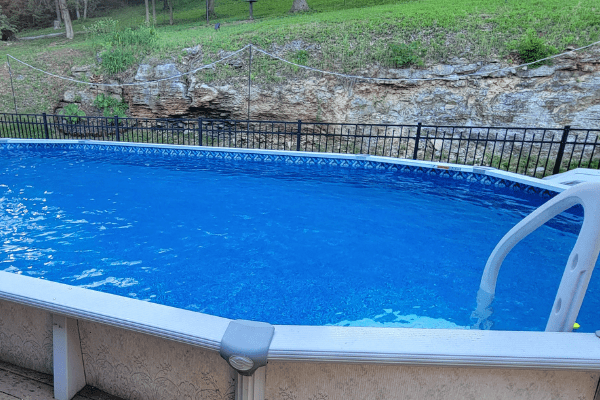
Step 8: Finish and Enjoy
Once the pool is full, turn on the pump, balance the water chemistry, and add the necessary chemicals. Your pool is now ready for enjoyment with its new liner!
Conclusion
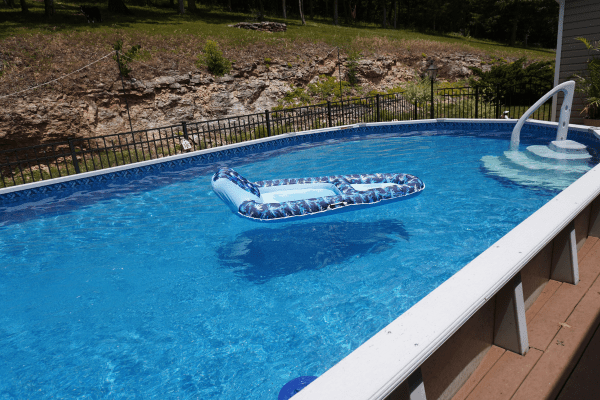
Replacing a pool liner is a straightforward task that can save you a significant amount of money. With some time and effort, you can ensure your pool looks great and is ready for summer fun. For a visual guide, check out the YouTube video above on how to replace a pool liner.
Remember, the lifespan of your replacement pool liner depends on factors like chemical usage, liner quality, and exposure to sunlight. Regular maintenance and proper care can help extend its life and keep your pool looking its best.
Now that you’ve successfully replaced your pool liner, you’re one step closer to enjoying a refreshing swim! But before you dive in, make sure your pool is ready for the season. Check out our blog post on how to open your pool for the season, where we cover everything from balancing the water chemistry to getting your filtration system up and running. Follow our tips, and you’ll be splashing around in no time!
Whether you’re replacing your liner or getting ready for the off-season, check out our guides on How to Open a Pool for spring and How to Close an Above Ground Pool for winter!
Shop For Liners/Supplies
Looking for a new liner for your above-ground pool? We’ve got you covered! You can find a wide selection of high-quality replacement pool liners on Amazon and PoolSplash.com. Whether you’re searching for a specific pattern, size, or brand, these trusted retailers offer a variety of options to suit your needs. Browse their collections today and find the perfect liner to refresh your pool’s look and ensure a leak-free swimming season!
The exact liner I used for my 15’X30′, 52″ deep Esther Williams pool can be found on Amazon here, be sure to get the correct depth size for your pool.