Build an Easy DIY Desk This Weekend
Whether you’re working from home, or just need a bigger and better desk to hold your stuff, here’s a simple way to build an easy DIY desk. And you can do this weekend. Using only a sheet of plywood, screws, and steel pipe. Customize this industrial style desk to fit your space.
Building a homemade desk can be cheaper than buying one, depending on the materials you use. It’s especially good to make your own so you can customize it to fit your needs. You may need a new desk for gaming, for work, or for writing. Make it standard height, or taller if you want a stand up desk. The possibilities are endless. Using steel pipe for the legs offers many different height and size combinations. As well as the option to add a few shelves. And the best part is, anyone can do this. Even if you have zero woodworking or DIY skills.
My son recently moved in to his own place after graduating from college and needed a new desk. Since his new place was a rental, he wanted something that could grow and change with him as he moves. He can change the size of the desktops at any time to make the desk bigger, or to reconfigure it.
Materials Needed For The Desk
- 3/4″ Plywood
- Wood Screws
- Steel Pipe
- Iron Pipe Fittings
- Sandpaper
- Paint or Stain For Desktop
- Polyurethane
- Spray Paint For Pipe (Optional)
For the desktop and shelf, we went with a 3/4″ plywood. The 4′ X 8′ size was enough to get two desktops (for an L-Shaped desk) and a shelf to hold the computer tower with plenty left over. Most local home improvement stores will cut this board for you. Our particular store gave us two cuts for free, then charged $1 for each extra cut. If you don’t have a table saw or a circular saw, take your measurements with you when you shop. They’ll cut the desktops and shelves to size.
Desktop & Shelf
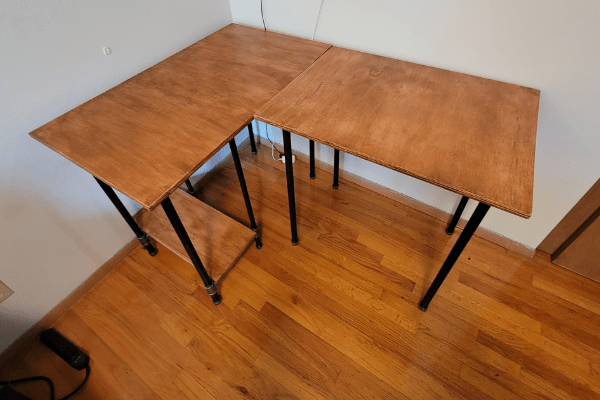
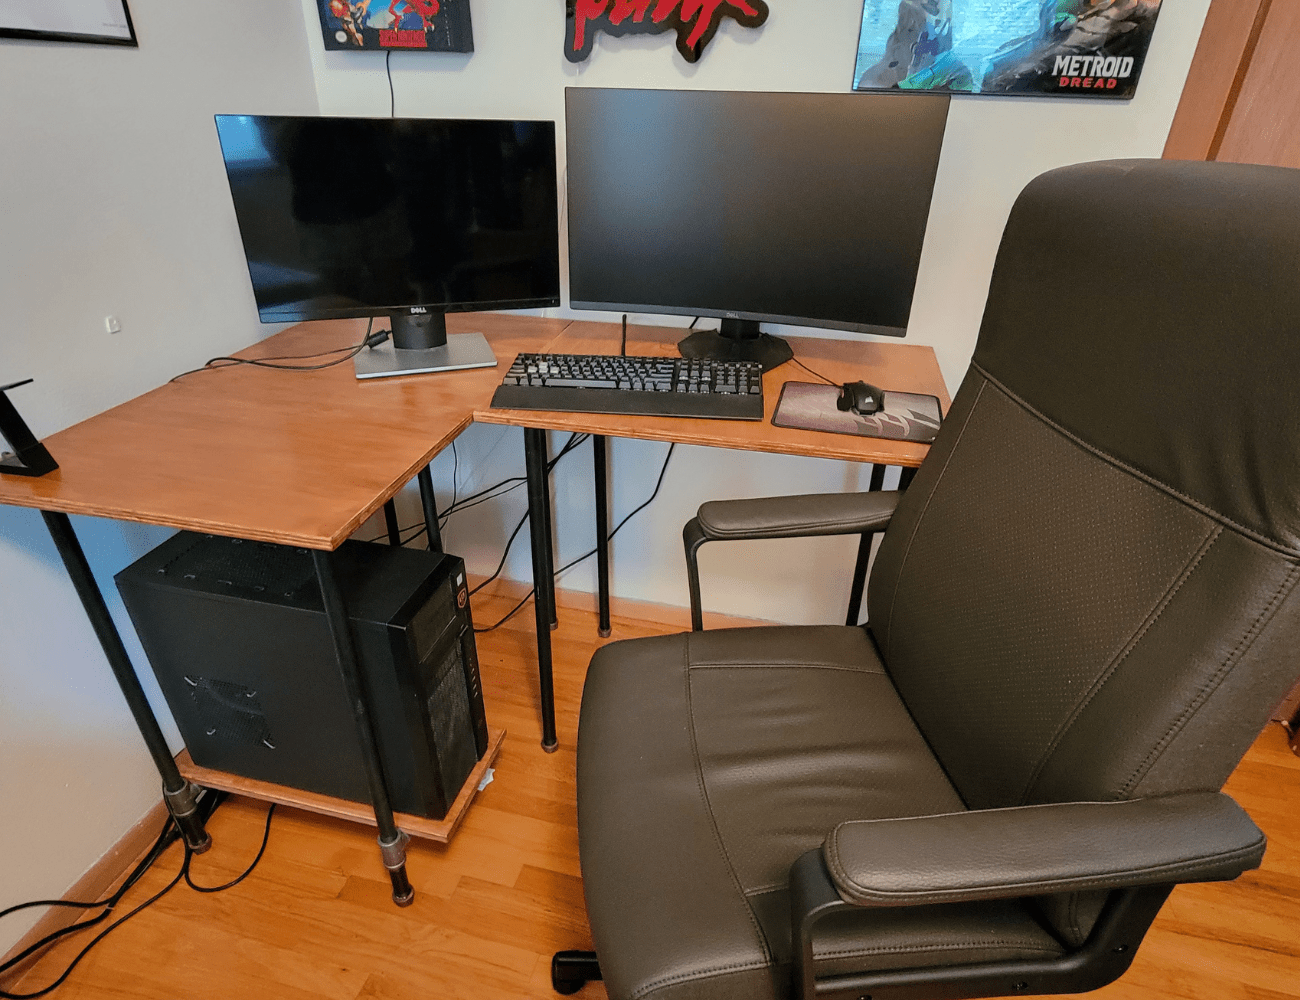
Since we chose an L-Shape for this easy DIY desk, we decided to make it in two pieces. This way he can rearrange the desktops if needed in the future. We also placed a small shelf on one side to hold a computer tower.
The desktops and shelf were made of 3/4″ plywood, and took a bit of work to get them the way we wanted.
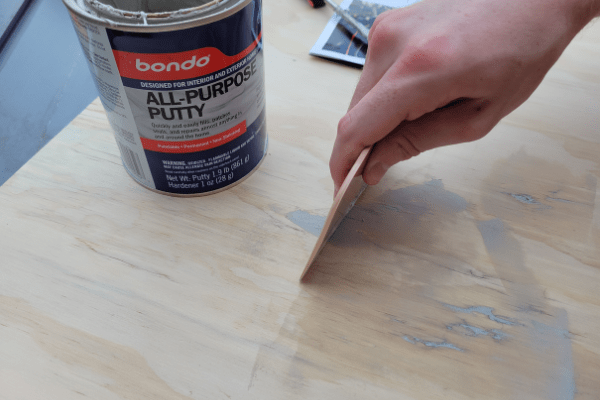
- Apply Bondo to fill in any chips or knots in the wood.
- After Bondo dries, sand those spots with 60 grit sandpaper until all excess Bondo has been removed and all is smooth.
- Sand entire surface of the boards with 220 grit. Round the corners so they aren’t sharp.
Desk Legs
We used the steel pipes and iron fittings for the desk legs. Even though the steel pipes were already black, they had printing on them, as well as inconsistent coloring. We sprayed them with a matt black spray paint. We left the iron fittings alone to give the desk legs an accent color.
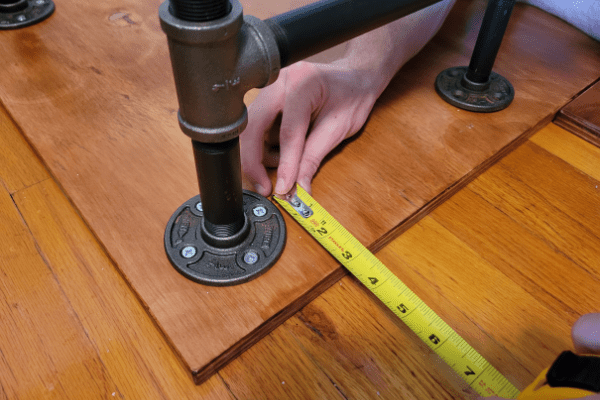
We chose 3/4″ black steel pipes that are 30″ long for the four outer legs of the desk. 3/4″ iron cap fittings for the legs on the bottom and we lined those with felt pads (so it won’t scratch the wood floor). Finally, we used 3/4″ iron floor flanges to attach them to the underside of the desktop.

To hold the small shelf for the computer tower, we added an extra set of legs for the 10″ wide shelf. 1/2″ black steel pipes were perfect for these inner legs. Using 24″ long size, 10″ long size, and 4 1/2″ long size with iron “T” fittings. See picture above.
Staining
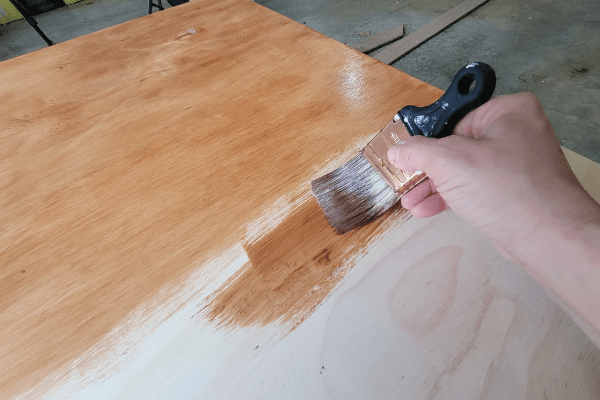
We stained the desktops and shelf for this project. First apply a pre-stain conditioner. Let this dry for at least 30 minutes. Then, sand with 220 grit sandpaper. Next, apply the first coat of stain. Let that dry at least 6 hours. Sand with 400 grit sandpaper. Paint the second coat of stain, and let this dry at least 6 hours and then sand again with 400 grit. Finally, apply a polyurethane to protect the surface. Give the boards a full day to dry and cure before attaching the legs.
To find out which sandpaper grit works best for different projects, check out Which Sandpaper Do You Need?
Painting
You can paint the boards for your easy DIY desk instead. Apply primer, paint, and a polyurethane to protect the surface. Apply at least two coats of paint and two coats of poly. Allow enough dry time between each coat. Sand using 400 grit sandpaper between each coat. Wait a full day after apply your paint and poly before you attach the legs.
Once your boards have cured you can attach the legs, and your all done! Now you have your beautiful, new, industrial style easy DIY desk.