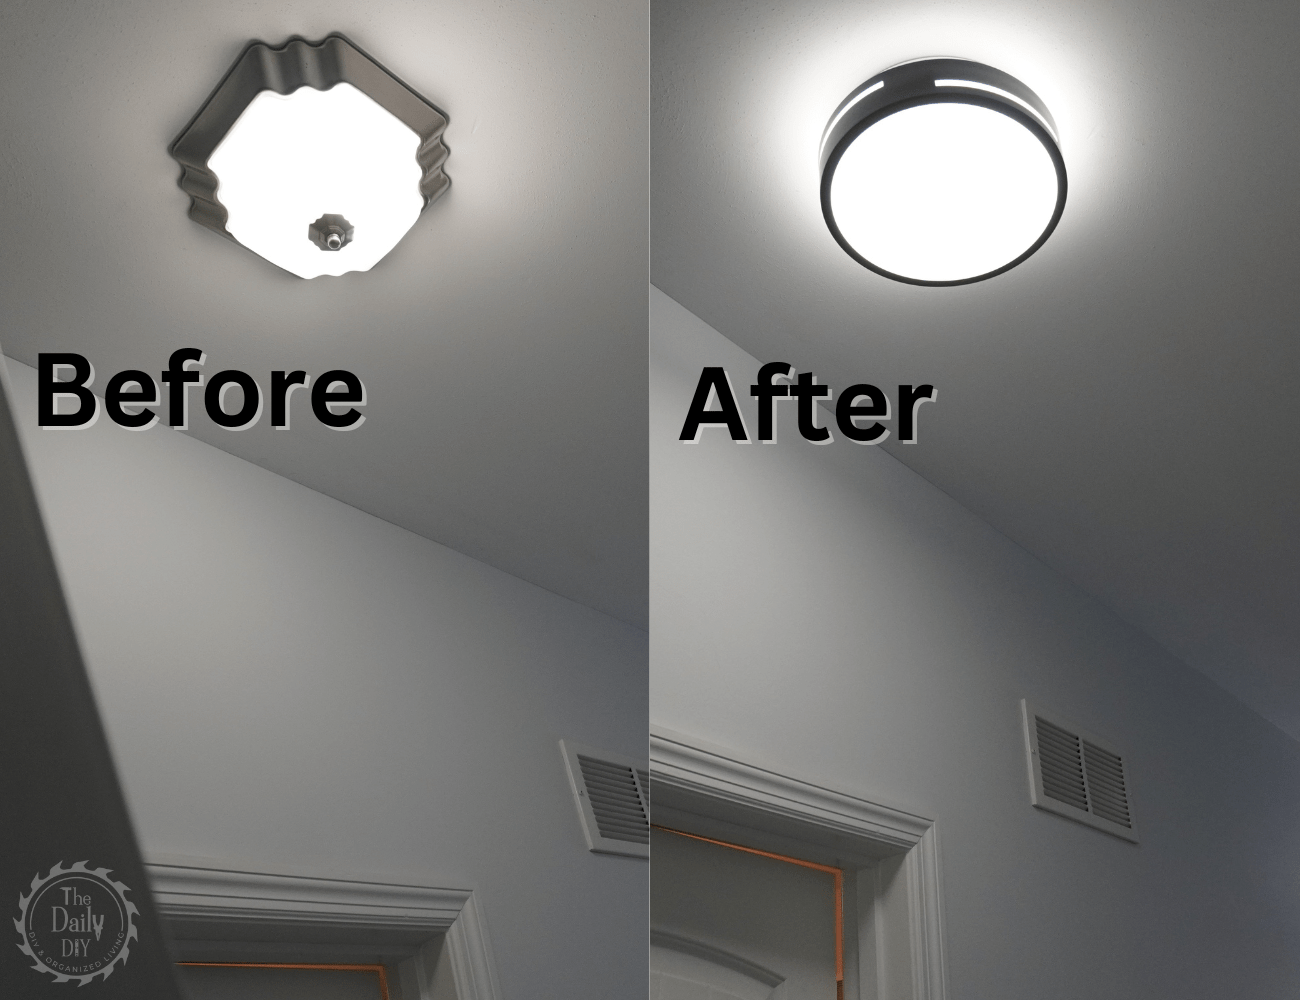
Change Your Lighting: Easy DIY Light Fixture Install
Lighting plays a crucial role in transforming the ambiance and style of your home. If you’re looking for a quick and affordable way to give your space a fresh new look, we’ve got you covered. A quick update to your lighting is a fantastic DIY project you can do today. In this step-by-step tutorial, you’ll see that you can change your lighting fixture within minutes. With a few tools, some basic electrical knowledge, and a little time you can update your space and create a warm, inviting atmosphere. Get ready to illuminate your home with style and flair!
We’ll be focusing on how to remove and install a flush mount ceiling light fixture for this tutorial.
Materials
- Screwdriver (usually Phillips or flathead)
- Wire stripper or wire cutter
- Voltage Tester Pen
- Wire Nuts
- Ladder
- New Flush Mount Ceiling Light Fixture
- Replacement Bulbs (if needed)
Safety Precautions To Consider
Safety should always be a top priority when working on electrical projects, and especially when you change your lighting. Here are a few precautions to keep in mind:
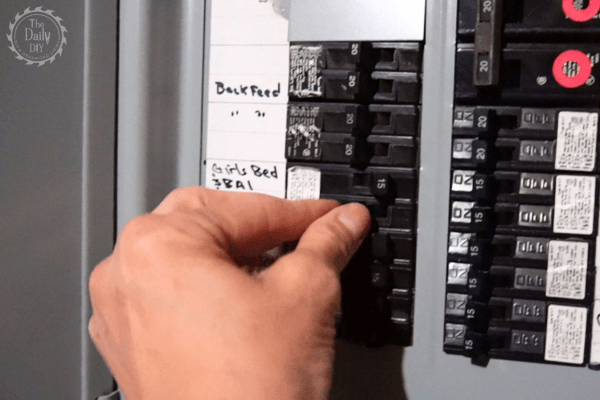
- Turn off the power: Before you begin the installation, locate the correct circuit breaker in your electrical panel and switch off the power to the existing fixture.
- Use a stable platform: When working on the ceiling, use a sturdy ladder or step stool that can support your weight. Ensure it’s placed on a level surface to prevent any accidents. Check out our favorite ladders here.
- Protect your eyes and hands: Wear safety goggles to shield your eyes from any debris or falling particles. Additionally, consider wearing work gloves to protect your hands during the installation process.
- Follow manufacturer instructions when you change your lighting: Always refer to the specific instructions provided by the manufacturer of the light fixture you’re installing. Different fixtures may have unique installation requirements, so it’s important to follow the provided guidelines.
Remove The Old Light Fixture
Step 1: Remove the fixture cover or shade
Depending on the design of your flush mount light fixture, it may have a cover or shade that conceals the inner components. Carefully remove any screws, clips, or fasteners holding the cover or shade in place. Gently set it aside, ensuring it doesn’t get damaged.
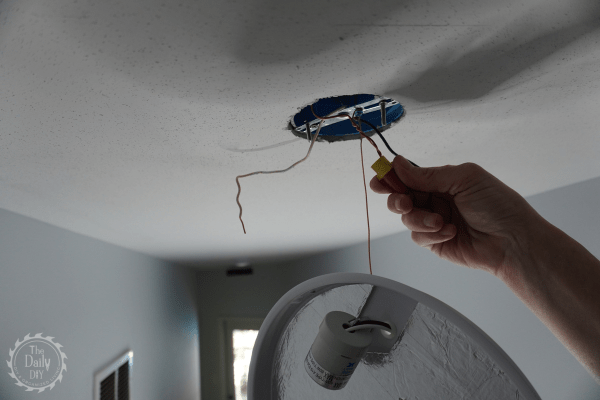
Step 2: Disconnect the wiring from the old fixture
Inside the electrical box, you’ll find the wiring connections that power the existing fixture. Before you start here, take your voltage tester pen and run it along the wires to ensure there is no power going through them. If not, then you can disconnect these wires. Typically, you’ll find three wires: black (hot), white (neutral), and green or bare copper (ground). Loosen the wire nuts that secure the wires together and untwist them. Disconnect the hot first (black wire), then the neutral (white wire), and finally the ground (green or copper wire).
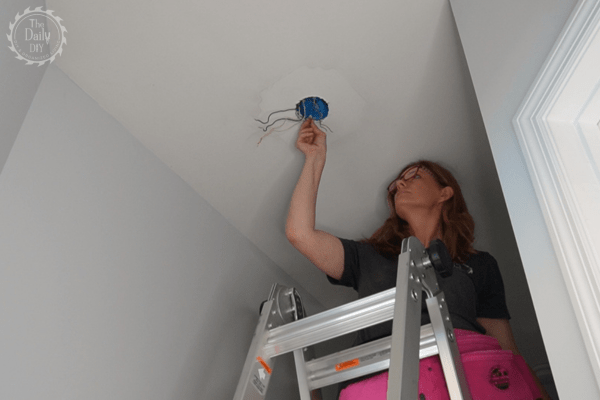
Step 3: Unscrew and remove the mounting bracket
Look for screws or bolts that secure the mounting bracket of the old fixture to the ceiling. Use a screwdriver or a suitable tool to unscrew and remove the bracket. Once removed, carefully detach the old fixture from the ceiling, gently lowering it down.
As you remove the old fixture, be cautious of any loose or hanging wires. Avoid yanking or pulling on the wires, as they may still be connected to the electrical box.
Installing The New Light Fixture
Before installing the new flush mount ceiling light fixture, it’s important to prepare it for installation. This step ensures that you’re familiar with the components.
Step 1: Unbox the new fixture
Open up the new fixture, ensuring that you don’t damage any delicate parts. Take a moment to inspect all the components and check for any visible defects or missing pieces. Refer to the manufacturer’s instructions or included documentation to familiarize yourself with the fixture’s specific features and assembly requirements.
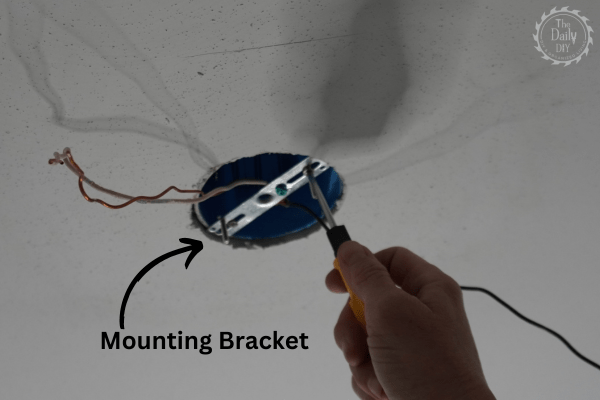
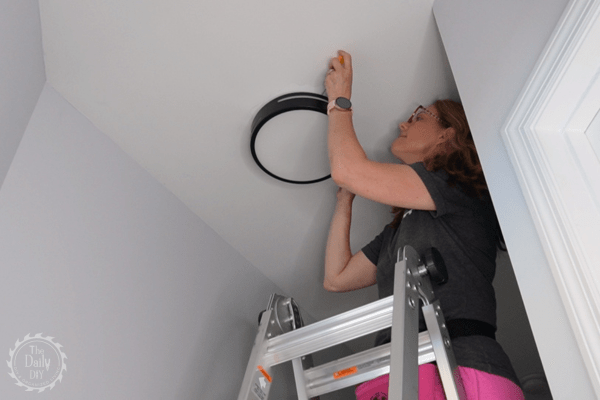
Step 2: Install the new mounting bracket
Hold the mounting bracket against the electrical box on the ceiling. Ensure that it is centered and level. The bracket should align with the screw holes or slots on the electrical box.
Depending on the design of the mounting bracket, you may need to use screws or other provided mounting hardware to secure it in place. Insert the screws through the holes in the bracket and into the corresponding holes or slots on the electrical box. Use a screwdriver or appropriate tool to tighten the screws securely. Ensure that the bracket is firmly attached to the ceiling.
Note: Some flush mount light fixtures may have a built-in mounting bracket or an alternative installation method. In such cases, follow the manufacturer’s instructions provided with the fixture.
Give the mounting bracket a gentle tug to ensure that it is securely fastened to the ceiling. It should feel stable and not wobble or move. If the bracket feels loose, double-check the screws or mounting hardware and tighten them further if necessary.
Step 3: Connect the wiring
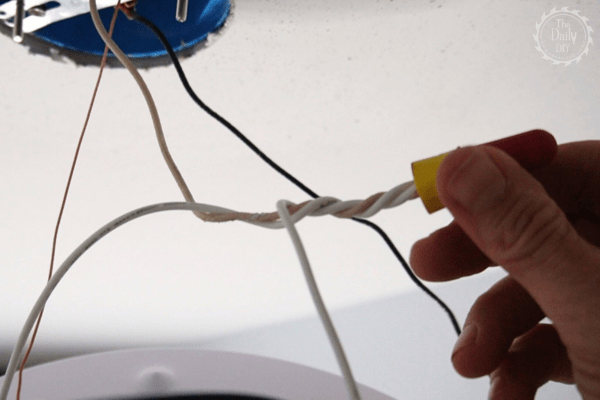
Start by identifying the three main wires: black (hot), white (neutral), and green or bare copper (ground). Match the corresponding wires from the new fixture to the house wiring. Connect them in this order, ground first (copper or green), then neutral (white) and finally black (hot). Twist the exposed ends of the wires together in a clockwise direction. This helps create a secure and reliable connection.
Once the wires are twisted together, cover each connection with an appropriately sized wire nut. Twist the wire nut in a clockwise direction until it is tight and secure. Give each wire nut a gentle tug to ensure that the connections are solid and won’t come loose.
With the connections secure, carefully tuck the connected wires into the electrical box. Make sure there is no excess wiring protruding from the box. Neatly arrange the wires to provide enough space for the new flush mount light fixture to fit properly.
Step 4: Attach the new fixture
Hold the fixture up to the mounting bracket and align it with the screw holes or slots. Ensure that the fixture is level and positioned correctly.
Depending on the design of the fixture, you will either need to insert and tighten screws or attach clips to secure the fixture to the mounting bracket. Follow the manufacturer’s instructions to properly attach the fixture. Be careful not to overtighten the screws or clips to avoid damaging the fixture or ceiling.
If your new flush mount light fixture includes a cover or shade, carefully attach it according to the manufacturer’s instructions. This may involve inserting screws, sliding the cover into place, or using other provided fasteners. Ensure the cover is securely attached and properly aligned.
Finish Up
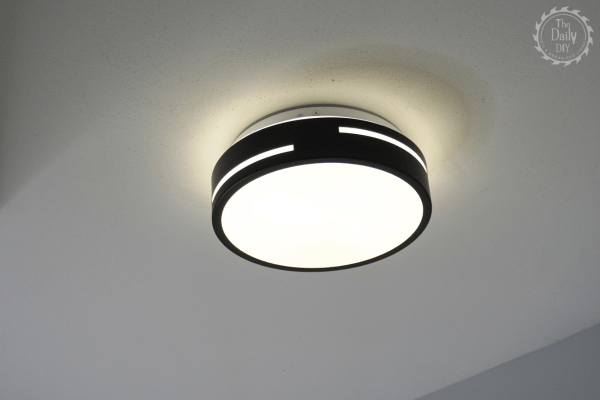
The final step is to turn the power back on at the electric panel and confirm the new light is working.
Congratulations! You’ve successfully completed the process of changing out your flush mount ceiling light fixture. With a few simple steps and a touch of creativity, you can change your lighting and change the entire feel of your home.