How to Build Pantry Shelves Easy
Building custom pantry shelves is a simple and rewarding DIY project. It not only improves your kitchen’s organization but also adds a personal touch. In this guide, I’ll take you through the steps to create sturdy, attractive pantry shelves. This same process can work for building custom wood shelving in any closet in your home as well. Let’s get started!

Materials You’ll Need For Your Pantry Shelves
To build your pantry shelves, first measure your pantry or closet space to determine the amount of wood you’ll need. Jump to tips for measuring.
Then, gather the following materials:
- Plywood or solid wood boards (1×12 for shelves)
- 1×2 lumber for supports (I used primed MDF)
- Screws
- Paint or stain (optional)
- Drill
- Level
- Nail gun with brad nails, or hammer and finish nails
- Clamp
If you need to remove other shelving first, then you’ll also need these materials:
- Putty knife
- DAP DryDex spackling
- Sandpaper (120 grit)
- Pry bar
- Wall Paint
Having all your materials ready before you start will make the project go smoothly.
Shop For Materials
Watch the Tutorial
If you prefer a visual guide, watch the step-by-step tutorial in the video below. It demonstrates each step in detail and offers additional tips.
How To Build Custom Pantry Shelves
Once you have your materials ready, let’s move on to the step-by-step process of building your pantry or closet shelves.
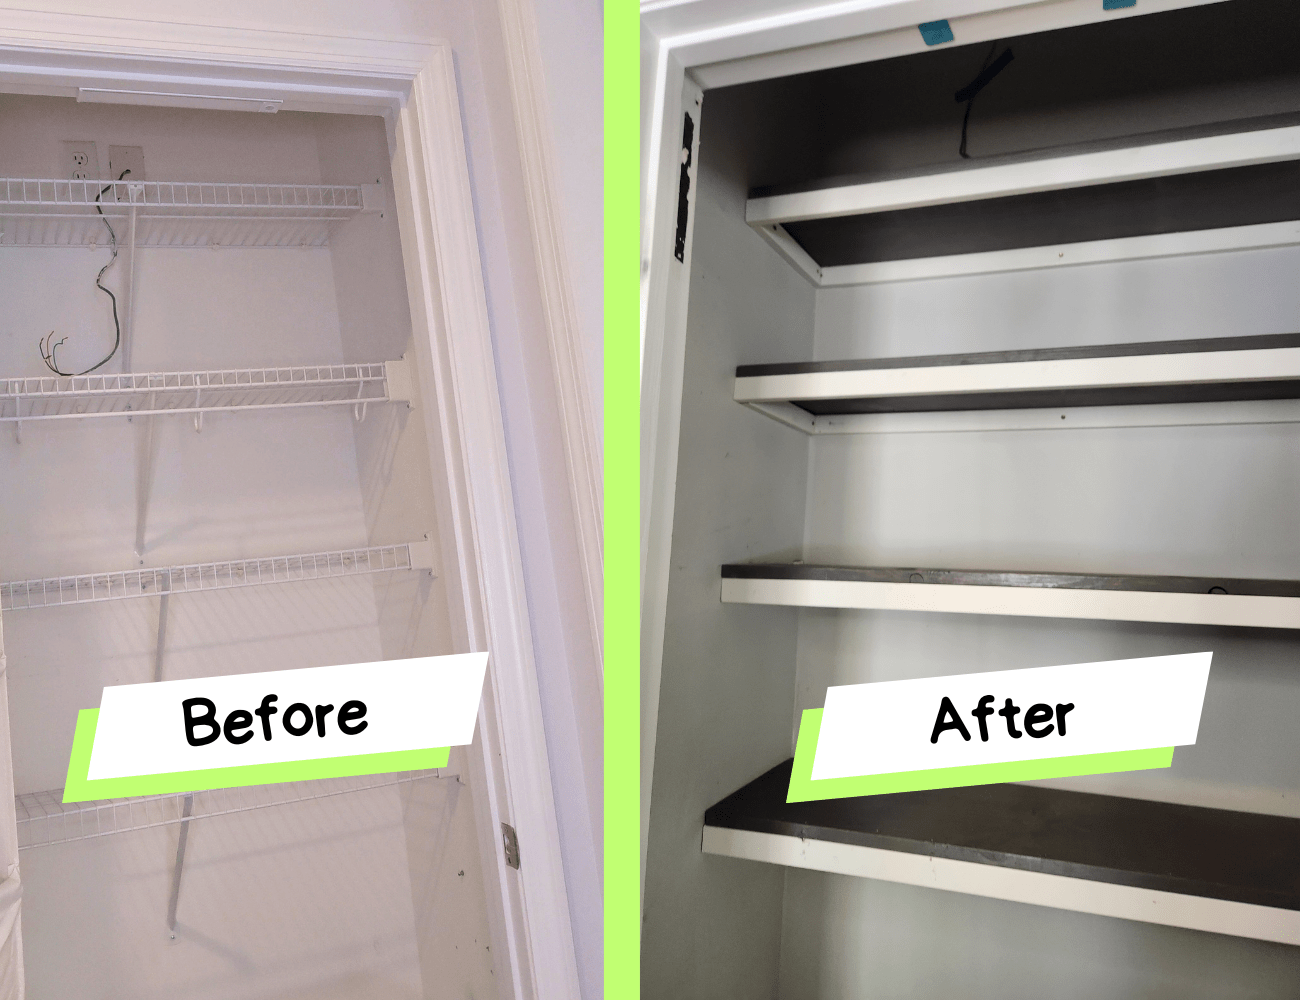
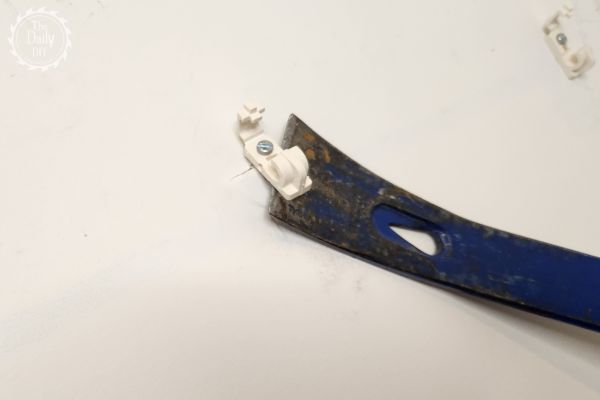
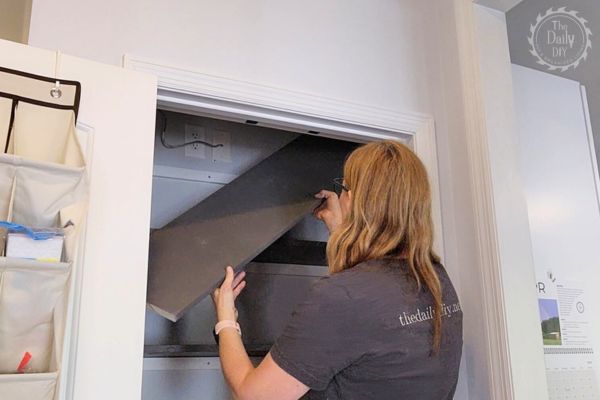
Step 1: Clear and Demo the Closet
First, clear everything out of the closet. Remove the builder-grade wire shelving or any other shelving or hanging bars you have. These are often attached with screws or nails. In my case, they were nailed in, so I used a pry bar to remove them. Once the shelves and clips are out, you’ll likely have many holes to fill.
Step 2: Prepare the Walls
With the previous shelving removed, you’ll have holes to fill before installing new shelves.
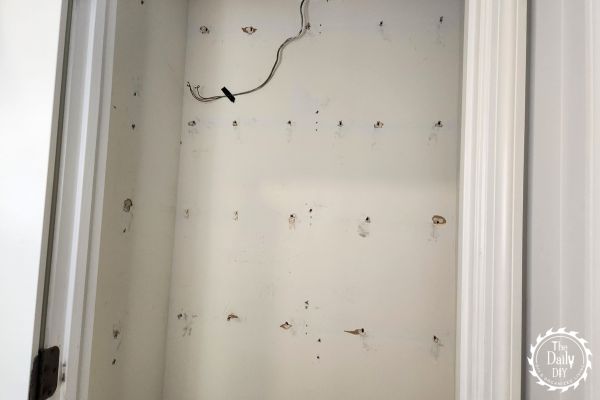
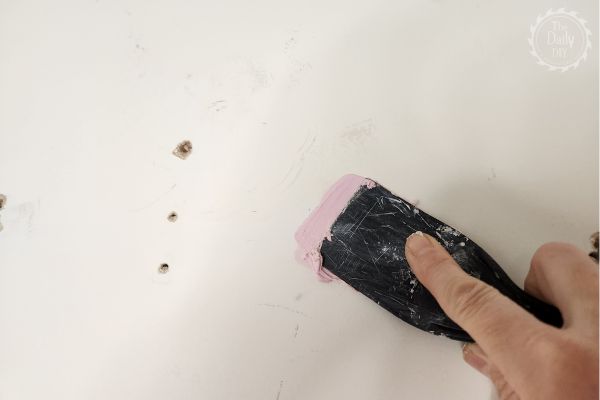
Sand and Spackle
Next, lightly sand the holes to smooth out the drywall. Then, fill the holes with spackling. Apply the spackling using a putty knife, working it into the holes thoroughly. Once dry, apply a second coat if needed to fill any remaining voids. Sand the spackled areas smooth and then wipe the walls with a damp rag to remove dust.
Related Post: How To Fill Nail Holes In Wall
Paint the Walls
Once the walls are prepped, it’s time to paint. Use paint that matches your existing wall color. You don’t need to prime if you’re using DAP DryDex spackling, as it has built-in primer technology.

Step 3: Measure and Cut the Wood
For the pantry shelves, use 1×12 boards for the shelves and 1×2 lumber for supports. I used common boards for the shelves and primed MDF for the supports and front trim.
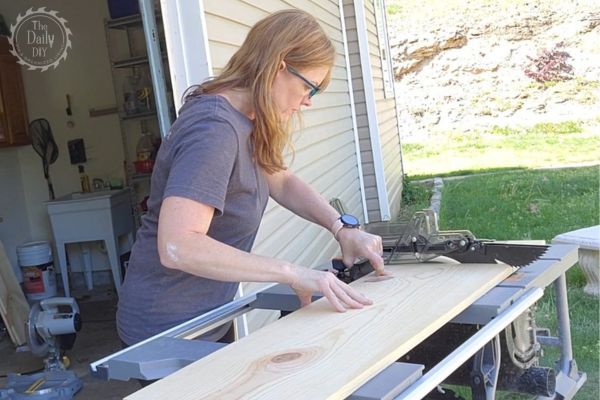
Shelf Boards
Measure the width of your closet to determine the length of your shelves. In my case, I cut the shelf boards (1X12) to 37 inches long.
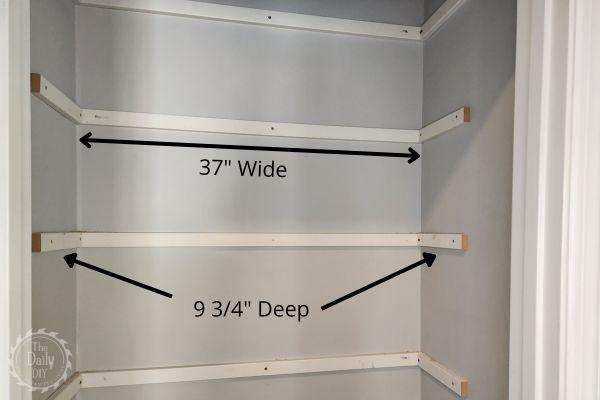
Back Support, Side Supports, and Front Trim
For the back support and front trim, cut two pieces of 1×2 the same length of your shelf boards. For my example I cut two 37″ long pieces of 1X2 for the back support and the front trim piece.
Now for the side supports, you’ll cut two pieces of 1X2 that are 9 3/4″ long each. Since a 1X12 board for the shelf is technically 11 1/2″ deep, you’ll need to account for that. Therefore, cutting your side supports 9 3/4″ will be perfect for this.
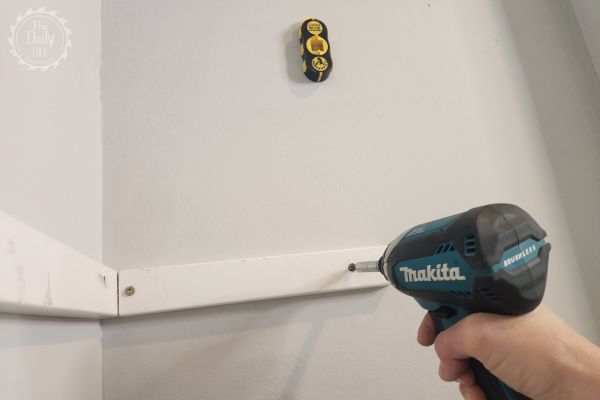
Step 4: Assemble the Supports
Install the back and side supports inside the closet. Secure the supports to wall studs with screws. If you can’t find studs, use wall anchors for added stability. Use a level to ensure the supports are straight.
Install Back Supports
Screw the back support piece across the width of the closet. Ensure it’s level before securing.
Install Side Supports
Now you can attach the side supports to the walls, making sure they’re level with the back support.
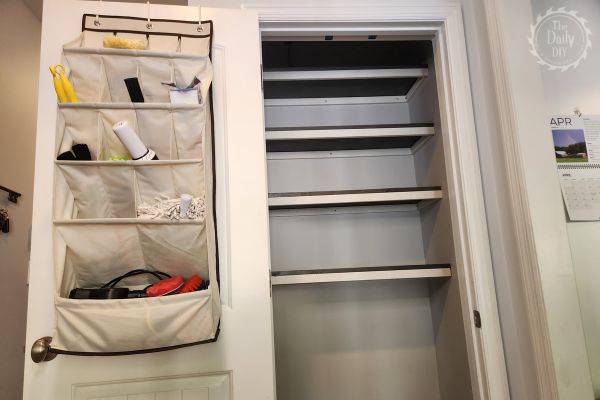
Step 5: Install the Shelves
Place the 1×12 shelves on top of the supports. You can paint or stain the shelves before installation for a finished look.
Secure the Shelves
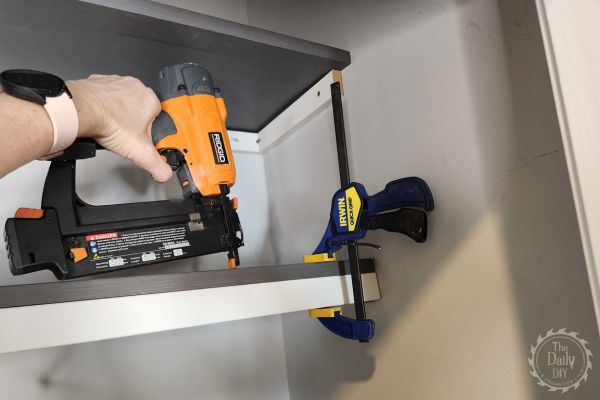
Use a nail gun, or hammer and finish nails, to secure the shelf to the back and side supports. This ensures they are stable and can hold heavy items.
Add Trim Pieces To Your Pantry Shelves
Finally, for a polished look, add the trim pieces to the front of each shelf. Clamp the trim in place and secure it with a nail gun, or hammer and finish nails. Since this hides the edges, it gives a professional finish.
Tips for Success
- Measure Twice, Cut Once: Accurate measurements ensure a perfect fit for your shelves.
- Use Quality Materials: Invest in good-quality wood and hardware for durability.
- Take Your Time: Rushing can lead to mistakes. Enjoy the process and take each step carefully.
Conclusion
Building your own pantry shelves is a fulfilling DIY project that enhances your kitchen’s functionality. By following these steps, you can create custom shelves that fit your space perfectly and provide ample storage. Whether you’re a seasoned DIYer or a beginner, this project is achievable and rewarding.
Start your DIY pantry shelving project today and enjoy the satisfaction of a job well done. Happy building!
For more DIY organization inspiration, check out our guide on building under sink storage sliding drawers!