6 Tips For Painting With an Edger
Many DIYers and contractors are hesitant to try and paint with an edger. I can understand why. It can be pretty tricky to use and get a good finish. With anything it takes patience and practice to figure out how to properly use an edger. But once you get the hang of it, you’ll be able to use one to get your room painted in record time! If you’re new to painting with an edger, here are 6 tips that you’ll want to keep in mind before you start painting.
Why Do You Need To Use an Edger?
When painting your wall with a roller, you won’t be able to get the paint all the way to the edge. Especially along any trim, ceiling, baseboards, or cabinets attached to the wall. You’ll need to use an edger, or a brush to spread the paint to the very edge.
Paint Edger vs Brush vs Tape
You can use painter’s tape to keep your trim free from paint, but that takes a lot of material, and extra time. And the paint doesn’t always pull off clean, leaving paint to transfer to the trim anyway.
The method of “cutting in” refers to using a paint brush to paint a straight line along the trim. Without using painter’s tape or anything else to keep the paint from transferring. You can achieve the same result with an edger. You need to know a few simple tips to getting the most out of your paint edger. These tips will give you a beautiful, professional finish.
Tip #1
Use a lint roller brush to remove any dust and lint from the paint edger pad before you begin.
Tip #2
When loading paint on to the edger pad, use a paint tray. Lightly dip the edger in to the paint and wiggle it. Then, blot the edger pad a few times to remove any excess. Take special care not to get too much paint near the top of your edger where the wheels are.
Tip #3
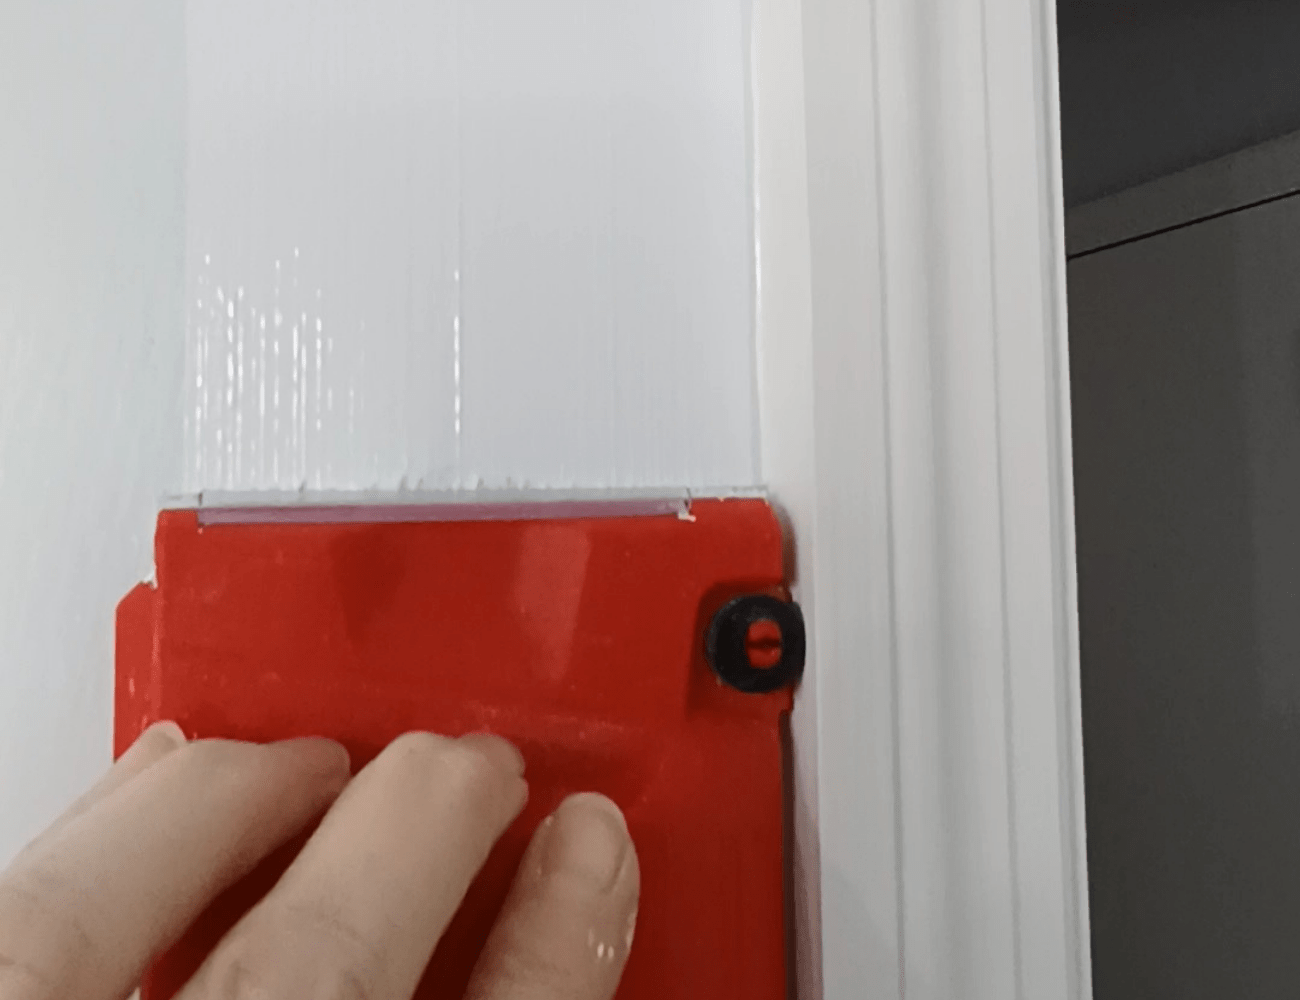
Keep the wheels free from paint at all times. Once you have your edger loaded with paint, take the edger and run the wheels along the dry part of your wall first. This will show you if there is paint on the wheels. If not proceed with painting along your trim.
Tip #4
Keep a wet rag nearby. If you do get paint on the wheels, or along the sides of your edger, you can wipe it off immediately.
Tip #5
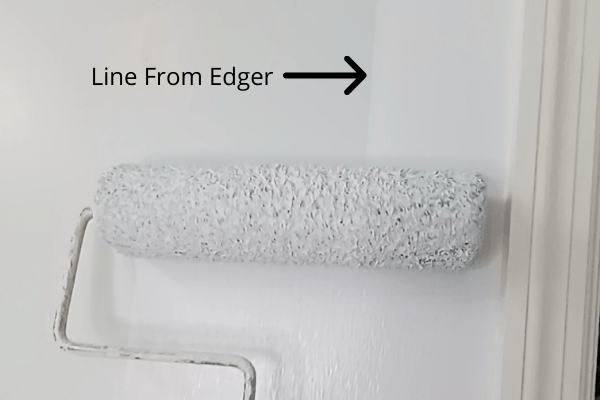
The edger will leave a thick line of paint along the outer edge. You’ll want to take care of this right away, otherwise it will dry and show through your finished paint job. Work in small sections and switch back and forth between your edger and your roller. For example, paint along the side of the door trim with the edger. Then immediately switch to the roller and blend that paint out to extend it to the rest of the wall. Next, paint along the top of the door trim with the edger. Then switch to the roller and blend and extend that paint out. And so on
I like to work with the edger in one hand, and the paint roller in the other. This allows me to quickly switch back and forth between the two. It gets my walls done so fast!
Tip #6
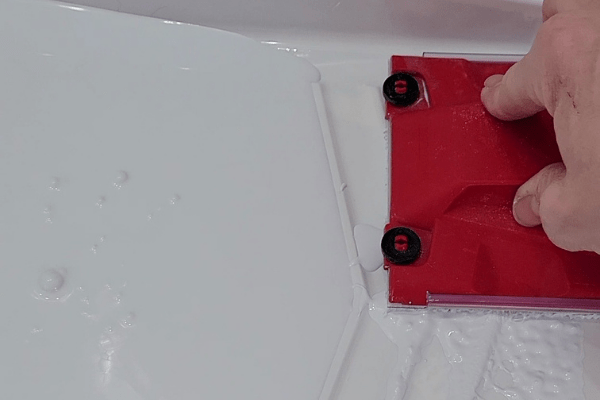
Don’t use the edger on a wet inside corner. If you just painted a wall immediately move on to the adjacent wall, you don’t want to use the edger on the corner. Paint from the wet wall will transfer to the edger wheels, and you’ll leave wheel tracks along the wet side. Instead, use a paint brush to brush paint in to the corner. Then use the edger and run it down the wall along the corner, but not all the way. Get as close as you can to the inside corner with the edger. The paint brush will have filled in the corner completely for you.
Bonus Tip
Don’t use too much pressure when applying paint to the wall with the edger. Keep it light. Otherwise paint will go on too thick along the edge, and will drip down. You likely won’t notice it until you are finished.
If you’re still wondering if you should use an edger, consider the time it would take you to tape everything off. Even cutting in with a brush takes more time as you have to work slow and with a steady hand. You can even use this style with a pole with an edger to get high and hard to reach places done with ease, so that’s a bonus.
Whether you are a beginner, or have been painting for a while, an edger is a great tool to use and is very efficient. You can paint the trim and baseboard in half the time of traditional methods. Stick with these 6 tips for how to paint with an edger, and you can get professional results with little to no prep work. Ultimately, it’s a faster approach to painting, and it’s easy for anyone to do.
You can watch a quick, 30 second video demonstrating these tips here on YouTube.
If you need help deciding which paint finish to use on your next project, check out How To Pick The Perfect Paint Finish For Your Room.