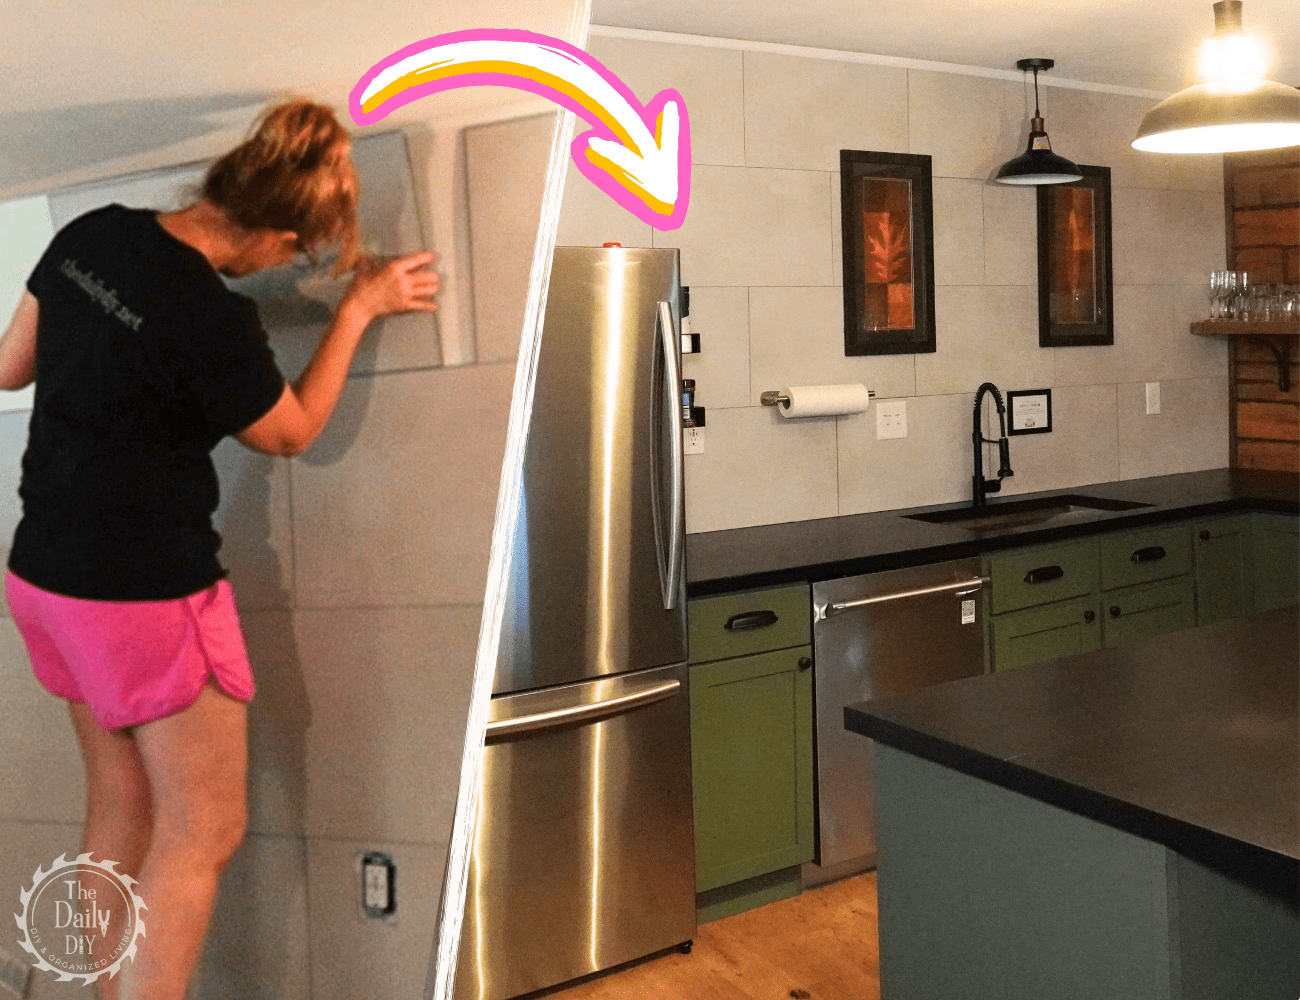
How to Install a Vinyl Tile Backsplash
Are you looking to refresh your kitchen without the mess and expense of traditional tile? Vinyl tile might be the perfect solution for you! Not only does it offer the look and feel of real grout, but it’s also waterproof and incredibly easy to install. In this step-by-step guide, I’ll walk you through how to install a vinyl tile backsplash that will transform your kitchen walls in no time with no wet saw or messy thin set required!
Why Choose Vinyl Tile?
Before we jump into the vinyl tile installation process, let’s talk about why vinyl tile is such a great choice. They are designed to mimic the appearance of traditional tiles, but they come with added benefits:
- Waterproof: Perfect for areas prone to moisture, like kitchen backsplashes.
- Real Grout Look: Get the look and feel of real grout without the need to actually apply grout.
- Mess-Free Installation: No need for a wet saw or thin set. You can cut the vinyl tiles with a simple utility knife and use adhesive to secure them in place.
- Budget-Friendly: Vinyl tile is an affordable alternative to traditional tile, saving you both time and money.

What You’ll Need:
To get started, you only need a few simple tools and materials:
- Vinyl tile of your choice (I used the color Wintry Mix in a 15″X26″ size by Palisade)
- Utility knife
- Adhesive
- Caulk Gun
- Measuring tape or ruler
- Optional if using in a wet environment: Silicone Sealant
- Optional for install: Laser Level, Jig Saw, Hole Saw/Drill Bit
Shop For Supplies:
Step-by-Step Guide to Vinyl Tile Installation
If you’d prefer a visual guide, check out the quick YouTube Video:
1. Prepare Your Surface
Before applying the vinyl tile, make sure your wall is clean, dry, and free from any debris. This ensures a secure bond between the tile and the wall. Remove any outlet or switch plate covers and screw, nails or anchors.
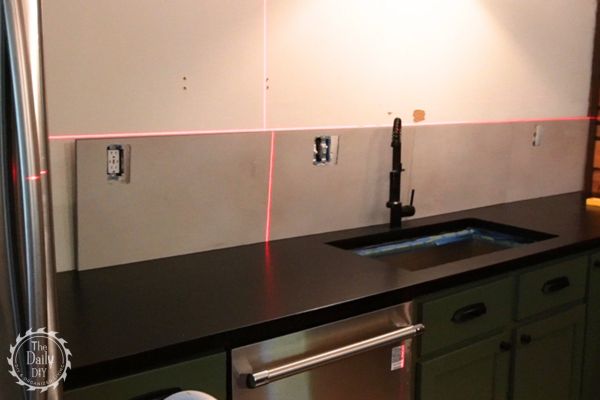
2. Measure and Plan Your Layout
Use a measuring tape to measure the area where you’ll be installing the vinyl tile backsplash. It’s important to plan your layout, especially if you want a specific pattern or look. Mark your starting point to ensure everything is even. A laser level can help speed this up for you as it can give you level lines projected on to the wall during the entire install process.
Related Post: Best Laser Level for DIY and Construction, or check out my favorite laser level by Intice.
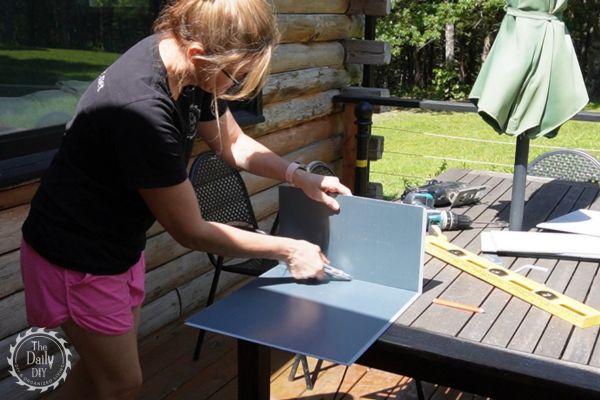
3. Cutting the Vinyl Tile
Here’s where the mess-free magic happens! Using just a utility knife, cut the vinyl tile to the size you need. Unlike traditional tiles that require a wet saw, vinyl is easy to cut with minimal effort. Simply score the tile and snap it along the line for a clean cut.
You can even use just a utility knife to cut out holes for outlets and switches. To speed that up though a jig saw and hole saw drill bit works good.
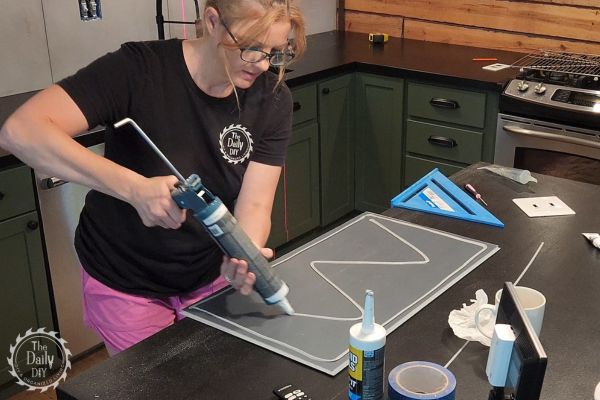
4. Apply the Adhesive
If using any trim pieces along the perimeter, or the corners, install those first the day before so the adhesive has time to set up before you apply the tiles.
Once your tiles are cut and ready, apply adhesive to the back of each tile. Make sure to apply an even layer to avoid bumps or gaps. Press each tile firmly onto the wall, starting from the bottom and working your way up. These vinyl tiles lock together so there is no need for grout, or spacers.
5. Finishing Touches
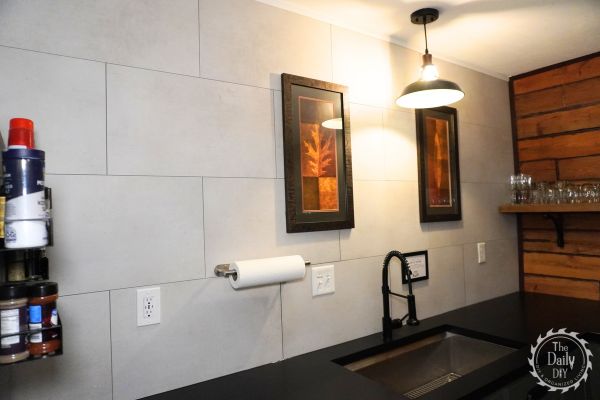
After all the tiles are in place, step back and admire your work! Vinyl tiles don’t require grout, but if you want to seal the seams (recommended if using in a wet environment like around the kitchen sink, or in a shower, or to just add extra protection, you can apply a silicone sealant in the seams before locking them together. Wipe off any excess sealant as soon as possible.

Why Vinyl Tile Is Perfect for DIYers
The beauty of this vinyl tile installation process is that it’s accessible to everyone, regardless of your DIY skill level. Whether you’re a seasoned pro or just starting out, installing a vinyl tile backsplash is a simple and rewarding project that can be completed in just a few short hours.
Plus, with the durability and waterproof nature of vinyl, you can be confident that your new backsplash will hold up for years to come. But don’t stop there, they are great for showers, bath enclosures, laundry room walls, and more! It’s a budget-friendly, mess-free way to give your kitchen, bathroom, or laundry room a facelift without hiring a contractor or spending a fortune on supplies.
If you’d prefer traditional ceramic or porcelain tile for your backsplash, we have a step-by-step installation guide for that here.
Related Post: How to DIY a Kitchen Tile Backsplash