How To Install a Bidet Attachment Fast
Are you interested in adding a bidet attachment to your toilet? A bidet is a great way to improve your bathroom experience. They are sanitary, leave you feeling cleaner, and reduce the amount of paper you need, saving you money. Bidets are becoming popular not only for homeowners, but they are great for renters too. They are easy to remove when you need to move out. Let’s take a look at how to install a bidet attachment, fast!
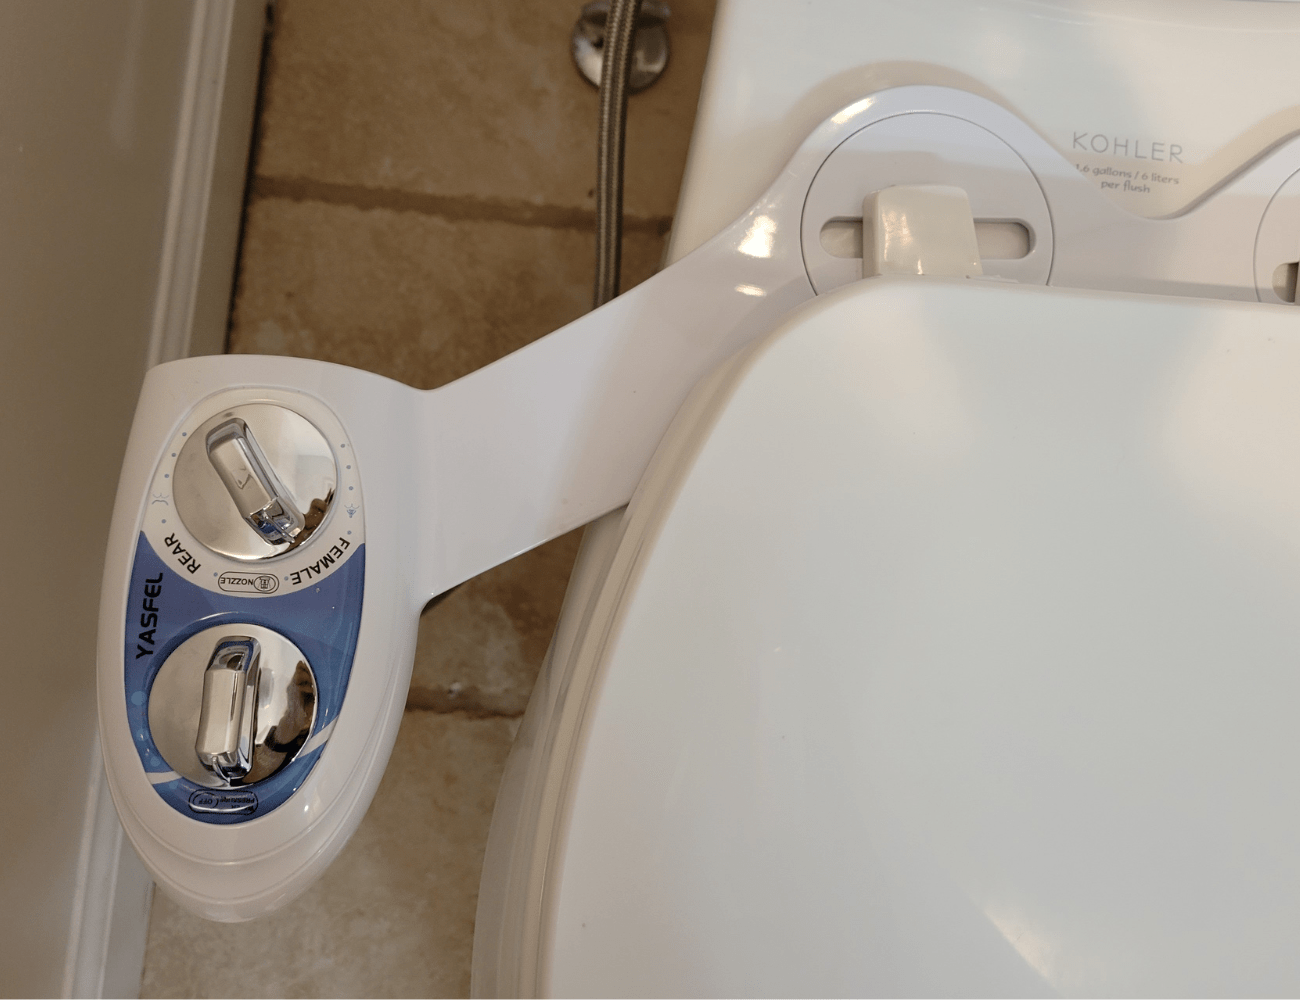
If you have a toilet in your home or business, chances are good that you can install one. Bidet attachments are very efficient and easy to add to your existing toilet. Even if you have no plumbing skills at all. This low cost self cleaning bidet option from YASFEL from Amazon comes in two accent color choices. Installs in under 20 minutes. And features a “rear” and a “feminine wash” setting. Bonus that it comes with everything you need to do a quick installation, even tread seal tape! Let’s take a look at how easy it is to install.
Step 1
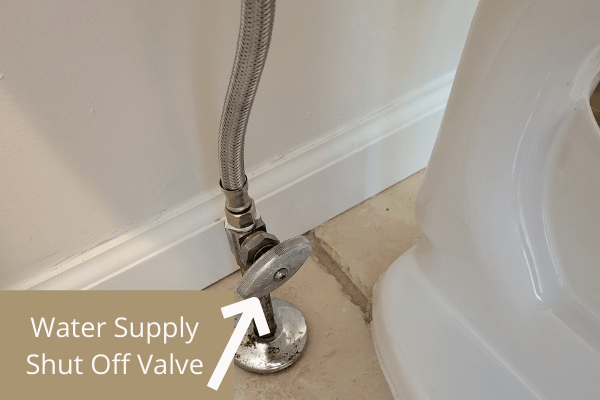
Turn off the water supply to the toilet. Hold down the flush handle to empty the water from the tank.
Step 2
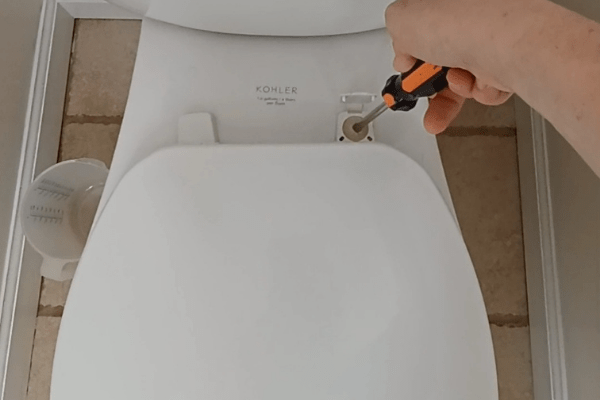
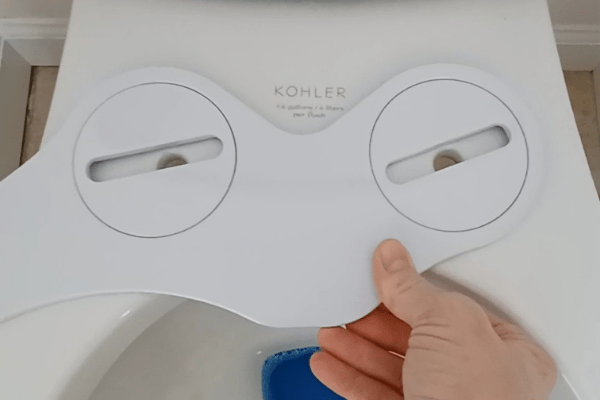
Remove the toilet seat and set aside.
Step 3
Get the bidet attachment ready to install according to the package instructions. For this model the non slip rubber mats had to be placed on the bottom, and the adjustable mounting brackets were set on to the top.
Step 4
Line up the adjustable mounting brackets with the holes for your toilet seat. Place the seat back on top and screw the seat back on to the toilet bowl.
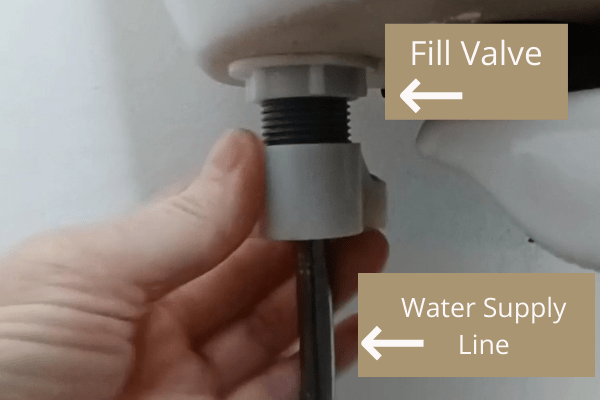
Step 5
Remove the water supply line from the fill valve located on the bottom of the toilet tank.
Step 6
Insert the rubber gasket in to the top of the T adaptor connector, both of which were included with this model. Refer to package instructions. Attach the T adaptor connector to the fill valve, use a wrench, or channel locks to tighten.
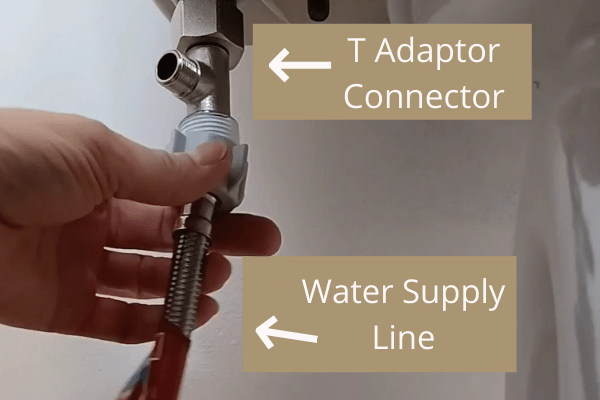
Step 7
Apply thread seal tape to the bottom of the T adaptor connector and attach the water supply line you disconnected earlier. This is most likely a plastic connector so don’t over tighten.
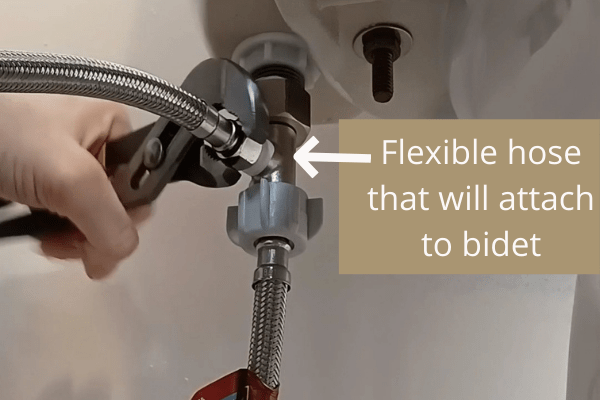
Step 8
Wrap thread seal tape around the last open connection on the T adaptor connector and attach the flexible hose that came with this bidet attachment. Tighten with a wrench or channel locks.
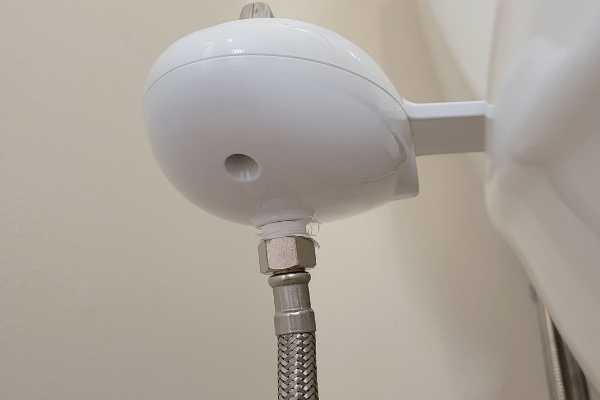
Step 9
Place thread seal tape around the valve on the bottom of the bidet attachment and attach the other end of the flexible hose. Wrench tighten.
Step 10
Turn the water supply back on and check for leaks.
There you have it. 10 quick steps to hook up your new bidet attachment in no time. If you are in an apartment and would like to uninstall this when you leave, just follow these steps in reverse. If you are looking for where to buy a bidet attachment, there are many options available to you online. The model used in this post from YASFEL comes from Amazon. Now that you’ve seen how easy and quick it is to install this, put your new plumbing skills to the test and check out How To Quickly Change Your Shower Head.
Check out this 90 second video showing how: