Complete Guide to Painting Vinyl Shutters Easy
Improving the curb appeal of your home as never been easer than with a fresh coat of paint. One of the cheapest, and most impactful ways to achieve this is by changing the look of the shutters. You may be wondering if you can paint vinyl shutters. And the simple answer is “yes”! Painting vinyl shutters is actually a very easy do it yourself project that you can do this weekend.
I recently decided to give my house a quick facelift, and wanted to do it on a very tight budget. Considering I have 11 sets of shutters, replacing them would break the bank as it would cost over $1,200 to buy 22 new shutters. Instead, I was able to breathe new life in to my old, faded shutters for about 10% of that cost with just a $45 can of paint and $120 worth of new shutter fasteners.
In this complete guide, I’ll walk you through the step-by-step process that I used for painting vinyl shutters. From how to remove your shutters, to how to achieve a professional finish using a Graco airless spray paint gun. Roll up your sleeves, gather your supplies, and let’s get to work.
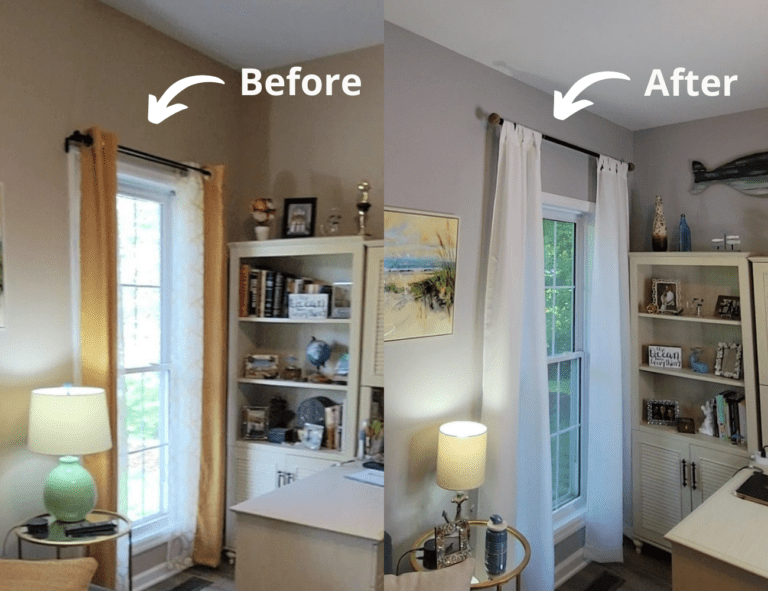
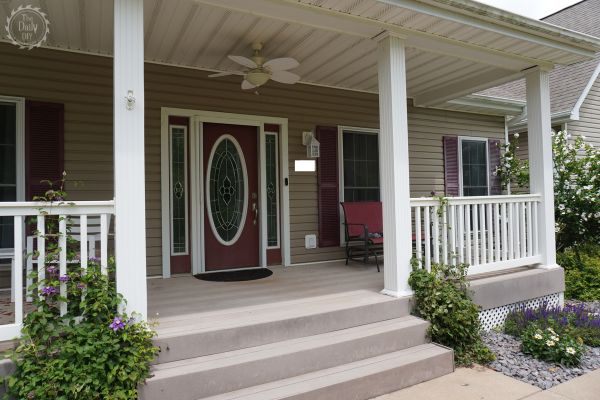
Here is a look at what the shutters looked like before:
Materials
- Airless Paint Sprayer
- Ladder
- Paint
- Plastic Sheeting
- Plastic Disposable Cups
- Shutter Fasteners
- Work Gloves
- Protective Eyewear
- 9-in-1 Painter’s Tool
- Hammer
- Rubber Mallet
- Pliers
- Drill and Drill Bits
- Cleaning Solution
- Bucket
- Soft Scrub Brush
- Garden Hose and Sprayer
Removing the Vinyl Shutters
The first thing you’ll need to do is remove the shutters from your house. Vinyl shutters are usually attached with shutter fasteners (or sometimes called shutter buttons). In which case, you’ll have to break them off in order to remove them. Use a sturdy ladder to help with shutters in high places.
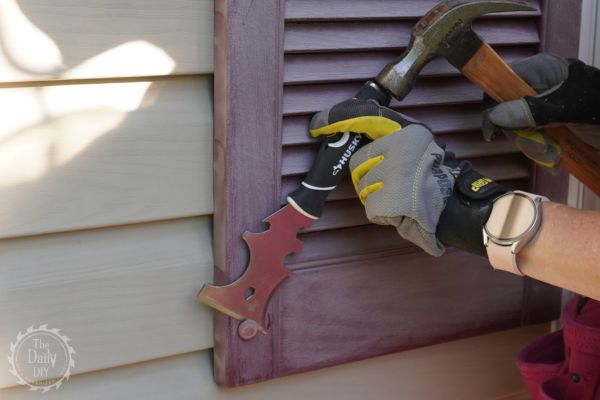
For this part you’ll need a 9-In-1 Painter’s Tool (or any type of painter’s tool) and a hammer. Wear a good pair of work gloves and protective eyewear for safety.
Take your Painter’s Tool and place it in between the fastener and the shutter. Apply gentle pressure if needed to wedge the Painter’s Tool in. Next, use your hammer to give the Painter’s Tool a light tap. The impact should break the head of the fastener off. You may need to move the Painter’s Tool from one side of the fastener head to the other while tapping with the hammer to get it to break off.
Repeat this process for all of the fasteners.
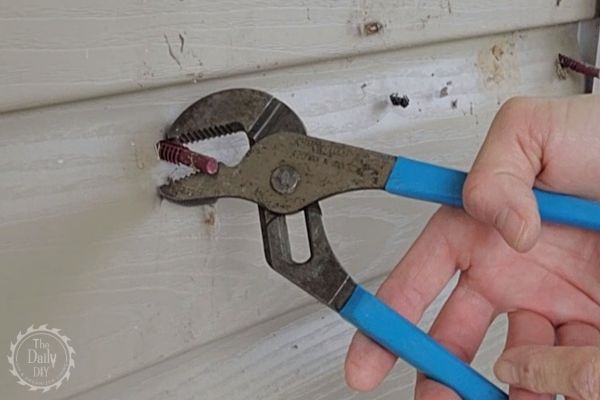
Once you have them all broken and the shutter removed, take your pliers to remove the rest of the fastener. You may need to wriggle it back and forth as you pull it out. If you cannot pull the entire fastener out, it could be that it is embedded in to a stud. In that case, use a drill to drill out the fastener. The size of the drill bit will depend on the diameter of the fasteners. Most are 1/4″.
If you have different sized shutters, be sure to label them on the back of the shutter so you can keep track of where they go to make it easy when it comes time to hang them back up.
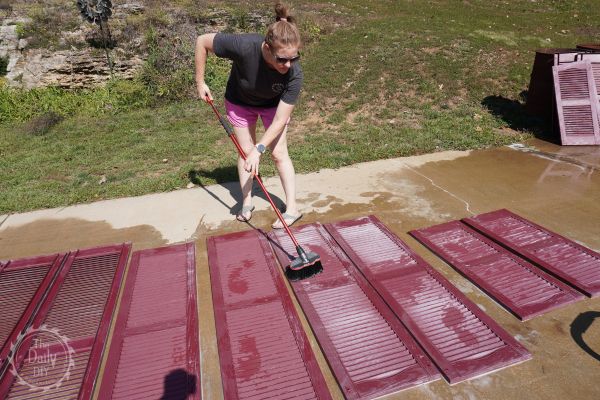
Cleaning the Shutters
It’s important to clean and prep the shutters in order to ensure a great finish when you paint them.
Begin by cleaning the shutters to remove dirt and grime. Use a mild detergent mixed in a bucket with water and a soft brush to scrub the surface gently. Rinse the shutters with a garden hose and sprayer to remove the cleaning solution entirely. Let the shutters dry completely before moving on to the next step.
Prep For Painting
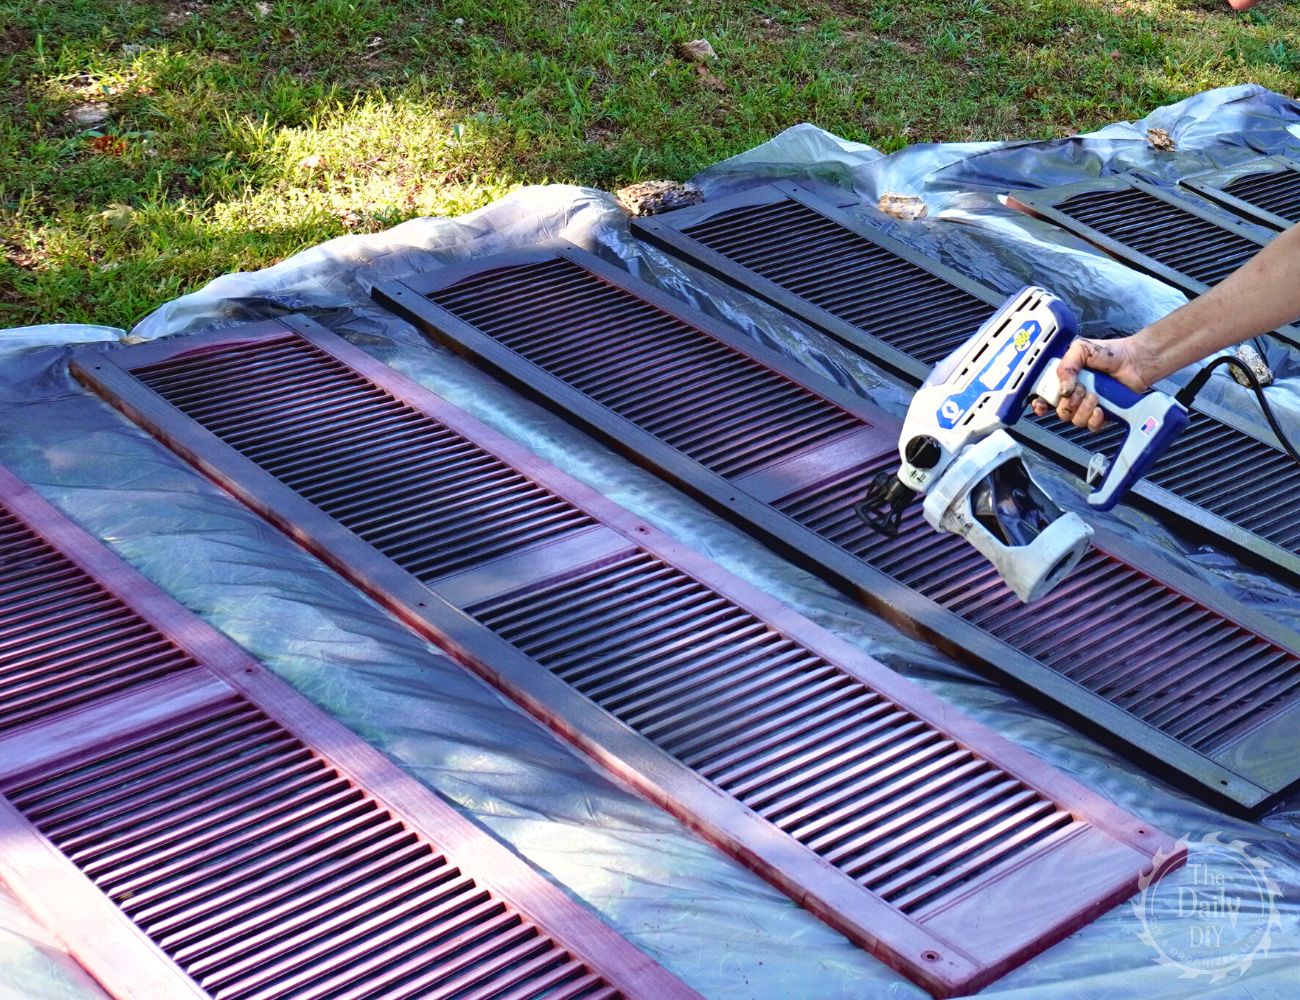
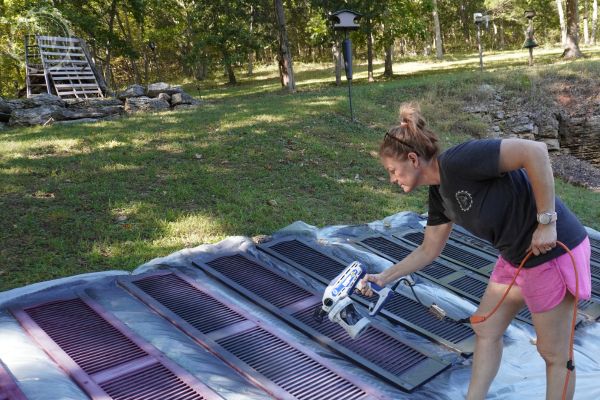
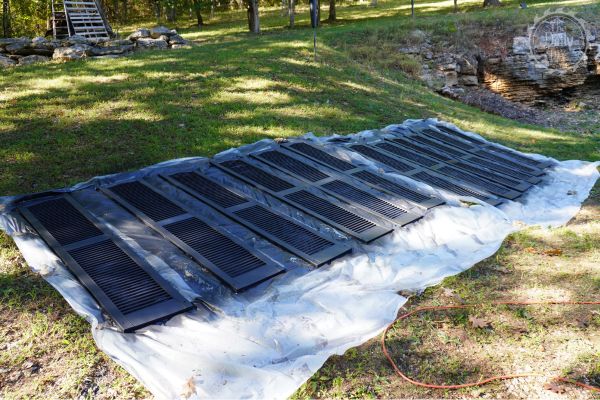
Next let’s prepare the area where you’ll be painting your shutters. Choose a well ventilated area, preferably outdoors, with plenty of room to move around. Lay out plastic sheeting on the floor or ground to protect the surface from paint overspray. Lay out the vinyl shutters, right side up, along the plastic sheeting. You can use plastic disposable cups to prop the shutters up off of the ground so they don’t stick to the plastic when painting them if you’d like.
Painting the Shutters
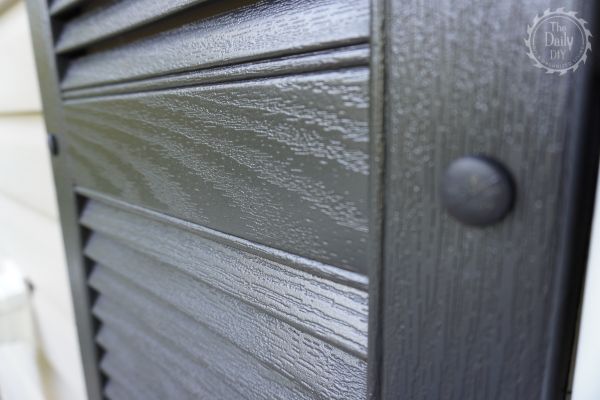
The best way to paint vinyl shutters is with an airless paint sprayer. In not only makes it very easy, but also provides a professional finish. I used the Graco Truecoat DSP 360 sprayer.
You’ll want to choose a high-quality exterior paint suitable for vinyl surfaces. Acrylic or urethane-based paints are recommended for their durability and flexibility. Choose a color that complements your home’s exterior. For my project, I am using Behr Premium Satin Urethane Alkyd Enamel from The Home Depot in a black color.
Begin painting the shutters by holding the spray gun about 12 inches away from the shutter surface. Use smooth, overlapping strokes, moving the spray gun horizontally or vertically, depending on your preference.
Spray in the same direction for this first coat. For example, start at the top and spray down the shutter while holding the trigger and keeping the spray gun in constant motion as you spray your way down to the bottom of the shutter. Let the paint dry completely before moving on to the second coat.
For the second coat, spray in the opposite direction, spray from the bottom of the shutter up while holding the trigger. This ensures the paint gets in to the side grooves of each shutter louver as well as all of the crevices and grooves.
If you cannot find shutter fasteners in the color to match your shutters, you can paint those as well. Insert them into a Styrofoam block and give them a quick spray on top.
Once you are done painting your vinyl shutters, and they are completely dry, place them indoors in a basement or garage and allow the paint to cure for two weeks before reinstalling them.

Reinstalling the Shutters
Insert the new shutter fasteners in to each hole on the shutter. Line them up to the holes on your siding and press them in. Use a rubber mallet to lightly tap them. Start by just tapping them all in about halfway. Once you get all of them started, go back and tap them in the rest of the way. Be careful not to tap them in too far as you will dent the vinyl shutter. Tap them in just until the fastener head makes contact with the shutter surface.
And it really is that easy painting vinyl shutters to give them a different color or just spruce them up if they’re faded. This is a project that you can do by yourself over a weekend. The amount of time it will take you will vary, especially depending on how many shutters you have. I had eleven sets of shutters to do so I split this up in to two days over 2 different weekends. Day one I took the shutters down, cleaned them and painted them. Then of course after two weeks for them to cure fully, I reinstalled them.
For more great project ideas, check out the blog.