How To Tile a Wall
When it comes to tiling a wall, there really isn’t much that much to consider. Once you understand the basic principals to it, you’ll discover that it’s very easy to do it yourself. Even for a beginner. Adding tile to a wall can not only freshen up your space with a new look, but it can also protect the surface behind it. Especially if installing a back splash in a kitchen or bathroom. Let’s take a look at how to tile a wall step by step.
The basic principals are all the same. Whether you are installing subway tile, hexagon tiles, porcelain, ceramic, or stone. We’ll be using mosaic sheets on a full bathroom wall in this tutorial using thinset as the adhesive.
If you’d prefer to use a mess-free vinyl tile for your project that doesn’t require thinset or grout, check out How To Install a Vinyl Tile Backsplash.

Understanding The Base Layer
Make sure you are laying your tile over the proper substrate. The substrate is the base layer, or the surface you’ll be applying your tile to. The type of substrate you should have as your foundation depends on where you place the tiles.
If you are tiling a wall that will be exposed to excessive moisture, like a shower, you should have a waterproof backing in place. There are a few products you can choose, like cement backerboard, or Schluter Kerdi. Family Handyman has a great article on The Pros and Cons of Various Tile Backers for more information.
If you are tiling a wall that won’t get that wet, you can choose to tile over clean, smooth, and level drywall. If the drywall is currently painted, give it a light sanding to remove the sheen. You don’t have to remove all of paint, just dull it down.
Prep Your Wall
Before you begin any tile project, clean your wall with either a large sponge, or use a Swiffer. You must remove any dirt, dust, and grime from the surface to ensure good adhesion with your tile. Repair any holes, divots, or damage to the wall with joint compound, then sand smooth.
Mix Up Your Thinset
Thinset is like the glue that will make your tiles stick to your wall. You can buy it premixed, or mix it yourself. I wrote a post last week for complete instructions on How To Mix Thinset For Tile. Mix up small amounts at a time, about as much as you’ll use in 20-30 minutes, as it will harden quickly.
Step 1
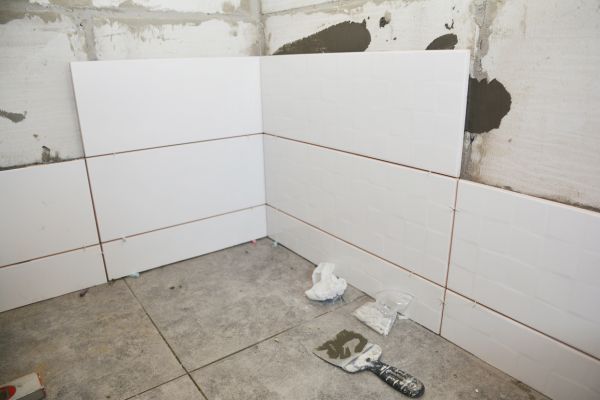
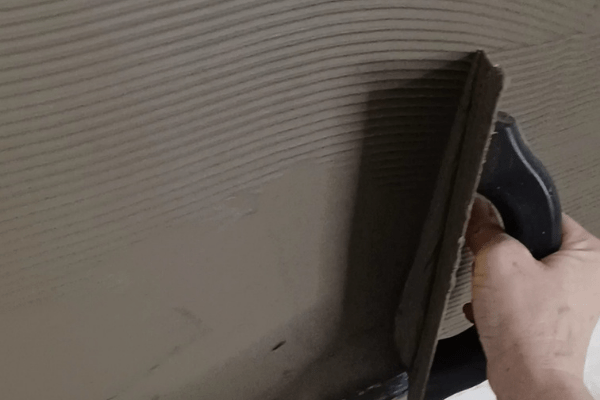
Apply thinset to your wall using a notched trowel. Apply it using the smooth side of the trowel, working in small sections. Like 3 feet x 3 feet.Then go back over what you just applied with the notched side, holding the trowel at a 45 degree angle. This will create the grooves you need for the tiles to adhere, and also scrape off any excess thinset. The goal is to leave about 1/8″ of thinset remaining on the wall.
TIP: use a light colored thinset if your grout is going to be light, or a dark colored thinset if you are choosing dark grout.

Step 2
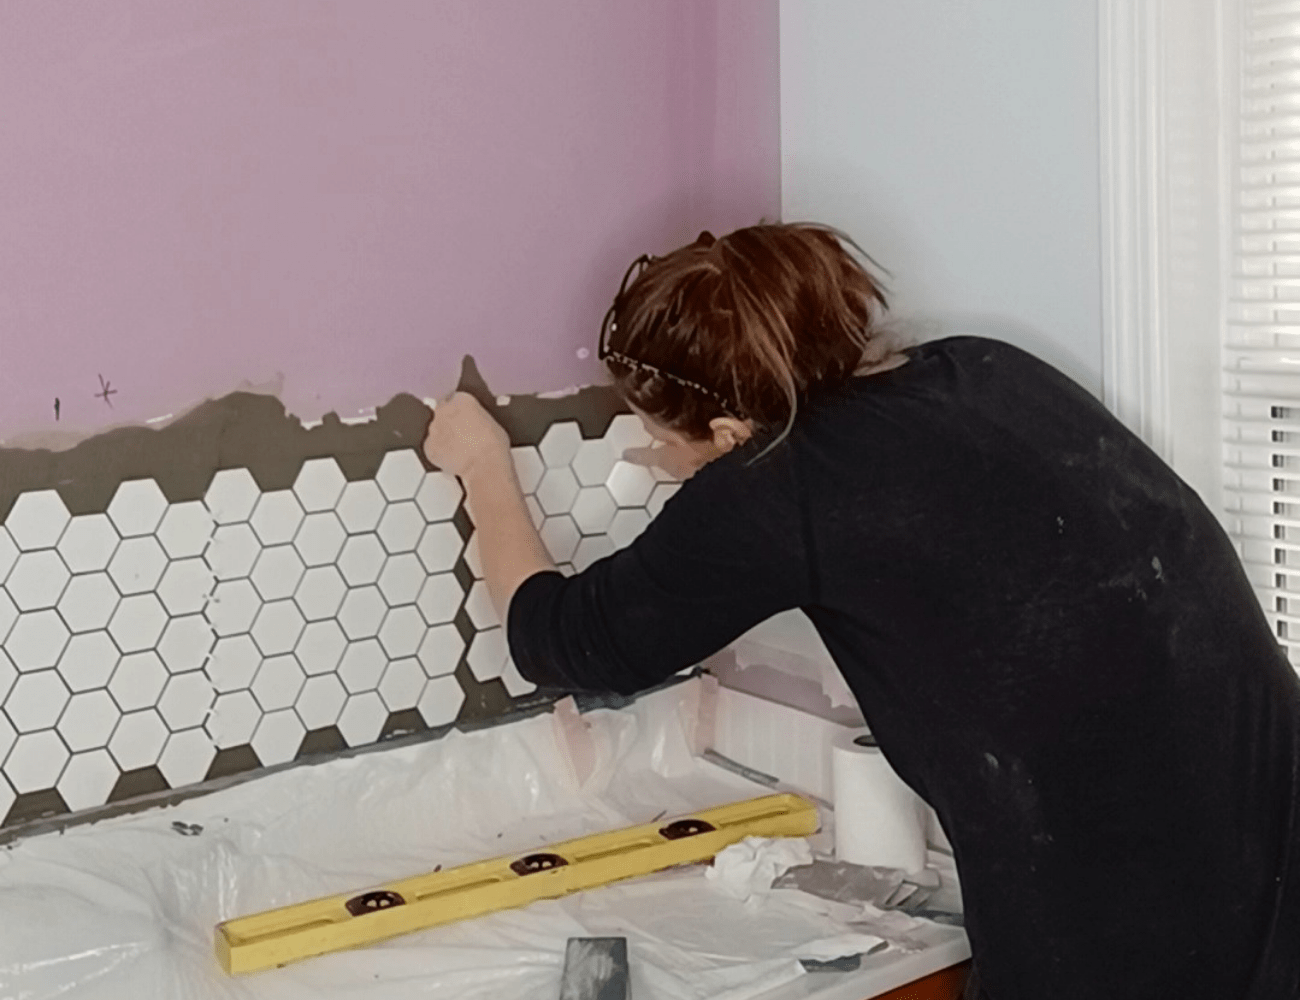
Apply your first tile. Begin in the center of the wall at the bottom, and work your way out, and up, from there. Make sure it is level. Press the tile gently in to the thinset. Use a slight wiggle motion so it bonds well. If using mosaic sheets, ensure each individual tile is straight. And has the proper amount of spacing needed. Make adjustments. Check for level again.
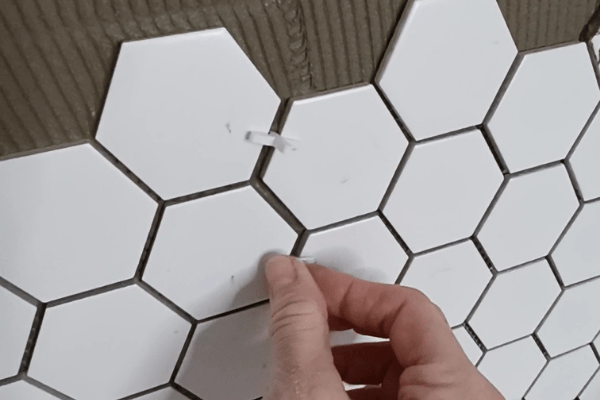
Next, take your second tile and place it on the wall. Using tile spacers, place several between the two tiles, or sheets of tile. Gravity can be your enemy when installing tiles on a wall. The spacers keep the tiles from sliding and provide for the proper spacing. The tile you choose should tell you what size spacers to use. Check that both tiles are level. Adjust if needed.
TIP: if too much thinset squeezes out between the tiles, scrape that away immediately. Otherwise it will take up the space needed in that joint for the grout that you’ll apply later.
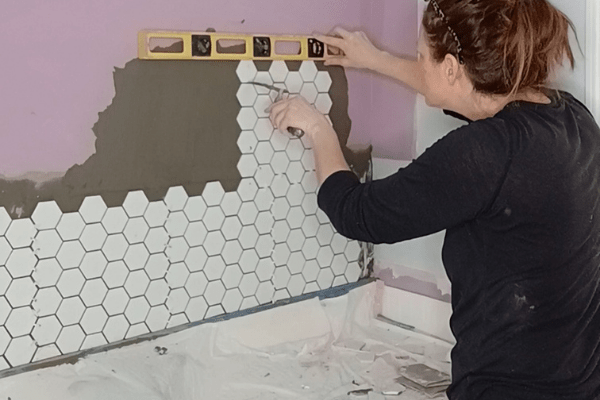
Continue setting your tiles up and out, like in a pyramid. Stagger the seams for each row/sheet. Check each tile to ensure it is level often. Vertical wall tiles are much more visible than horizontal floor tiles. Floor tiles can get hidden under furniture, and fixtures. If it’s off by a bit it’s likely not as noticeable. Wall tiles are always prominent. If you set them crooked, you’ll always notice.
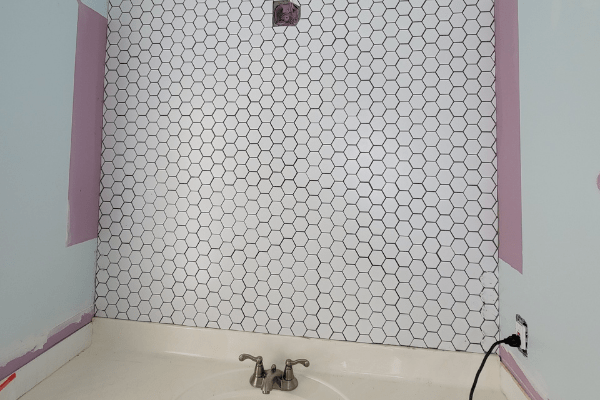
And that’s really all there is to it. It does take some time and patience, plan accordingly. After you get all of the tiles set, let it cure fully (at least 24 hours) or according to the thinset package instructions. The next part is to apply the grout.
This is the second in a three part blog series on how to lay tile:
- Part 1 How To Mix Thinset For Tile
- Part 3 How To Apply Grout
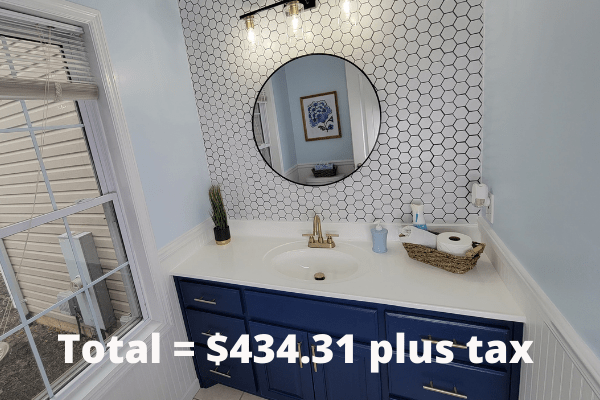
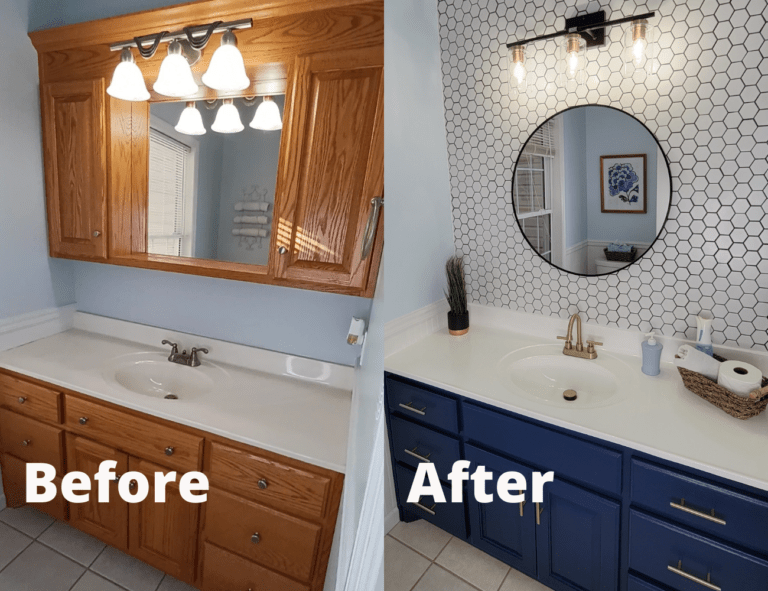
This tile project was part of a half bath remodel I did in 2022 where I remodeled this half bathroom for under $500. You can see the entire project here.
Related Post: Bargain DIY Bath Remodel For Under $500