How To Replace a Toilet Fill Valve
Is your toilet always running? Or running louder than normal? It could be a defective fill valve. Repairing the fill valve on your toilet is easy to do, even with zero plumbing skills. Why wait for a plumber for this fix when you can DIY it for less than $10 and less than 10 minutes of work? Grab a bucket and a wrench and let’s get to work. Here are step by step instructions for you to replace a defective toilet fill valve.
There are a few different styles of fill valves. The best way to ensure you get the right replacement is to do steps 1-5 first. Take a picture of the old fill valve, or the entire part with you to the hardware store. Then complete steps 6-10 when you get back home.
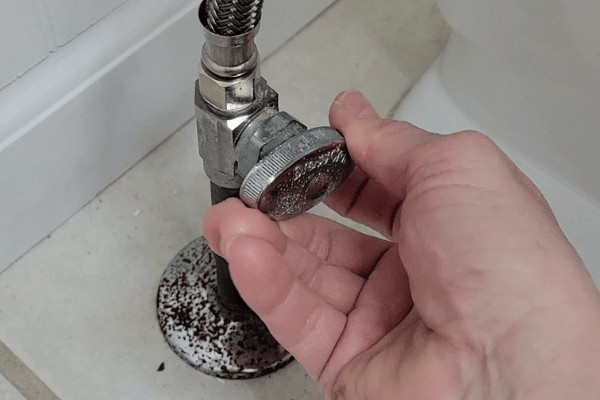
Step 1
First, turn off the water supply to the toilet.
Step 2
Next, flush the toilet to drain the water out of the tank. Take a sponge to soak up excess water.
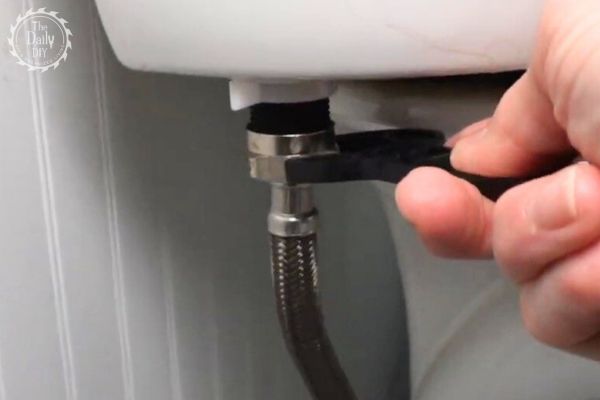
Step 3
Remove the water supply connector. Put a towel down so as to catch any water that may drip out.
Step 4
Remove the locknut from the old fill valve.
Step 5
Pull out the old fill valve from the toilet tank.
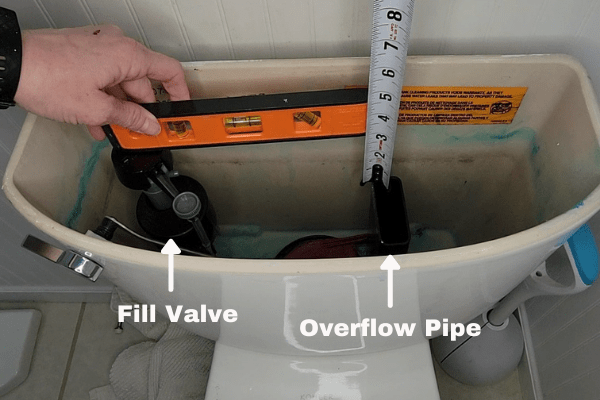
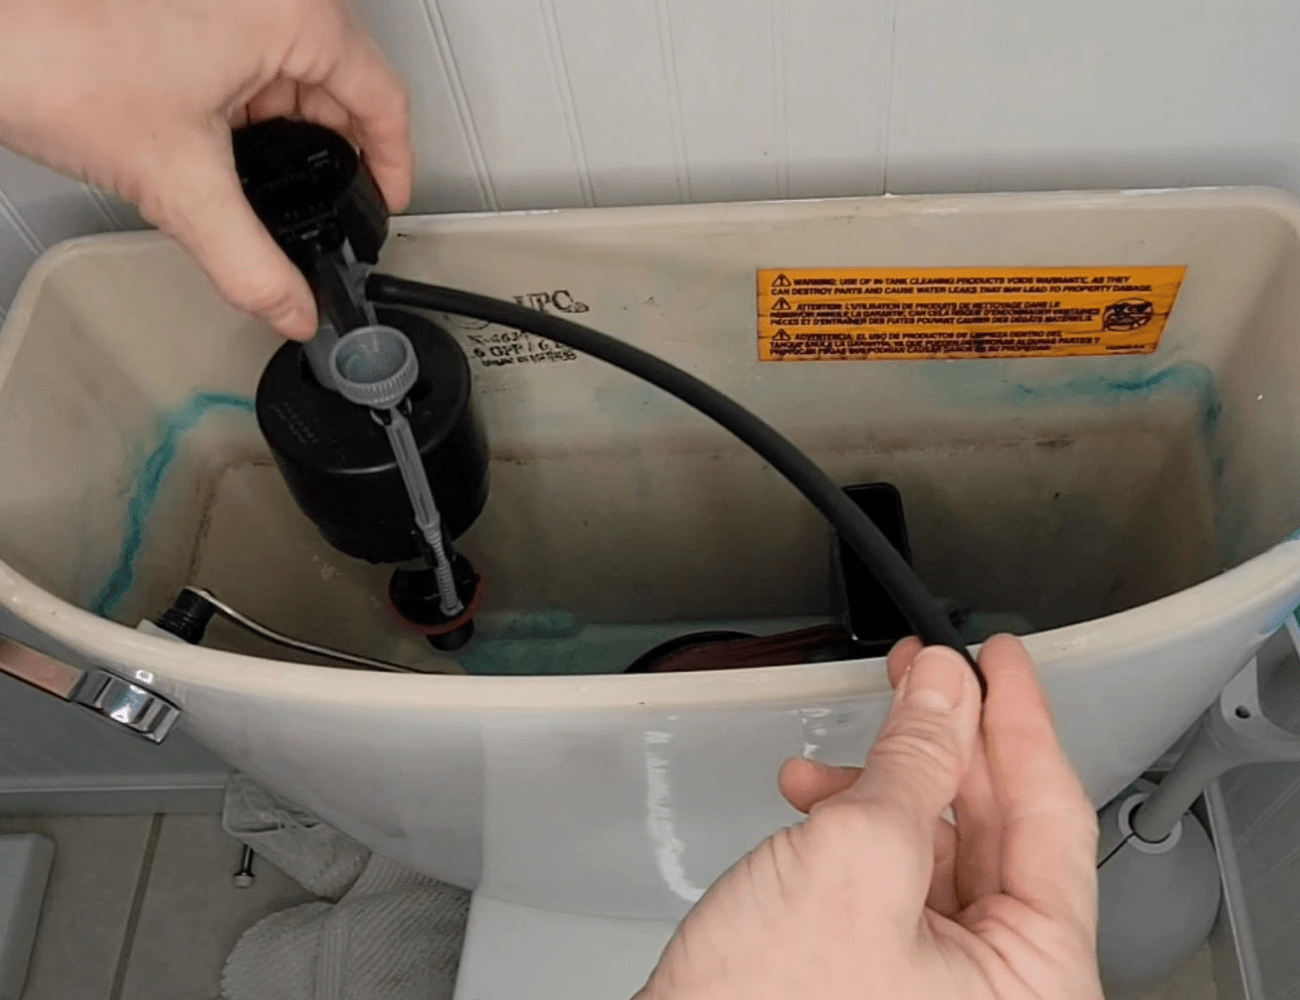
Step 6
Insert the new fill valve. Make sure the top of the fill valve cap is roughly 3” above the top of the overflow pipe. If not twist the body of the new fill valve to adjust.
Step 7
Attach one end of the refill tube to the fill valve, and the other end to the clip that came with your kit. Place the clip on to the overflow pipe in order to direct the water from the refill tube in to the pipe.
Step 8
Install the locknut. Hand tighten only and do not over tighten.
Step 9
Put water supply connector back on. I like to use thread seal tape on any metal to metal connections. It’s not necessary for plastic connections. Wrench tighten the metal connection at the bottom, and hand tighten the plastic connection at the top. Do not over tighten.
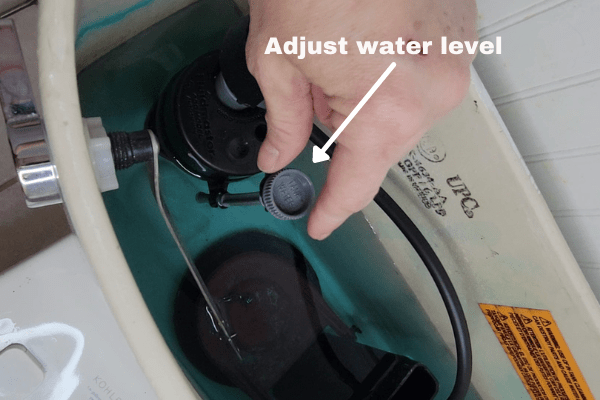
Step 10
Finally, turn on the water and check for any leaks. Then let the tank fill up. If the water level is too low or too high you can adjust it by turning the gray knob. You’ll need to flush again and let it fill back up. Keep adjusting and flushing until it’s filled up to the correct level.
Hopefully, this article has given you the confidence to tackle this job yourself. It is not difficult at all and it certainly beats paying a plumber $150 to do the same repair. So don’t hesitate, pick up your parts and let’s get started!
Check out the YouTube video below for a quick visual tutorial, and see the blog for more instructional posts for home repair.