How To Install a Beautiful Wood Countertop
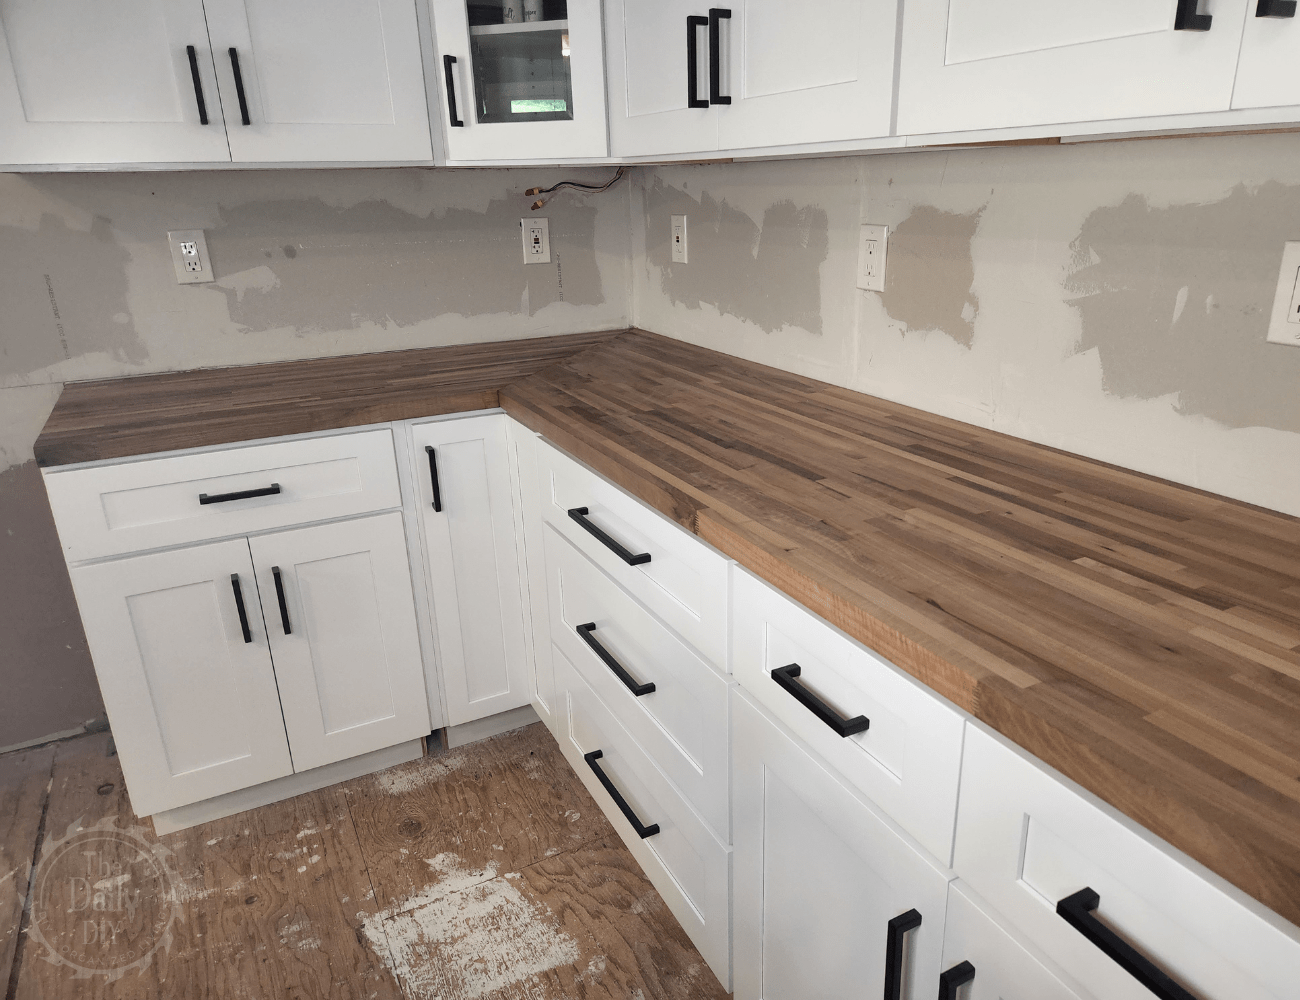
Butcher block is a great, affordable alternative to quartz, marble and granite countertops. They’re also completely customizable in shape, size and material. See how easy it is to install a beautiful wood countertop in your home.
Not only can you choose from so many wood options, but you can leave them natural, or stain them to your desired color. The possibilities are endless.
Where To Buy Butcher Block Countertops?
Most big box home improvement stores have butcher block countertops. Usually they have various sizes, types, and colors in stock. We chose a walnut style from The Home Depot since they had them in stock for us to pick up right away. There are many different types available to order online as well.
Are Butcher Block Countertops Expensive?
The best part about using wood countertops is they are much cheaper than stone, solid surface, or corian. The cost of the Hardwood Reflections brand we used was about $25 per square foot on average. They have other brands for as low as about $11 per sq. ft.
We also used a water based polyeurethane to seal them before applying a glaze coat on top, so that added a few bucks to the cost. In total is was still a fraction of what we would have paid for stone.
How To Cut, Finish, and Install Your Countertop
Materials Needed
- 60 teeth saw blade and a circular saw
- 220 grit sandpaper
- 400 grit sandpaper
- water based polyeurethane
- Table top fasteners with screws
- Mitre-bolt kit
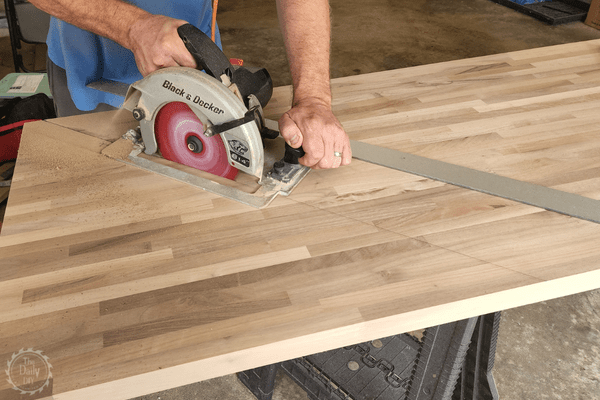
Cut
For cutting your butcher block, the Diablo 60-teeth saw blade in a circular saw works the best. It’s a fine finish saw blade that works slowly through the wood, but leaves a clean cut that you don’t even have to sand if you don’t want to.
Finish
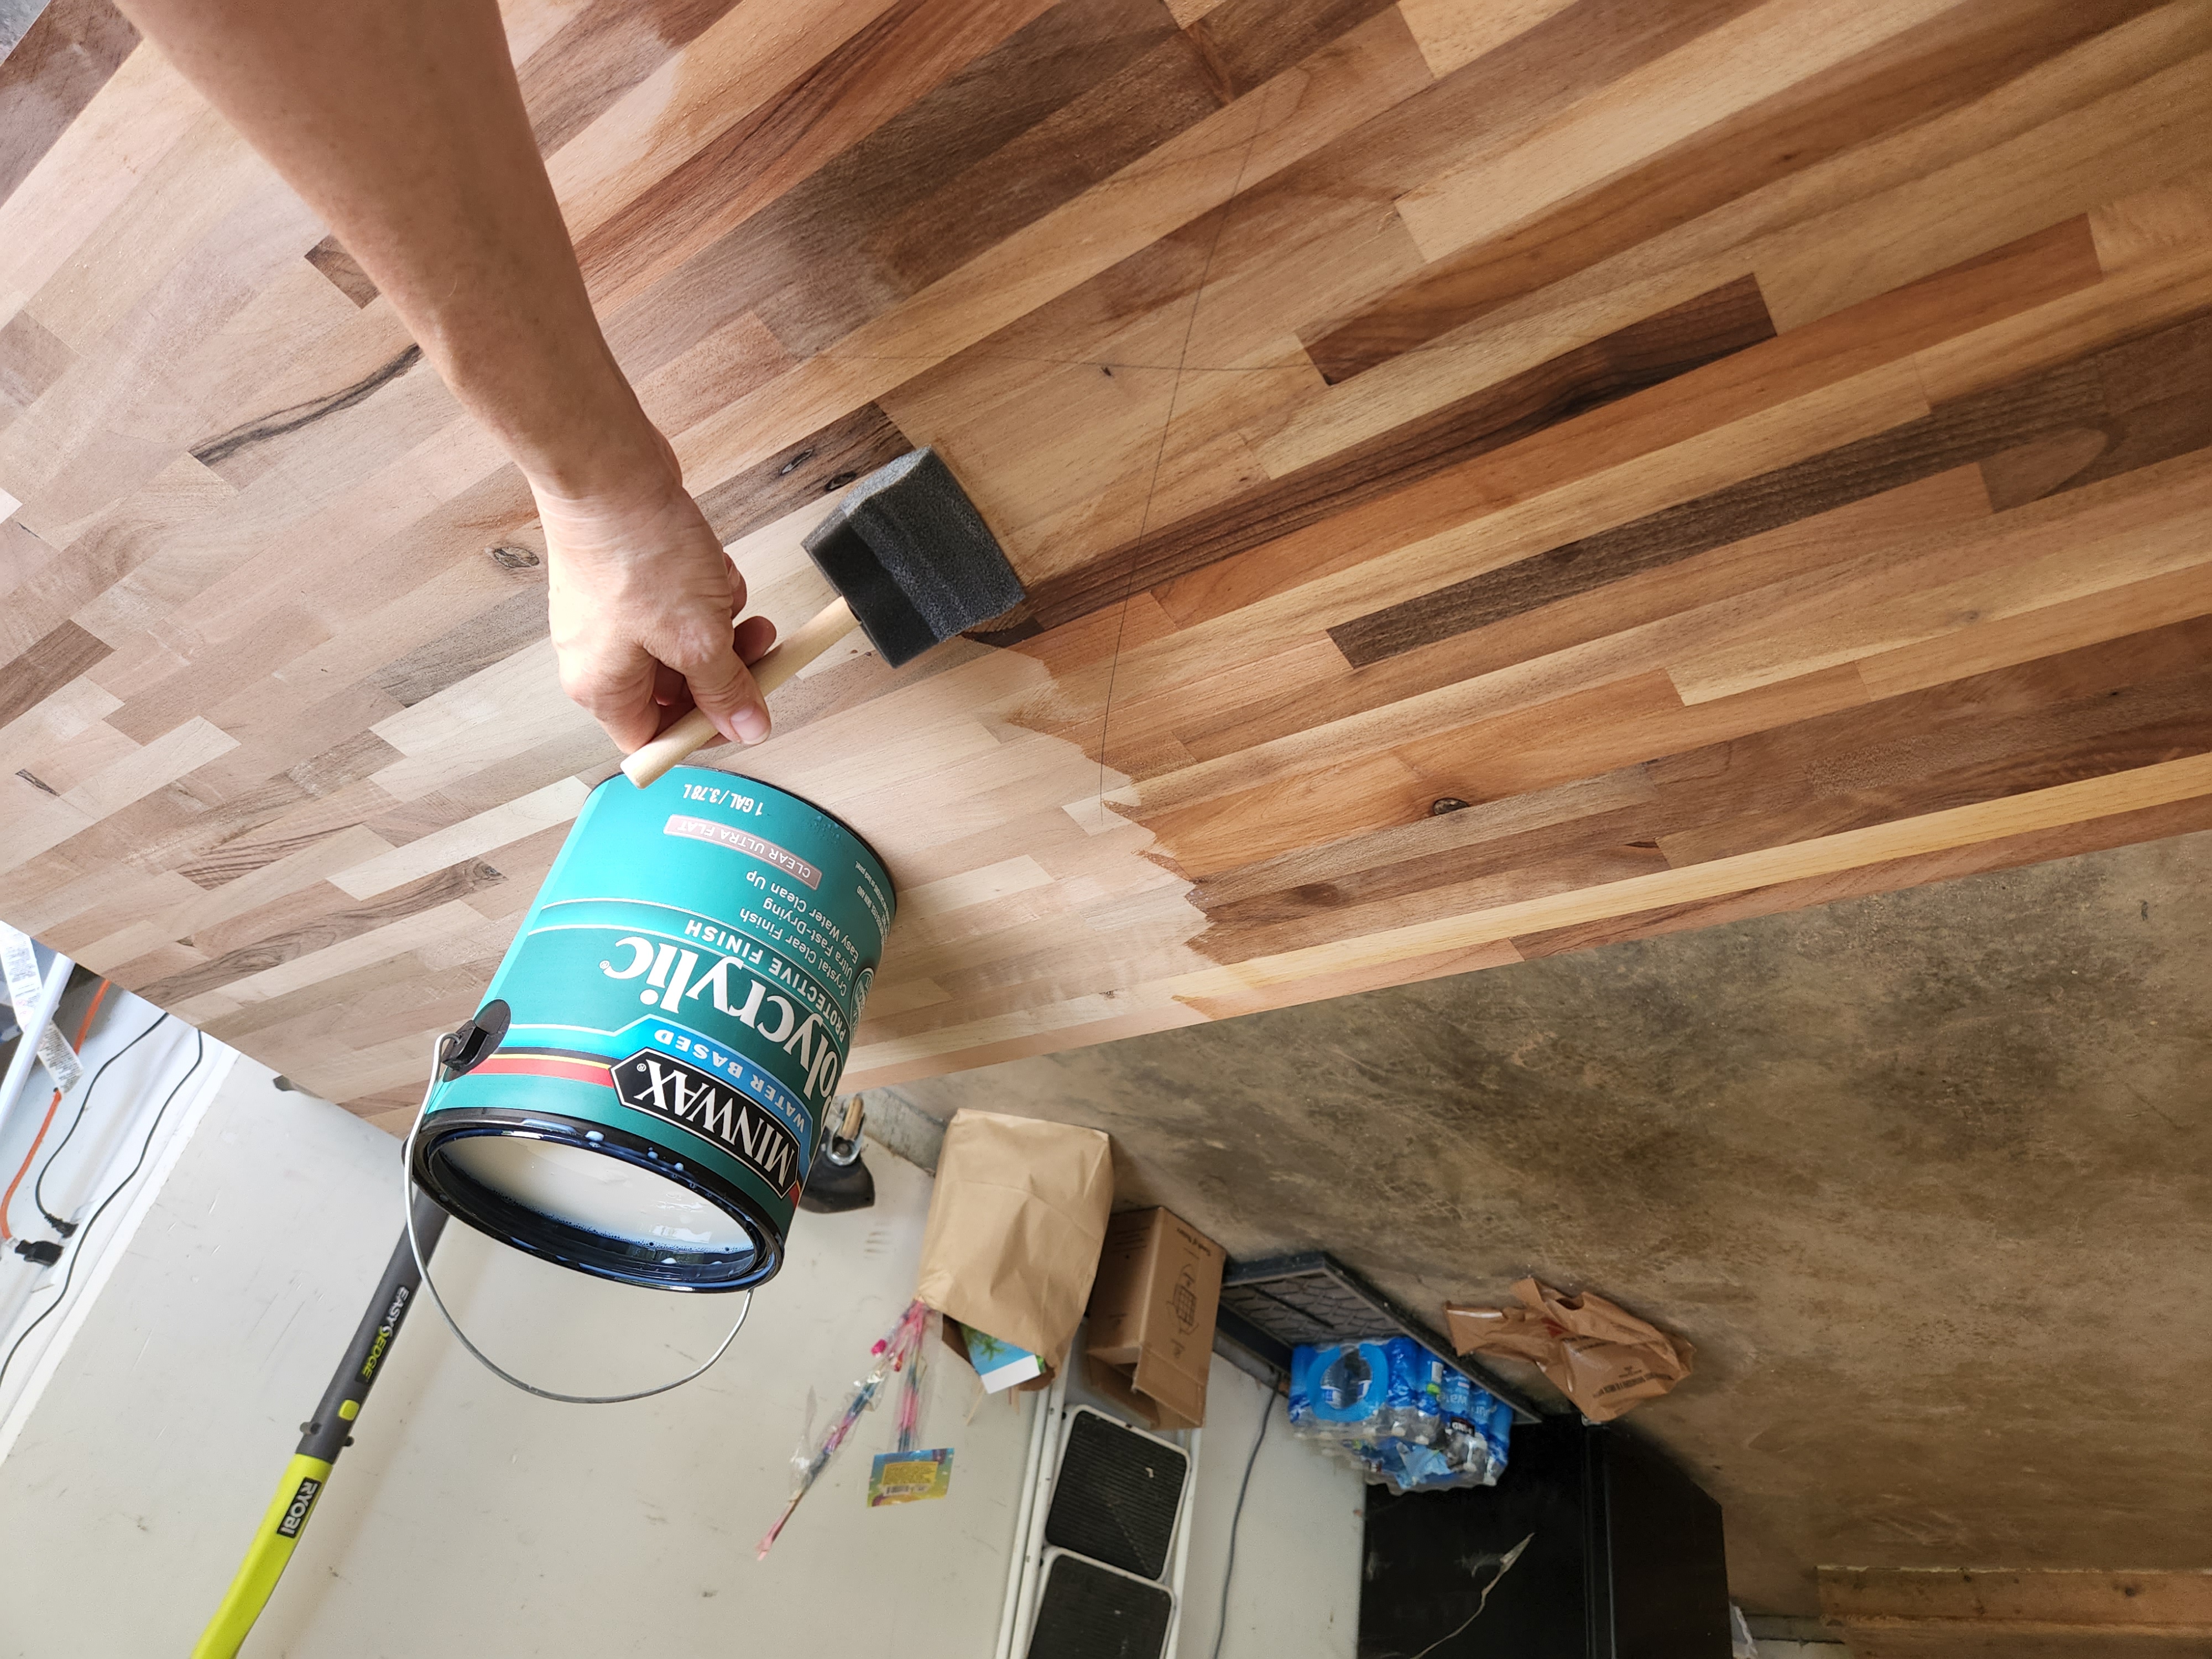
First, take 220 grit sand paper and sand down the top and bottom, as well as the sides after you’ve made your cuts. Next, use acetone to clean the butcher block and remove all sanding dust and debris.
At this point, you can stain the wood if you’d like. Or you can leave it natural. For a protective finish, apply a coat of water based polyurethane to the top, bottom and all sides. This seals the wood. Apply this if leaving the wood natural, or after you apply the stain. Please note certain brands of polyurethane are not food safe. If you plan to prep food directly on your butcher block countertop choose a brand that is, or just use mineral oil to seal the wood and skip the polyurethane.
Finally, sand all surfaces with 400 grit sandpaper.
You can repeat this process one or two more times if you’d like. For a high gloss finish, check out the Famowood Glaze Coat kit. Again, check to ensure you are using a food safe product IF you plan to prep food directly on to the countertop surface.
Install
For the installation, you’ll need some table top fasteners with screws. If you are joining two pieces of countertop together in a corner, or side by side, then you’ll also need a mitre-bolt kit.
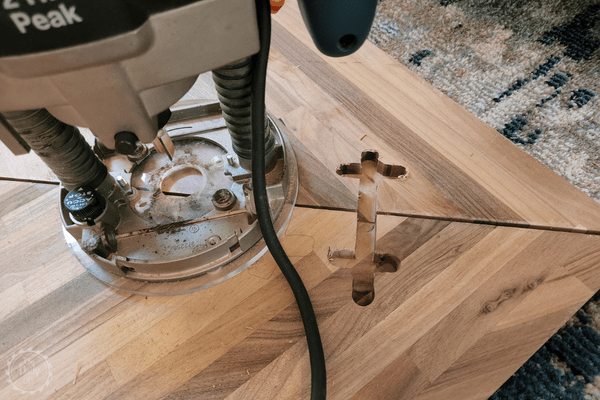
When working with seams you’ll want to bolt them together. Using a plunge router, trim out slots for the mitre bolts to sit on the bottom of each countertop piece. The slots should be about 1/2″ deep. Trace the mitre bolts with a pencil and router out that shape.
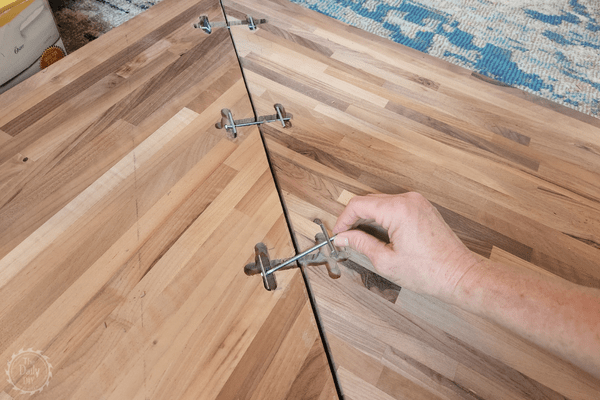
The bolts will fit in to the slots like pictured above. You’ll use a crescent wrench to tighten them. Once you have created the slots, you can place the countertop pieces on your counters. Then you’ll assemble the bolts from underneath. Using a small brush, apply some wood glue in to the seam first.
Wood will expand and contract with the changes in temperature and humidity. Therefore, Z table top fasteners are designed to allow the countertop a little bit of flexibility to move and adjust as it needs to. If you screw the countertops onto the cabinets directly instead, they may be too tight and could cause cracking and splintering in your beautiful wood countertop.
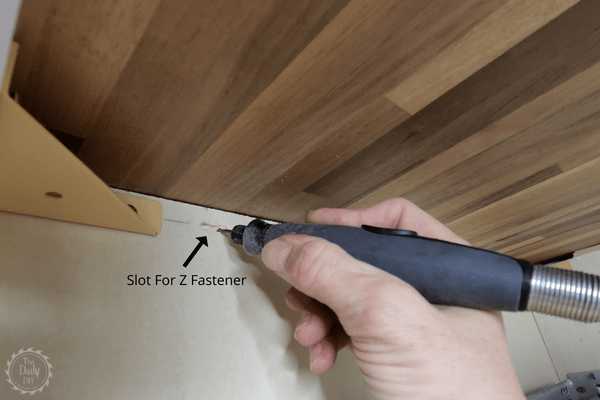
You’ll want to create a small slot on the inside of the base cabinet to hold the Z fastener. I used a Dremel with a router bit to carve out the slot. Make the slot a bit wider than the Z fastener. You can use a router, or a biscuit router to create the slots as well.
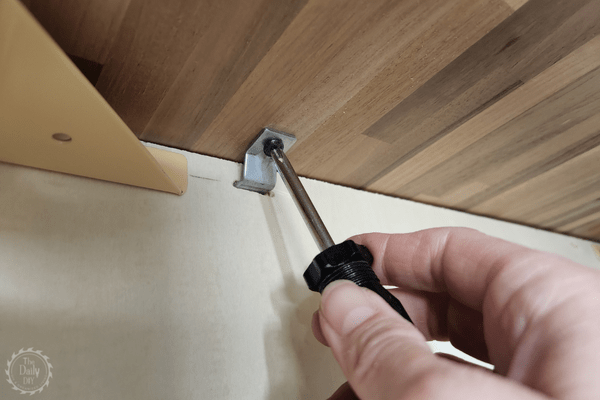
The other end of the Z fastener gets screwed in to the underside of the countertop.
Once you have the fasteners in place, and the mitre bolts at the seams all tight, then you’re all set. If you want to apply a protective, high gloss finish to the countertops, then you’d do that project next. Otherwise, you’re all finished and can enjoy your new beautiful wood countertop.
Check out these other great articles in this Kitchen Renovation Series:
- How To Install New RTA Cabinets
- How To Install New Cabinet Pulls
- How To Epoxy Your Wood Countertop
- How To DIY a Kitchen Tile Backsplash
- How To Install Luxury Vinyl Plank Flooring
- Easy DIY Kitchen Island Makeover

