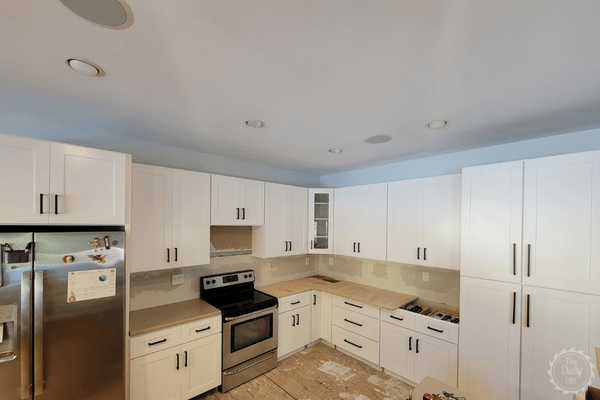
How To Install New RTA Cabinets
Ready to assemble (RTA) cabinets are becoming more and more popular. They’re easy to put together and install. Which makes a do it yourself kitchen remodel possible. They also save you money since shipping is much cheaper. And you don’t have to pay labor for someone to put them together. I recently put RTA cabinets from Lily Ann Cabinets in my kitchen remodel. Here I’ll show you how to install new RTA cabinets.
Why I Chose Lily Ann Cabinets
A friend of mine used Lily Ann Cabinets in his kitchen remodel 8 years ago. His cabinets still look amazing today. And, since they are highly rated and reviewed online, it was an easy choice.
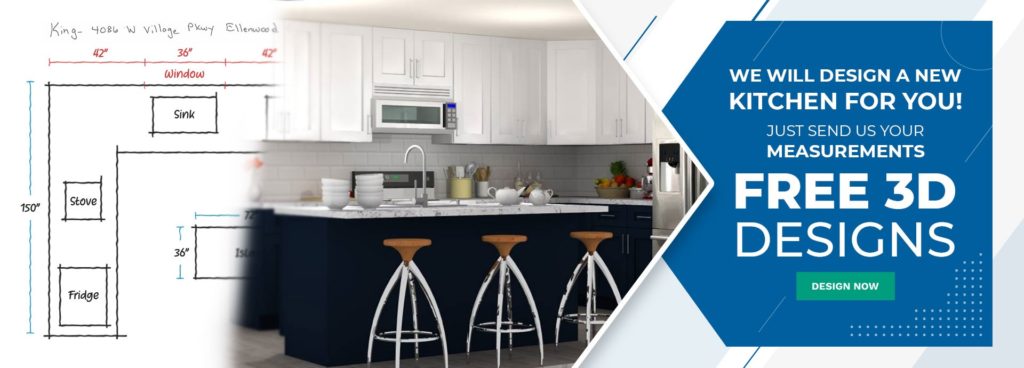
They have a free design tool on their website that you can play around with to get a visual picture of what your new space will look like. They also have a free designer that works with you to help you create, and pick out, your new cabinets. Measure your walls and your current cabinets, and fill out the form online. After, you can order two free cabinet samples. Check out my recent review of Lily Ann Cabinets for more information.
Assembly Of RTA Cabinets
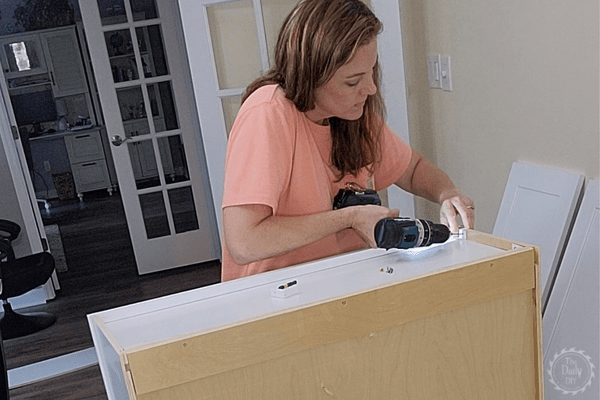
Assembly is so easy! If you can use a screwdriver, then you can assemble them yourself. All the parts are pre-drilled and precut. The instruction sheet shows exactly where to put each piece. Think of it as building a box. Each side slides into the next, and you complete the assembly with a few screws. Once the box is built, put on the doors, drawers, and/or shelves.
You can assemble the upper cabinets in under fifteen minutes. The base cabinets will take a few minutes longer since most will have an extra step to assemble the drawers. I was able to put together thirteen of the upper and base cabinets by myself. I only needed help with the tall pantry cabinet due to it’s size.
Install Of RTA Cabinets
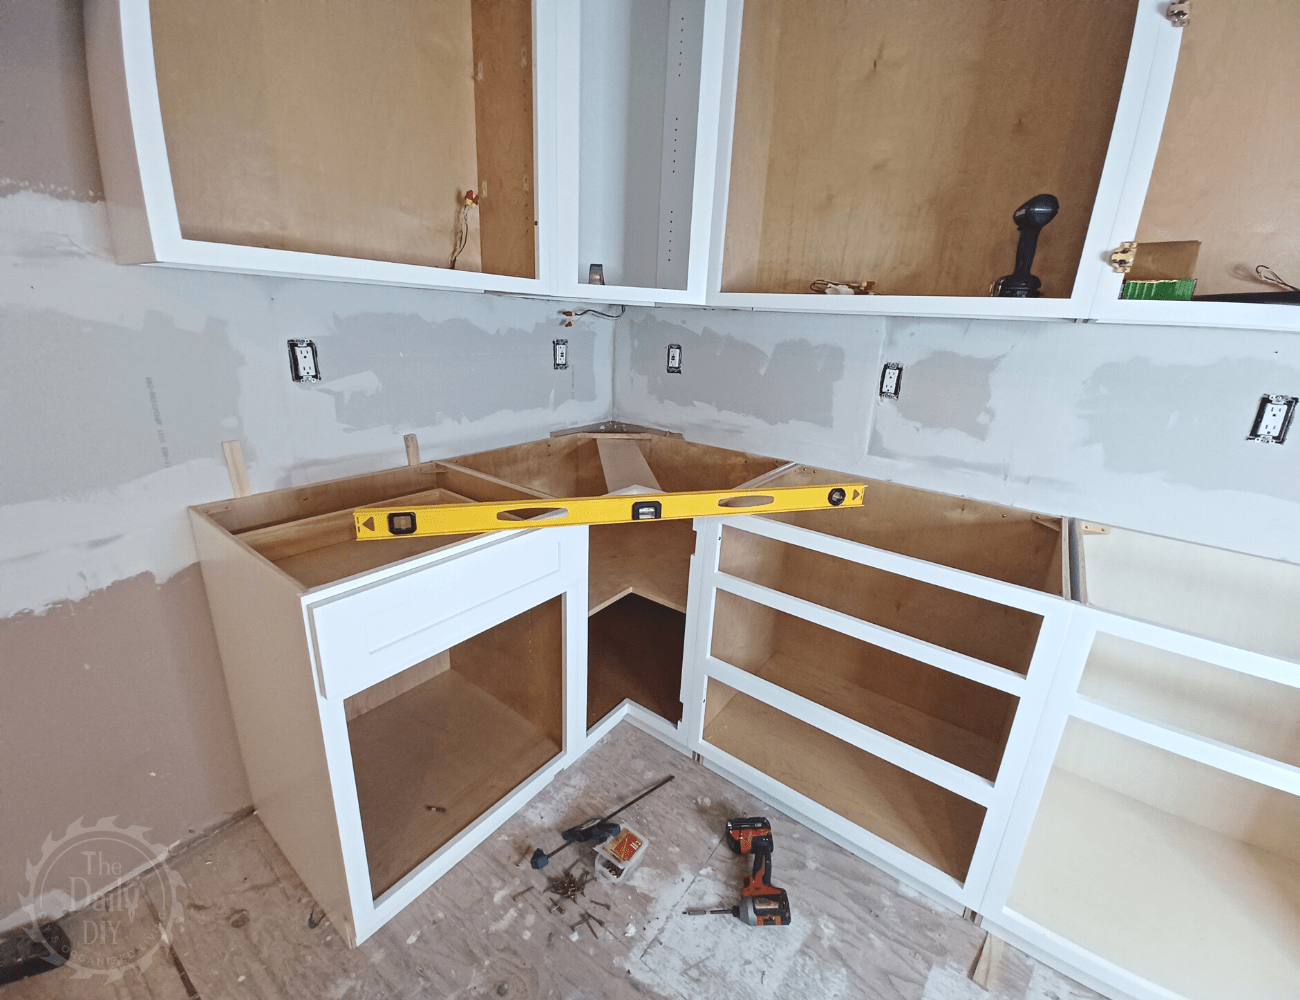
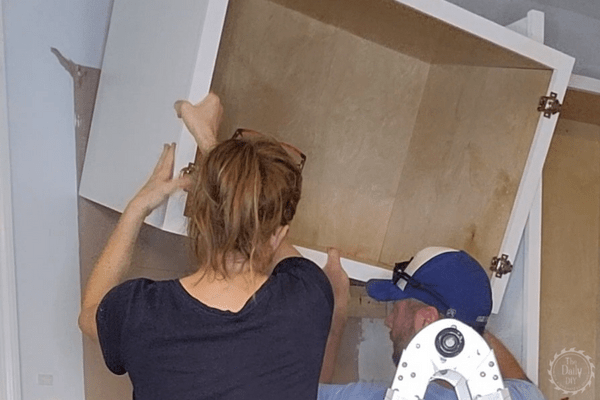
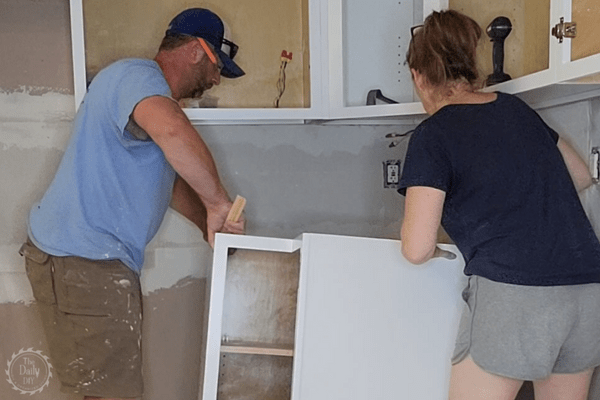
The assembly is easy, and the install is even easier. First, you’ll want to begin with the upper cabinets. If you have a corner to work with, begin there. Then work your way out on each side.
I’d recommend getting a good laser level. It will take the guesswork out of getting your cabinets level, square, and plumb. The Intice Laser Level is a great one as it offers both horizontal and vertical beams.
Upper Cabinets and Base Cabinets
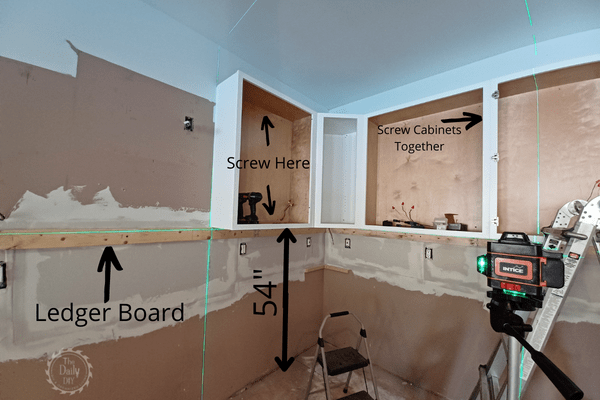
The standard height for upper cabinets is 54″ up from the floor. Put up a ledger board to assist during the install. Take a 2X4 and screw it in to the studs of your wall. Make sure it’s level and the top of the 2X4 sits at 54″ from the floor of your kitchen. The ledger board not only makes it easy for you to keep the cabinets level, but it helps give you a place to rest the cabinets on while you screw them in to the wall.
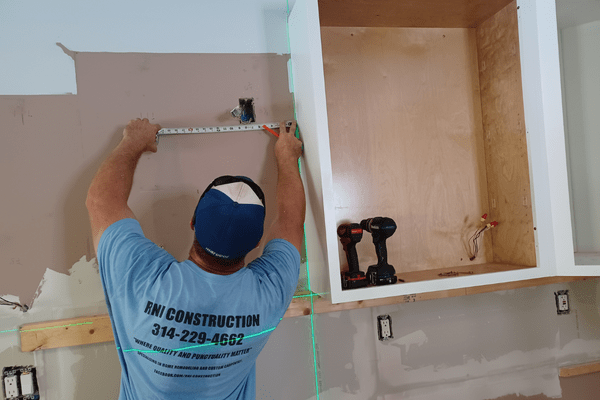
Screw the cabinets near the top and bottom of the inside of the cabinet in to the studs of your wall. Using a level, check that each cabinet is level, plumb, and square. Once you get the next cabinet attached to the wall, screw the two cabinets to each other.
For base cabinets, start in the corner as well. Screw the base cabinets in to the studs in the wall at the top of the cabinets. Check for level, plumb, and square. Use shims if needed.
When using filler pieces, cut them to size first. Next, attach to to the cabinet. Finally, attach the cabinet and filler piece to the wall.
If you’re in the St. Louis market, he’s available for hire. Call Matt at RNI Construction at 314-229-4662.
You may have outlets inside your cabinets, like for an over the range microwave. If so, measure where the outlets need to go and measure for any holes to insert bolts, wires, or cords, and cut those out. An oscillating saw makes cutting fast and easy.
Materials / Tools Needed For This Project
- Level, and/or Laser Level
- 2X4 to use as a ledger board
- Cabinet Screws
- Drill / Driver
- Cabinet Pulls or Knobs
Once you have the new cabinets installed, put on the doors, drawers and shelves. Attach drawer pulls or knobs, learn how to do that here. Next up is to put on your new countertops. Check out this 2 minute video below showing the install process.
For some custom storage solutions for your new cabinets, check out how to build DIY under sink storage drawers.
Check out these other great articles in this Kitchen Renovation Series:
- How To Install New Cabinet Pulls
- How To Install a Beautiful Wood Countertop
- How To Epoxy Your Wood Countertop
- How To DIY a Kitchen Tile Backsplash
- How To Install Luxury Vinyl Plank Flooring
- Easy DIY Kitchen Island Makeover