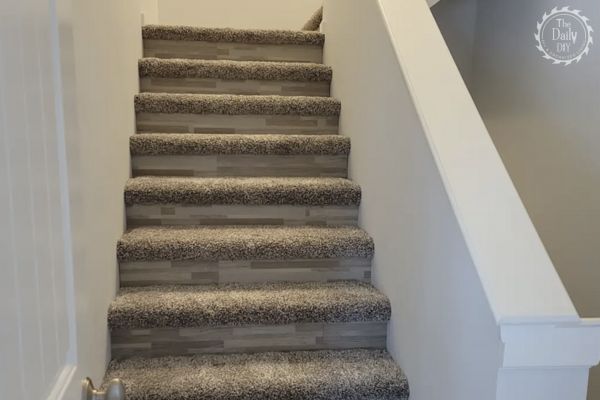
Upgrade Stairs With This Easy DIY
Have your stairs seen better days? Mine were in desperate need of a makeover. There were pet stains from the previous homeowner. Not to mention the existing carpet was 16 years old. With a desire to give my stairs a makeover, and a tight budget, I decided to do an easy DIY project that you can do in a weekend. Even with zero carpentry skills. Here is a step by step tutorial on how to upgrade stairs with this easy DIY.

Step 1 – Prep Your Stairs
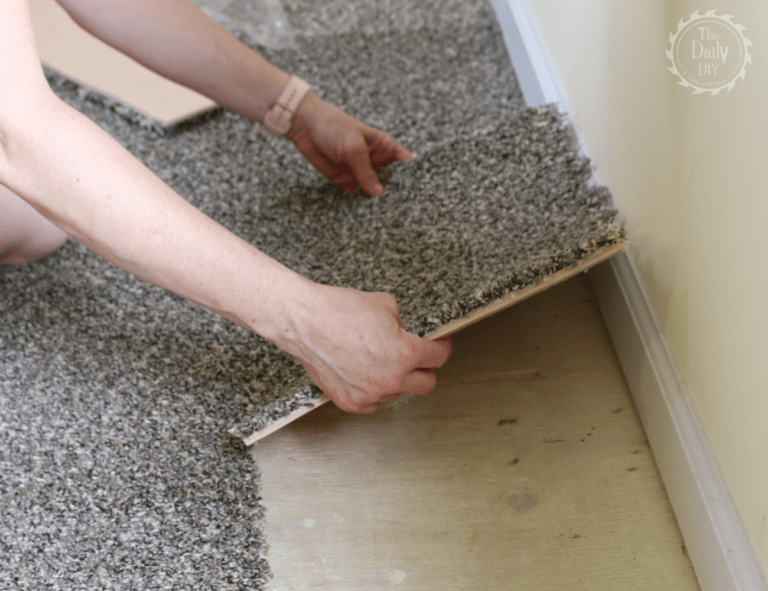
If you have carpeting on your steps now, you’ll need to remove it all, as well as the old padding and tack strips. You can reuse the padding if you want. I put new padding down since the old padding held 16 years worth of dust, debris, and pet stains. Remove all staples from the stair treads and risers. Needle nose pliers and a flat head screwdriver help with that.
Step 2 – Risers
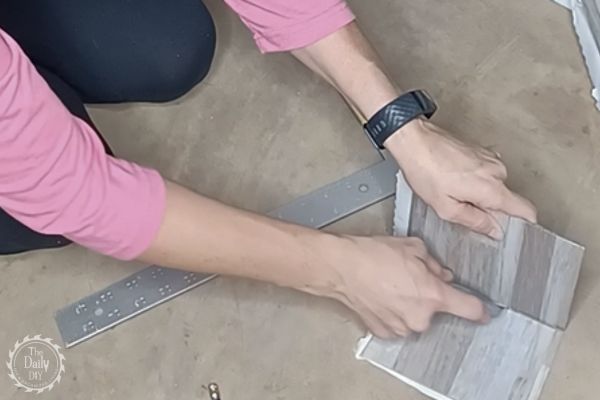
For the risers, a faux wood look came from using peel and stick vinyl tiles. Even though they are self stick, the adhesion won’t last long using them on a vertical surface. I chose to attach them to the risers using PL Construction Adhesive and a caulk gun. You can cut these vinyl tiles using a utility knife. It’s as simple as measure, cut, and glue.
Step 3 – Treads
Measure the top only of each tread, leaving about 1/2″ of space around each of the back and side edges. Cut carpet padding for each tread and attach to the treads using a staple gun. 1/4″, 6mm staples work great for this.
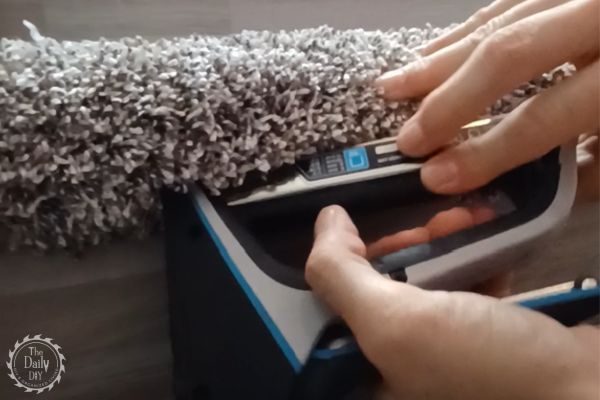
Next, measure each tread again but this time include the bull nose in the measurement. A seamstress ruler works best since its flexible to wrap around the bull nose. Cut carpeting to fit this measurement using a utility knife. Cut along the back side of the carpet. Attach carpet to each tread using 1/2″, 12mm staples. Staple the carpet to each tread along the outer edges. Doing this will allow the staples to only go in to the wood of each tread, and not through the carpet padding as well. This is why you cut the padding 1/2″ shorter on the back and side edges. After the carpet is secure on the back and sides, wrap it around the bull nose and staple in to the bottom of the bullnose.
Note, the carpeting I used was from Home Depot Home Decorators Collection, Wholehearted III, in the color Hazy Shadow. This was the carpeting we installed in our bedrooms when we moved in to our home. Since I had a lot left over it made sense for me to use it in the stairwell. You can use any type of carpeting you’d like. Thick pile or thin pile. In fact, stair runners or rugs are inexpensive and great for this project too. Cut them to fit your tread and staple them down.
Step 4 – Clean Up
Finally, vacuum the stairs and put all supplies away. You can watch a 90 second YouTube video below that walks through each step.
And that’s all there is to it to upgrade stairs. Overall this is an affordable, and very easy way to give your stairs a facelift. As you can see, this is a great project for beginners, or anyone short on time. It’s well within reach of most DIY’ers and there are no fancy tools required. If you feel that your stairs are are seeing too much traffic and need an update, grab some supplies and give it a try. Subscribe for the weekly newsletter for more DIY made easy.