How To Paint Your Bathroom Sink
Is your bathroom vanity sink, bathtub, or tile outdated? If so, you can refresh it without doing any major demo and without breaking the bank. The Rust-Oleum Tub and Tile Refinishing Kit allows you to paint your bathroom sink. Whether it’s ceramic, porcelain, or fiberglass, or tubs, sinks, and tiles, this product covers it all.
So, if you’ve been wondering how to paint a sink, this article is for you. It’s a fairly simple project to do. However, there are a few things that you must do to ensure a good outcome on this DIY project. Let’s dive in to see how you can update your bath sink on a budget.
This project was one of many DIY projects featured in the half bath remodel. Check out these articles for information on other parts of the remodel:
- How To Tile a Wall
- How To Mix Thinset For Tile
- How To Grout a Tile Wall
- How To Paint Vanity Cabinets
- Wall Painting Tips
- Entire DIY Bath Remodel For Under $500
Product Overview
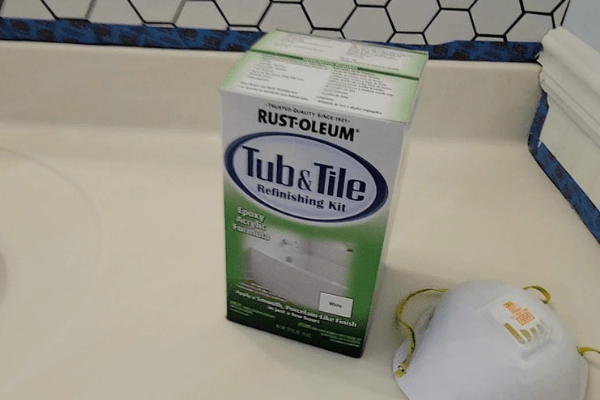
Rust-Oleum Tub and Tile Refinishing Kit is a two-part epoxy paint for bathroom sinks and more, that you “paint” onto the surface you want to refinish. You can use it on sinks, showers, countertops, tile, and tubs. It’s meant for indoor use and creates the look of porcelain with a glossy, waterproof finish. Their 1-quart kit covers up to 110 sq feet (2 coats on a standard size bathtub). They offer this in White, Biscuit, Almond, and Coastal Fog Colors. At the time of this posting, this product was sold out in stores everywhere. I contacted Rust-Oleum to inquire and they informed me they were having difficulty getting the raw materials to make more. Not wanting to wait, I was able to find the product in the white color for a great price on Facebook Marketplace.
Why This Product
I had a sink and countertop that wasn’t very old and didn’t need to replace it. My half bath was remodeled recently and was screaming for a bright white sink and countertop. Since it was a yellow/biscuit color, I decided to refinish it. After scouring the Internet for reviews and watching a ton of DIY videos, Rust-Oleum Tub and Tile looked like the right fit for this project.
Supplies
The kit contains the two part epoxy cans only. You’ll want to have a few more supplies on hand. Roller covers and brushes needed are very specific. Get the proper ones so you get the best finish. A quick call was made to Rust-Oleum when doing my project asking for suggestions. I have included the exact brush and roller covers they recommend.
- Rust-Oleum Tub and Tile Refinishing Kit
- Gloves (this doesn’t wash off your hands easy like paint does)
- Respirator
- Wooden Stir Sticks
- Tack Cloth
- Abrasive Cleaner
- Scotch Scour Pad
- 400 Grit Sandpaper
- Multi-mix Pail
- Paint Brush
- 4″ Roller Covers
- 4″ Roller
- Painter’s Tape
- Plastic Drop Cloths (optional to protect nearby surfaces)
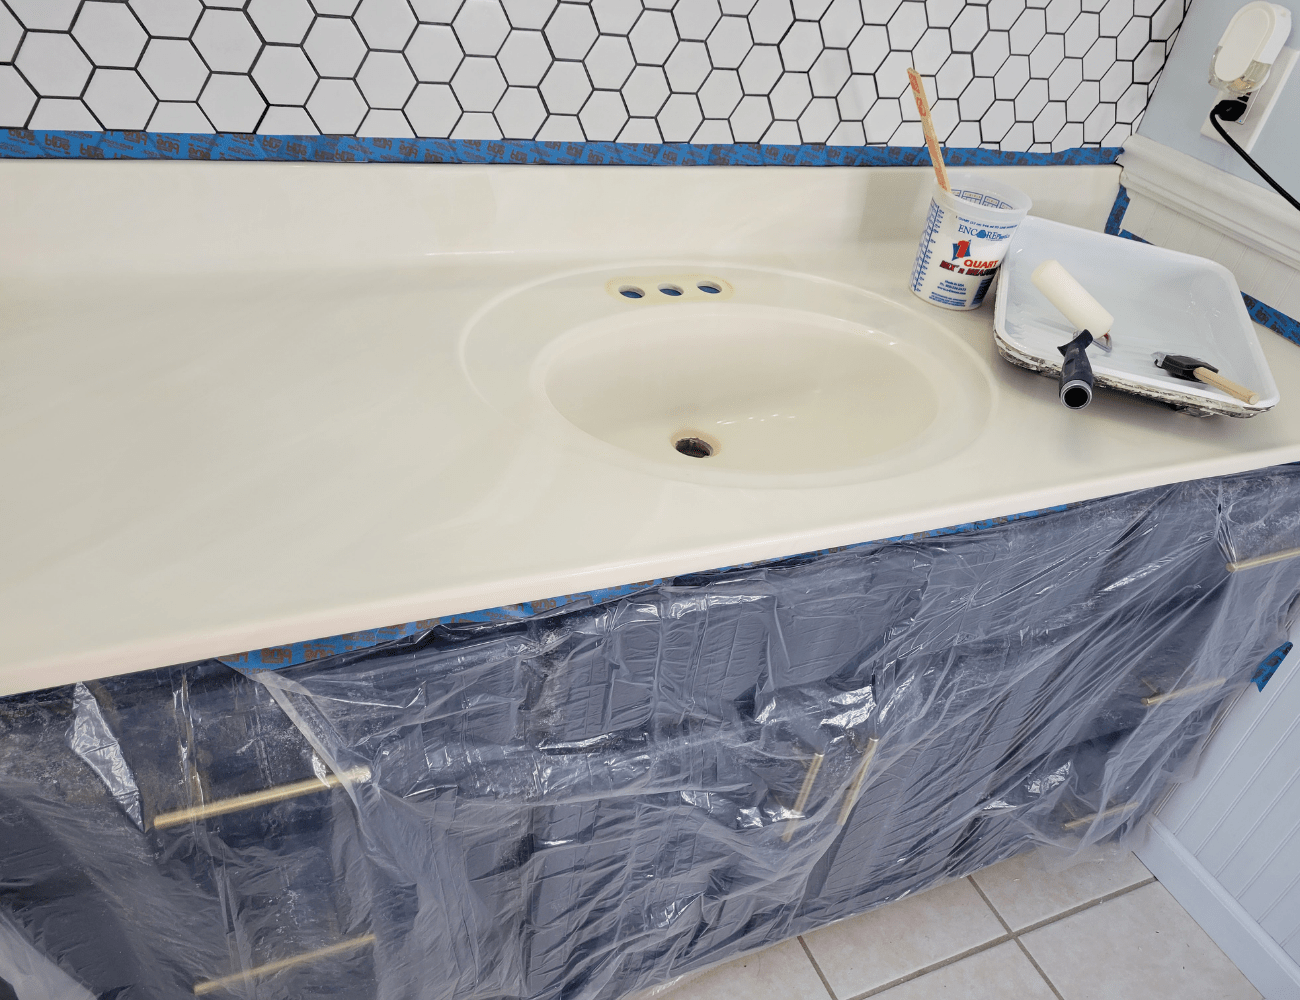
Preparation
DO NOT skip any of the preparation. This product is self-leveling and very thin. It will not perform as it should if you don’t prep your surface properly. Here’s how you refinish a sink with detailed preparation steps:
Step 1
First, remove everything from the sink, tub, shower, or tile. All faucets, drains, mirrors, etc. Remove all caulking and plumber’s putty. Goo Gone helps to get rid of this.
Step 2
Next, clean the entire surface with an abrasive cleaner and a Scotch scour pad. Rinse thoroughly.
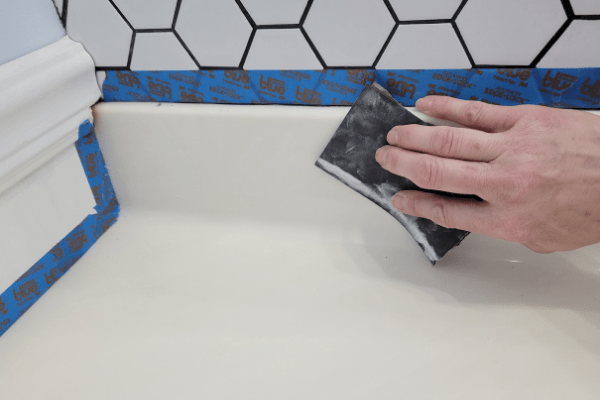
Step 3
Use 400 grit sandpaper to sand the entire surface. Don’t sand much, just enough to rough up the surface. Be sure to rinse the sanding dust off thoroughly. Let the surface dry completely.
Step 4
Tape off anything next to your work surface that you want to protect. Although you can clean up this product using lacquer thinner, or isopropyl alcohol, it’s best to avoid messes.
Step 5
Take a tack cloth and wipe the surface down completely to remove any lint or dust.
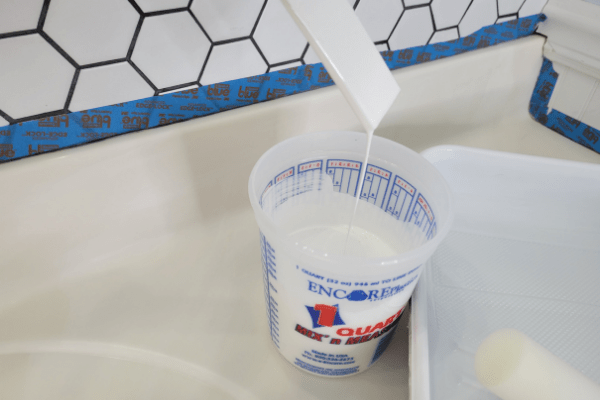
Mix and Apply The Product
The fumes are going to be very strong. With this in mind, wear a respirator. Open a window, run the bath fan, and put a towel under the door to contain the fumes.
Your kit comes in 2 parts that you mix up when you are ready to apply. For a 60″ sink and countertop, I only used half of the product in 3 coats. Mix each can up with a wooden stir stick first. Then, use a scale to measure out half and pour in to a multi-mix pail. Doing so allows you to work with half of the product at one time. Which helps because this product sets up quickly. Even if you think you will need the entire kit, work with half at a time.
Step 6
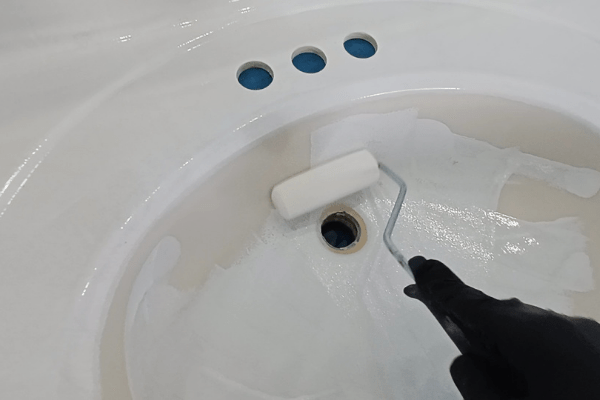
Begin to apply the product to your surface using a roller or a brush. Notice it is very thin, but that’s what you want. Paint a small area and move on to the next. Avoid going back over the same spots. Immediately it will begin to set up and you’ll pull the product back up doing so. Streaks may be present at this point, you’ll be applying more coats to cover them.
Any brush marks that you notice during the application can usually be smoothed out by lightly skimming the surface of the coating with the brush, knocking these imperfections down. Air bubbles may also be noticed after the first coat dries. These should go away with the next coat.
As soon as you finish the first coat, wrap the remaining mixed-up product and brush in plastic to keep the air out. Wait one hour for this to set before applying the next coat.
Roller covers will get sticky during the one hour set up time and are hard to work with after that. With this in mind, plan to use a new roller cover with each coat.
Step 7
When the one-hour time is up, apply the second coat. In the same fashion, apply it quickly and move along. If the Tub & Tile epoxy doesn’t seem to be flowing easily, you can thin the mixture by adding 99% isopropyl alcohol, acetone, or xylene, up to 10% by volume.
Wait an hour for the second coat to dry.
Step 8
Finally, apply a third coat just like you did for the first two coats. According to the package instructions, three coats should do it. Let the product cure for at least 3 days before exposing it to water.
Now that you have the information you need, you can update your bath sink on a budget. As can be seen here, it takes a bit of patience and the right supplies to update your bath. Equally important is to remember to use the proper brushes and roller covers. This should give you a fantastic finish. You can certainly do this DIY project in one afternoon.
Update: Two Years Later
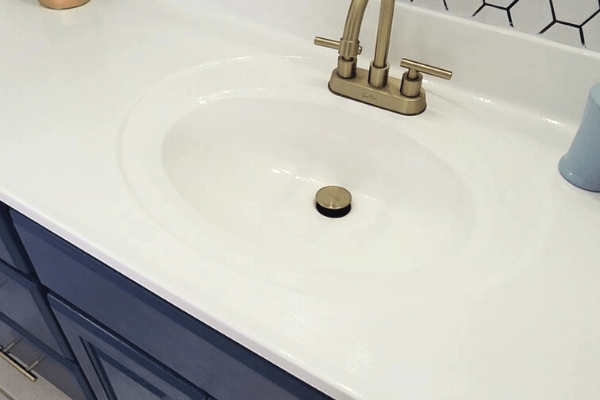
It’s been two years since I undertook the task of refinishing my bathroom sink with the Rust-Oleum Tub and Tile Refinishing Kit, and I’m thrilled to report that the sink is holding up perfectly. Despite daily use, it looks just as pristine as the day I finished the project. This durability is a testament to the quality of the bathroom sink refinishing kit and the proper preparation and application process I followed.
This experience solidifies the Rust-Oleum kit not only as the best paint for a bathroom sink but also as an economical and durable solution for homeowners on a tight budget. The process of how to paint a sink, from preparation through to painting a sink with epoxy paint for a bathroom sink, proves to be a worthwhile investment for any DIY enthusiast looking to refresh their space without the need for costly replacements.
Painting a sink with the right sink reglazing kit can transform your bathroom, making it feel brand new. The journey from selecting the best bathroom sink paint to witnessing the enduring results two years later offers a fulfilling DIY adventure for any homeowner eager to enhance their home’s aesthetics and functionality on a budget.
Shop For Supplies